This provides information relating to the Configuration Menus for Venue Hub.
The content is targeted at Resellers and SwiftPOS Venue Administrators who have a sound knowledge of and experience with SwiftPOS. For further information or assistance, please contact your SwiftPOS Reseller or SwiftPOS Support.
Notes …
DO NOT FORGET to select the Save button to ensure all changes made to configuration settings are saved.
Subjects

General Tab


- Enable Venue Hub – Select to ensure the selected Cloud Client will be available to Venue Hub.
Notes …
This will need to be selected for both the Host Venue and each of the Vendors.
Branding Tab

- Select from the colour options available to adjust colours as required for the following:
- Primary
- Accent
- Highlight
- Header Background Image – Select the Select Header button to select an Image that will be displayed as the background image in the header section for the selected Cloud Client.
- Default Message Template – Not used.
Vendors Tab
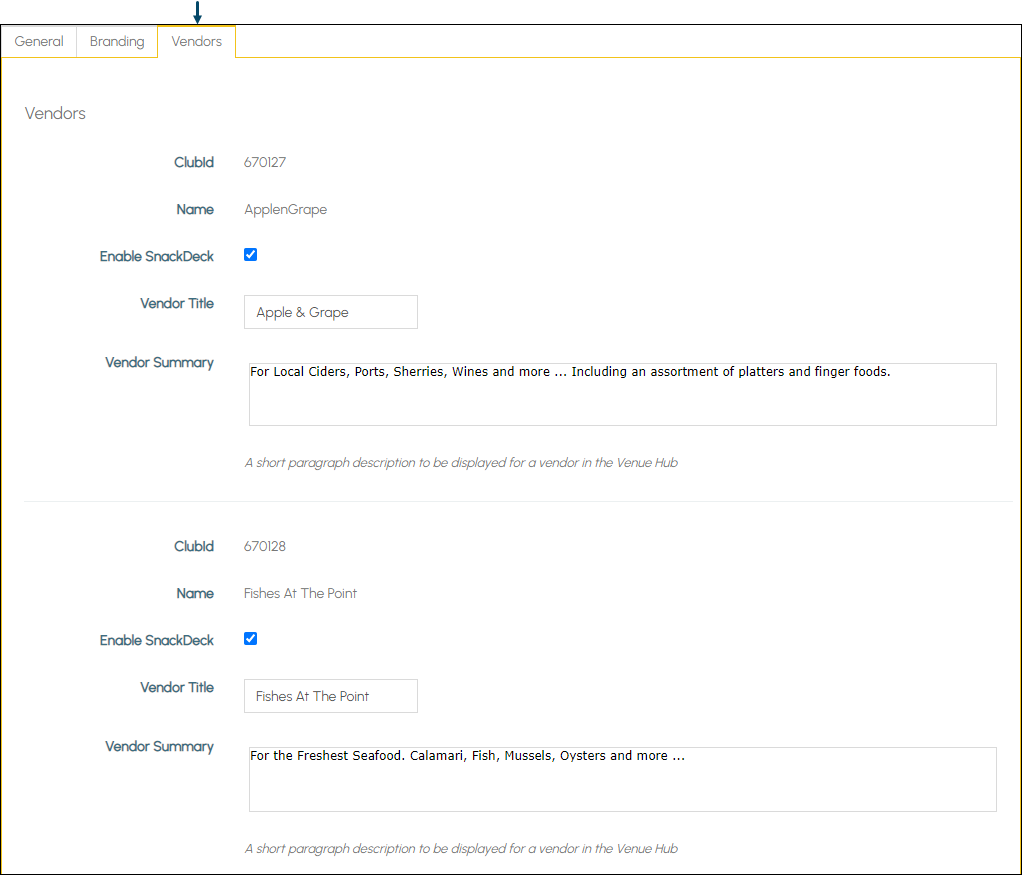
- Clubid – Displays the ID of the selected Cloud Client.
- Name – Displays the name of given to the select Cloud Client. This can be changed via the Venues menu option.
- Enable SnackDeck – Select to ensure that Vendor will be displayed and will be able to be selected by patrons from the Host Venue’s main Venue Hub screen.
Notes …
If it is NOT enabled the Vendor will NOT be accessible to patrons.
- Vendor Title – Displays/Enter the name patrons will see in the Host Venue’s main Venue Hub screen.
- Vendor Summary – Displays/Enter a short description of the Vendor and their offerings that patrons will see in the Host Venue’s main Venue Hub screen.
This completes CONFIRGURATION MENUS.
Related Topics