This outlines the steps required to onboard an Oolio Pay All In One Device for TouchMini.
Subjects

- What Is Required?
- How To Onboard An Oolio Pay Device?
- How To Apply A Surcharge?
- How To Configure For Tipping?
- To Be Considered
- Related Topics
What Is Required?
Venues will need to do the following:
- Contact the Oolio Pay Know Your Customer team (KYC) and:
- Request the creation of an e-commerce merchant account. This account will be used for online ordering and online (card not present) transactions.
- They can also add Google and Apple Pay as payment methods.
- Once the account has been created, Oolio Pay will need to provide the Venue with the following information:
- Merchant Account
- Store
- Client
- API Key
- Configure OrderAway:
- Locate and access OrderAway’s Payments menu.
- Select Oolio Pay from the drop down list at the top of the screen.
- In the General tab enter the details provided by Oolio Pay (outlined above) in the corresponding fields.

- In the Portal tab based on the Venue’s requirements:
- Enable each option under Notify Venue for heading.
- Enable each option under Notify Member for heading.

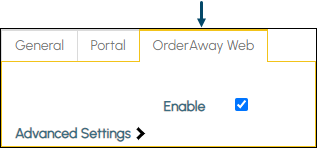
- In the OrderAway Web tab based on the Venue’s requirements:
- Enable each option under Notify Venue for heading.
- Enable each option under Notify Member for heading.
How to onboard a Oolio Pay Device?
- Unbox the device.
- S1E2L (no printer) – Refer to the User Manual for more information.
- S1F2 (with printer) – Refer to the User Manual for more information.
- When connecting to the Venue’s Wi-Fi Network, the devices must be able to communicate outbound to the following endpoints:
- touchmini.swiftpos.com.au (HTTPS TCP 443)
- *.adyen.com (HTTPS TCP 443)
- *.adyenpayments.com (HTTPS TCP 443)
- Install the TouchMini app. To be continued …
- Once installed the TouchMini icon should appear on the home screen.

- Launch the TouchMini App
- From the Home screen, select the TouchMini app to launch it.
- Once opened the TouchMini logo and App version should be visible.
- Wait a few seconds and the App Settings screen will be displayed.

- Launch the TouchMini App continued …
- Confirm the TouchMini URL is set to the correct URL based on the Venue’s region. Namely:
- For Australia and NZ, it should be set to touchmini.swiftpos.com.au
- For UK, it should be set to touchmini.swiftpos.uk
- Enter the Cloud Client ID associated with the Location in which the device is going to be used.
- Select SAVE to save any changes.
- The device will automatically attempt to register itself using the Cloud Client ID entered. The device registration process will need to be completed before continuing. The process is similar to the PAX device. Refer to How To Onboard A PAX Device for more information.
- Confirm the TouchMini URL is set to the correct URL based on the Venue’s region. Namely:
- Configure the device
- In the Device tab, ensure the All In One Device option is selected in the Device Type drop down list.
- In the Payment tab, ensure the Integrated card payment option is selected. Once selected:
- Ensure the Oolio (Adyen) option is selected in the Payment Type drop down list. Once selected:
- Consider selecting (optional) the Enable Tipping option. Refer to How To Configure For Tipping for more information.
- Enter the Terminal ID by Adyen.
- Enter the API Key provided by Adyen.
- Enter the appropriate URL to connect to the Adyen Cloud API.
- If applicable, enter the SwiftPOS Surcharge ID to be assigned to any surcharges associated with payments, into the Surcharge ID field. Refer to How To Apply A Surcharge for more information.
- Enter the SwiftPOS Media No to be associated with payments into the Media No field.
- Select Save to save any changes.
- Ensure the Oolio (Adyen) option is selected in the Payment Type drop down list. Once selected:
- In the Receipt tab:
- Consider the Receipt options available to be configured. Refer to the Receipt Tab for more information.
- Select Save to save any changes.
- If the device is being onboarded for the first time, then selecting the HOME button on the device after the above has been saved and completed. This will ensure the devices’ configuration is retrieved and applied.
Notes …
If any further changes are made to the device’s configuration, then the device’s cache will need to be cleared. To do this, go to Settings > Clear Cache. Then clos the app and re-launch it, so the most recent configuration settings are retireived.
How To Configure For Tipping?
When Is It Used?
When a Venue has the requirement to provide patrons with the opportunity to enter a Gratuity/Tip for a service received.
Configure
To configure Oolio Pay for tipping, do as follows:
- Ensure the Enable Tipping option is selected for the Oolio (Adyen) option in the Payment tab.
How Is It Used?
Refer to Tipping for more information.
To Be Considered
- When a card payment is being taken on an Oolio Pay device, TouchMini will determine the Merchant Reference based on the to be the Cloud Client ID and the Order number, in the format XXXXXXXXX_YYYYY, where:
- XXXXXXXXXX is the Cloud Client ID
- YYYYY is the Order number.
- TouchMini will display a loading indicator if an action (like clicking a button) takes longer than 200ms to perform. From experience, the Adyen S1F2 device, when set to:
- Mobile Data (Cellular), displays a loading indicator each time a menu button is selected or a Product is added to an Order.
- Wi-Fi, hardly ever displays a loading indicator each time a menu button is selected or a Product is added to an Order.
- EFTPOS Merchant Receipts and Customer/Cardholder Receipts can be configured by the Oolio Pay KYC team to suit Venue requirements. It can be done at the Merchant, Store or Terminal level. A suggested configuration to request would be:
- Print a Merchant Receipt only if the payment is unsuccessful (so not for success or cancelled payments) and prompt to print a Customer/Cardholder receipt always (Prompting is only possible for Customer/Cardholder receipts).
This completes HOW TO ONBOARD AN OOLIO PAY DEVICE for TouchMini.