
Subjects ▲ ▼
About ▲ ▼
What Is Required? ▲ ▼
- Touch will need to be installed and operational.
- Ensure the Kitchen Printer has been added as a peripheral to Touch. Refer HERE for more information.
What To Consider? ▲ ▼
- It is recommended that Venues with more than one Touch terminal, configure their print devices in the Back Office HERE.
- To ensure items/products on kitchen dockets are NOT sorted by Print Groups, ensure the Print Group field for all Categories is set to either <<None>> or the same Print Group.
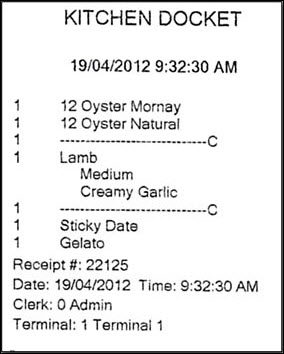
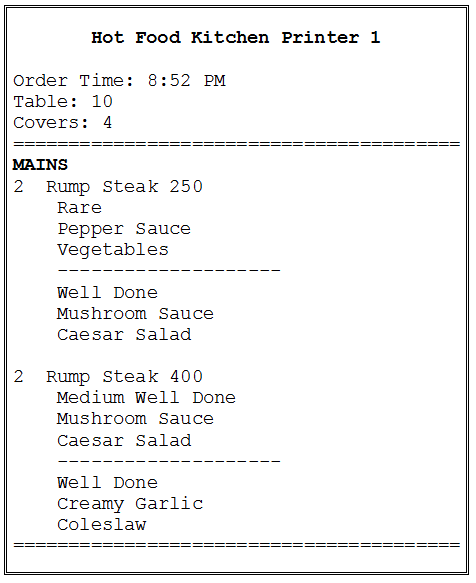
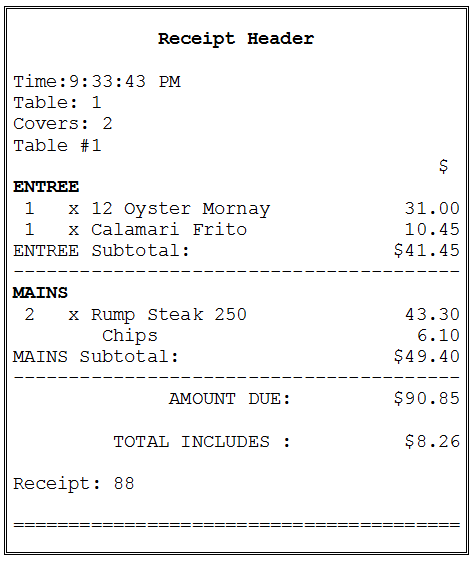
Example of a kitchen docket printed in exactly the order that the items/products were ordered and allowing the insertion of lines in between each course.
When Is It Used? ▲ ▼
Used to configure the settings for printing kitchen dockets for staff preparing food and drinks orders. More than 1 is allowed.
Examples ▲ ▼
The printing order is determined by the Print Groups that have been configured. For multiple orders of the same item/product, the order of printing is set by the Instructions.
| PLU Number | Description | Numbering the instructional PLUs/Products in an appropriate sequence will result in the meals sorted so that "Well Done" prints prior to "Medium" on the kitchen dockets. |
| 200 | Well Done | |
| 201 | Medium | |
| 202 | Medium Rare | |
| 203 | Rare |
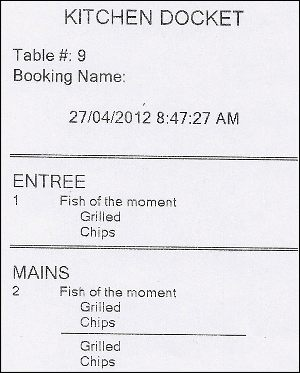
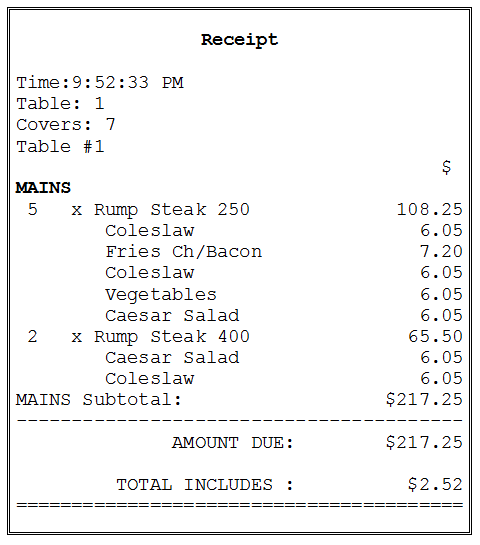
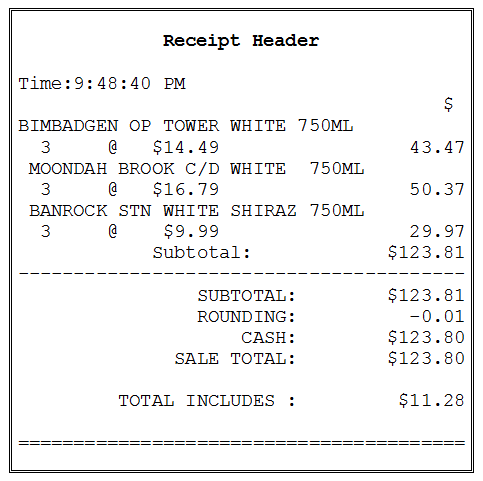
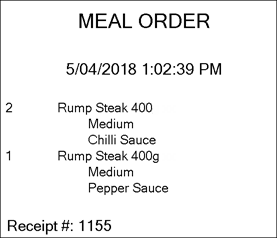
Order with no seat numbers but using the Print Group Change (#106) POS Key to serve a Main as an Entree.
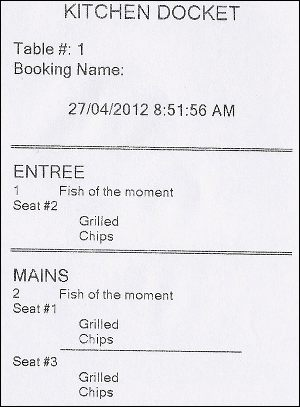
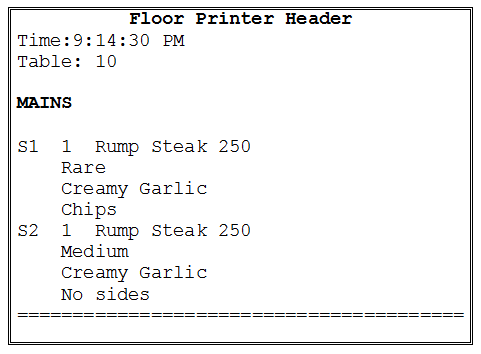
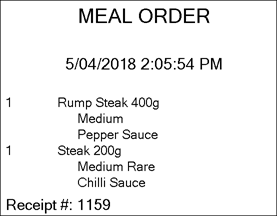
Order with Show Seats selected and using the Print Group Change (#106) POS Key to serve a Main as an Entree.
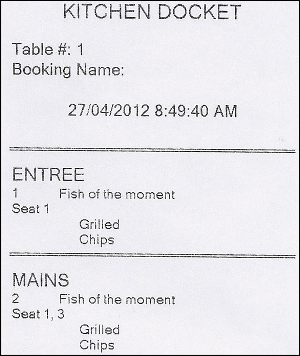
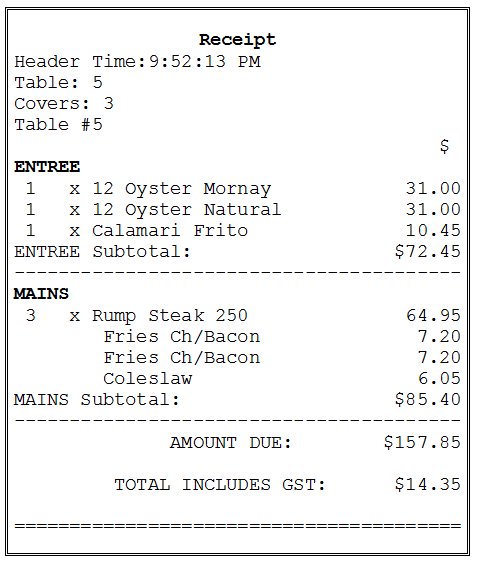
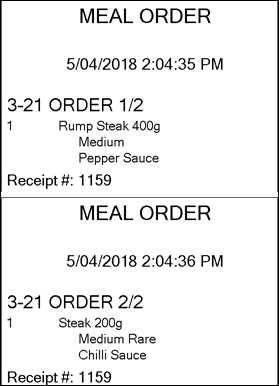
Order with Show Seats and Consolidate Seats selected and using the Print Group Change (#106) POS Key to serve a Main as an Entree.

How To? ▲ ▼
Screens ▲ ▼
Kitchen Printer Screen ▲ ▼
To access, select the Kitchen Printer option from the Peripheral Type drop-down list in the Add New Peripheral screen, and then enter an appropriate Description for the peripheral being added (For example, Kitchen Printer) and select OK. The above screen will then be displayed. Used to configure/manage/view Kitchen print devices for Touch.
![]()
- Disabled - Toggle select to enable/disable the print device.

- Print Device - Select from the drop-down list the print device for printing kitchen dockets.
- Copies - Displays/Set the number of copies required.
- Graphical - Select to ensure the print device is in graphical mode. This is mandatory if printing in languages other than English is required. For more information HERE.
- Backup - Select from the drop-down list the print device to be designated as the backup print device. Refer HERE for more information.
- Synchronise With - Select from the drop-down list the Back Office option from which this print device will inherit it's settings. Any changes made to their settings in Back Office will automatically be applied when the Touch device receives an update. This option is only available to Windows Printers with the Graphical Printing option selected.
- Automatic Printing - Select to ensure that the kitchen docket will print automatically print when an order is either finalised/saved or saved to a Table. If not selected, then the Kitchen Print (#15) POS Key must be used to print the kitchen docket when required.
- Order Types - Select which Order Types can be printed using this print device.
Notes ...
If the << NONE >> option is selected, then kitchen dockets will NOT be printed. Please ensure an option is selected for delivery or pickup orders.
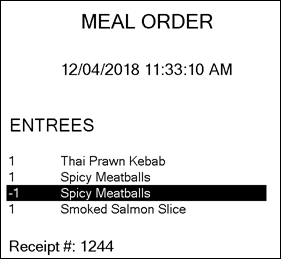
- Invert Colours of Negative Lines - Select to ensure that when items/products are credited or refunded, the item/product will print on the kitchen docket with the colours inverted. For example:
- Order Instruction By PLU - Select to ensure sets of Instructions are sorted by PLU.
- Show Instructional Qty - Select to show.
- Show POS Description - Select to ensure the item's/product's Short Description is printed.
- Show Product Notes - Select to include any Product Notes.
- Show Reason Codes - Select to include any Reason Codes.
- Show Seats - Select to ensure Seat Numbers are displayed on the kitchen docket. Refer HERE for an example.
- Consolidate - Select to ensure all seat numbers are reported against the same item/product when multiple orders are taken for the same item. Designed to reduce the length of the kitchen docket. Refer HERE for an example.
Notes ...
This option will only be enabled for selection if the Group orders by Product and the Show Seats options above are selected.
- Show Seats continued ...
- Hide Names - Select to ensure all names associated with a Seat are hidden.
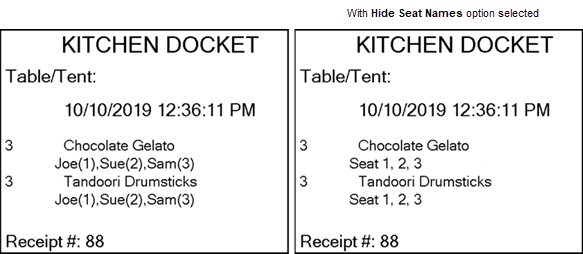
Notes ...
This option will only be enabled for selection if the Consolidate Seats option above is selected.
- Use Wrap (ignores other settings) - Select to activate the Wrap feature. This feature overrides all other kitchen print device settings.
- Order Types - Select which Order Types can be printed using this print device.
Notes ...
If none are selected, then kitchen dockets will NOT be printed. Please ensure to select these options for pickup or delivery.
- Group By - Select to group kitchen dockets by:
- Print Group - Select to group kitchen orders by Print Group. This is the default. If the sorting of kitchen orders is not required, then refer to Kitchen Printing Sorting.
- Repeat Headers - Select to ensure a docket is printed for each Print Group ordered.
- Print Group - Select to group kitchen orders by Print Group. This is the default. If the sorting of kitchen orders is not required, then refer to Kitchen Printing Sorting.
Notes ...
This option is only available for kitchen print devices.
- Group By continued ...
- Product - Select to group kitchen orders by items/products. The default sort order is by Print Groups.
- Consolidate Instructions - Select to ensure that the same Instructions are consolidated. For example:
- Product - Select to group kitchen orders by items/products. The default sort order is by Print Groups.
|
With option NOT selected |
With option selected |

|
|
- Group By continued ...
- Product continued ...
- Repeat Headers - Select to ensure a docket is printed for each item/product ordered.
- Product continued ...
Notes ...
This option is only available for kitchen print devices.
|
With option NOT selected |
With option selected |
|
|
|
- Combine Bumped Items - Select to ensure items/products that are in the same Print Group and have been bumped are combined to print on one docket.
![]()
- Categories - Select to open the Kitchen Printer Categories screen to select the Category that when sold will trigger the kitchen docket to be printed.
- Header/Footer - Select to open the Header/Footer screen to configure kitchen dockets. Refer HERE for graphical and HERE for non-graphical printing information. Header/Footers can also be configured for peripherals set up in the Back Office.
- Printers - Select to open the Printing Devices screen to configure print devices.
- Schedules - Select to open the Printer Schedules screen. Refer HERE for more information.
Kitchen Printer Categories Screen ▲ ▼
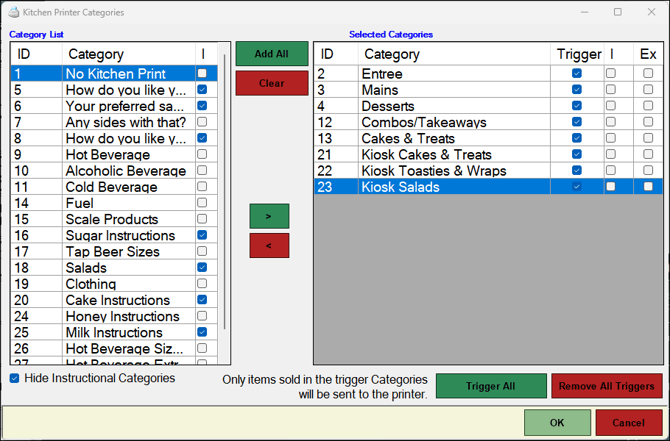
To access, select the Categories option in the footer section of the Kitchen Printer screen. Used to select Categories and assign them to KVSs and/or print devices.
Category List Section
Lists the available Categories that can be selected.
Selected Categories Section
Lists the Categories that have been selected.
End of article ▲