
This provides information relating to the various NetPOS Screens that can be encountered in Swiftpos Back Office.
The content is targeted at Resellers and Swiftpos Venue Administrators who have a sound knowledge of and experience with Swiftpos . For further information or assistance, please contact your Swiftpos Reseller or Swiftpos Support.
Screens ▲ ▼
Add Interface Instance Screen ▲ ▼

To access, refer HERE.
- Interface Type - Select to display the list of Interfaces that are currently supported by Swiftpos NetPOS.
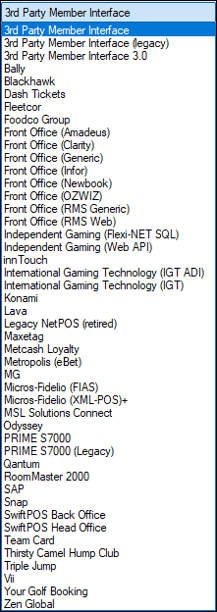
Refer HERE for more information relating to a specific NetPOS interface.
- Instance Name - Displays/Enter a customised name. This is optional. The name entered here will be used instead of the default name.
- Default - Select to ensure that the selected Interface is set as the default.
NetPOS Menu ▲ ▼

To access, refer HERE.
- Start/Stop - Select to start/stop the NetPOS service.
- Settings - Select to open the Settings screen.
- Registration - Select to open the NetPOS Registration screen to configure from the list of Interfaces any one of the Interfaces required. For example, connecting to IGT for Gaming and Swiftpos Back Office for Vouchers.
- Open Log File - Select to open the Event Log Reader.
- Exit - Select to remove the NetPOS icon from the system tray.
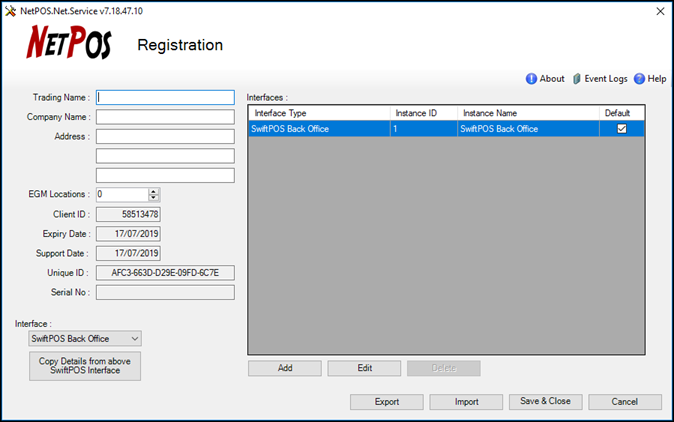
NetPOS Registration Screen ▲ ▼
To access, refer HERE.
Interfaces Section
Grid
The grid displays a list of the current NetPOS Interfaces available, and lists for each their Interface Type, ID, Name and Default option.
Footer
- Add - Select to open the Add Interface Instance screen and then select from the drop down list one of the Interfaces listed.
Notes ...
Interfaces will need to be added here before their settings can be configured via the Settings screen.
- Export - Select to open the Export NetPOS.Net Registration screen to save the NetPOSRegistration.INI file.
- Import - Select to open the Import NetPOS.Net Registration screen to select the new NetPOSRegistration.INI file received from registrations@swiftpos.com.au.
NetPOS Settings Screen ▲ ▼
General Menu Option ▲ ▼

To access, refer HERE.
Notes ...
Any changes made to the settings will require the NetPOS service to be Stopped/Started to ensure changes will take effect.
- Full Debug Logging - Select to enable.
Notes ...
This should only be enabled when advised to do so by Swiftpos. Enabling will generate very large log files.
- Use SSL - Determines whether or not communication between Swiftpos Touch and NetPOS.Net will be performed via HTTPS.
Notes ...
Enabling this feature requires some advanced configuration, which is outlined HERE.
- Sync Members - Select to enable.
- Port Number - Displays/Enter the Port number. Default is 10101. Any other Port number entered will need the same number to be entered at each Swiftpos Touch terminal.
- Timeout - Displays/Set the timeout value in seconds. Default is 5.
Notes ...
The Timeout setting can have adverse repercussions when NOT set appropriately. For example, a Transaction may fail to post. If Gaming is being used at a site, then it is strongly recommended that Timeout setting set here, is greater that that set for Gaming. For example, if the Gaming Timeout setting is set to 4 seconds, set this setting to 5 seconds.
When a large site is getting Timeout issues (see the NetPOS.Net logs), then the suggested Timeout settings might need to be changed. For example, to 30 secs for Gaming, 32 secs for NetPOS and 34 secs for the Customer settings (at Touch). This means there maybe a considerable delay (+/- 30 secs) to get a response at the Touch.
- File Extension - Displays/Enter the file extension. By default this is set to BJL. BJL is the file extension required by NetPOS to support the accrual of Member Points. eing the next letter available after AJL (which is reserved for Swiftpos).
TIP
The AJL file extension is reserved for Swiftpos use only and is the extension applied to the sales data file generated by Touch.
- Processing Interval - Displays/Set the interval in seconds. Default is 30.
- Retry Transactions - Displays/Set the number of retries if the host goes offline. Default is 3.
- Clear Transactions After - Displays/Enter the number of days transaction history is to be kept. Default is 7. Transactions older than the specified days will be deleted when NETPOS service is started.
- Update Interval - Default is 30 seconds.
- Last Update - This will display the last update date and time.
- Backup Settings - This will backup all NetPOS settings to a zip file.
- Restore Settings - This will restore all NetPOS settings from the zip file created above.
- Clear Transactions - Select to delete all transactions.
Service Email Settings
-
SMTP Server - Displays/Enter the domain name (host) or IP address of the SMTP server (email server for outgoing email) that will send emails. For example : mail.swiftpos.com.au. or 192.168.1.100.
- Recipients - Displays/Enter the email addresses of the recipients to whom emails will be sent.
- Sender Address - Displays/Enter the email address that will appear as the return email address. This has to be a valid email address on the SMTP server that is sending the emails.
- Sender Domain - Displays/Enter the fully qualified domain name.
- SSL Encryption - Select to ensure SSL encryption is to be used when sending emails.
- Port - Displays/Enter the port number for the SMTP server connection. Port 25 is generally the default SMTP port. If Gmail SSL is being used then SSL works on port 25 and may not work on port 465 as the Gmail documentation recommends.
- Username/Password - Displays/Enter the Username and Password. If an Exchange Server is being used, then the Username entered must include the domain name and Username. For example: Samford\User1.
Notes ...
The Username/Password may not be required if the email server being used allows for anonymous logins. Check with your ISP.
- Email
- Developers - Select to ensure emails are sent to Developers.
- Errors - Select to Errors are emailed.
- Failure Audits - Select to ensure Failure Audits are emailed.
- Warnings - Select to ensure Warnings are emailed.
- Limit X per Hour - Set to ensure the number of emails sent are limited to the number X specified here.
Comms Folders
- Folders - Displays/Enter the folders to which transactions will be written. This is normally set to the same folder where the Swiftpos Touch terminal sales (AJL) file is written to in the Swiftpos Back Office.
- Add - Select to add a Folder and then select the option in the right most column of the grid to select the Folder.
- Delete - Select to delete the selected Folder.
- Delete All - Select to delete all Folders.
- Interfaces - Select from the drop down list the appropriate Interface.
- Add From Interface - Select to add the default Folders associated with the Interface selected above.
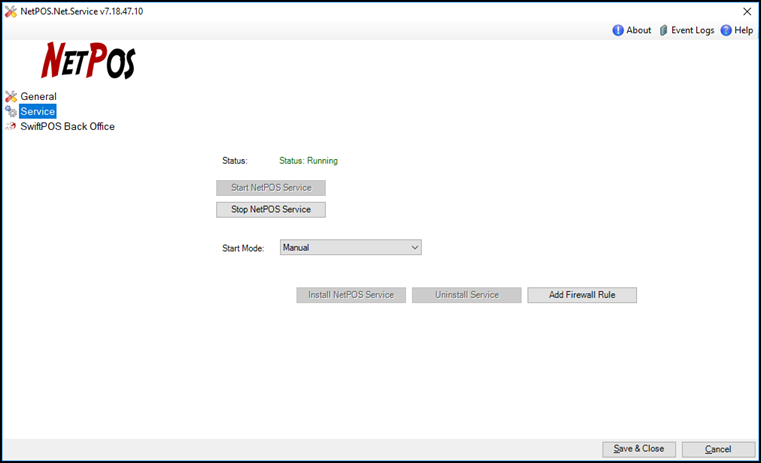
Service Menu Option ▲ ▼
To access, refer HERE.
- Start/Stop NetPOS Service - Select to Start/Stop the Service. The Services will need to be restarted if any changes to the settings have been made.
- Start Mode - Select from the drop down list one of the following:
- Automatic - By default this will be set to automatic once NetPOS.Net has been correctly registered with the right interface. Each time the PC starts, then the Service will start automatically. The software update process will automatically stop the Service and restart it after the update.
- Manual - Select to ensure the NetPOS.Net Service is manually started/stopped.
- Disabled - Select to disable the NetPOS.Net Service.
- Install/Uninstall NetPOS Service - Select to install/uninstall
- Add Firewall Rule - Select to add the NetPOS.Net Service to the Microsoft Windows firewall exceptions so that the Swiftpos Touch terminals can connect to it. If third party firewalls are being used, then ensure these are configured.
End of article ▲