This outlines How To Transfer Table Items / Products in Touch.
Refer HERE for information on how to transfer a Table.
Subjects ▲ ▼
About ▲ ▼
What Is Required? ▲ ▼
-
Table items can be transferred in Touch either using the Transfer Table Items (#42) POS Key or via the use of the Floor Plan Display (#402) POS Key. Therefore, one or both of these POS Keys will need to be added to a Keyboard Layout. Hence, refer:
When Is It Used? ▲ ▼
Used when one or more items in a Table's order have to be moved to another Table.
How To? ▲ ▼
- GET STARTED?
- Transfer Table Items using the Floor Plan Display (#402) POS Key?
- Transfer Tables using the Transfer Table Items (#42) POS Key?
How To GET STARTED? ▲ ▼
How To Transfer Table Items using the Floor Plan Display (#402) POS Key? ▲ ▼
In Touch, do as follows:
- Select the Floor Plan Display (#402) POS Key to display the Floor Plan layout.
- Select the Transfer option in the footer section of the screen.
- At the following prompt, select the Items option.

- Select a non-empty Table in the Floor Plan.
- The Transfer Table Items screen will be displayed.
- Select the items that are to be transferred from the items listed in the grid section.
- Enter the number of the Table to which the items are to be transferred to, in the Transfer To field in the footer section.
- Select OK to transfer the items.
- If the Table number entered is an empty table, then the Table Information screen will be displayed allowing the Clerk/Staff Member to enter details about the patron and table.
- Enter the details available and select the SAVE option.
- The following prompt will be displayed:
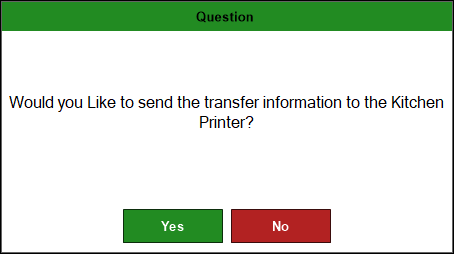
- Select either Yes or No.
- That completes the transfer of the selected Table items.
How To Transfer Tables using the Transfer Table Items (#42) POS Key? ▲ ▼
In Touch, do as follows:
- Select the Transfer Table Items (#42) POS Key.
- The Open Tables for All Clerks screen will be displayed.
- Locate and select the Table for which items are to be transferred from.
- The Transfer Table Items screen will be displayed.
- Select the items that are to be transferred from the items listed in the grid section.
- Enter the number of the Table to which the items are to be transferred to, in the Transfer To field in the footer section.
- Select OK to transfer the items.
- If the Table number entered is an empty table, then the Table Information screen will be displayed allowing the Clerk/Staff Member to enter details about the patron and table.
- Enter the details available and select the SAVE option.
- The following prompt will be displayed:
- Select either Yes or No.
- That completes the transfer of the selected Table items.
End of article ▲