
To access, refer HERE. Used to access the menu options available in the Connect menu in Venue Manager.
The content is targeted at Resellers and Swiftpos Venue administrators who have a sound knowledge of and experience with Swiftpos. For further information or assistance, please contact your Swiftpos Reseller or Swiftpos Support.
Notes ...
The explanation of Menu Options and/or Tabs NOT yet included here, will be coming soon. In the meantime, for further information or assistance, please contact your Swiftpos Reseller or contact Swiftpos Support.
IMPORTANT
DO NOT FORGET to select the Save/Update option to ensure all changes made are saved.
Menu Options ▲ ▼

Admin API Assignment Menu Option ▲ ▼

To access, select the Admin API Assignment option in the Connect menu. Used to configure the Admin API. Previously known as Swiftpos API Permissions.
- Select Integrator - Select the appropriate 3rd Party Integrator from the drop-down list. Once selected, the Methods available will be listed.
- Expand as required to view a list of Calls for each of the Methods, along with their availability and whether they are enabled or not. If available, these can be enabled as required to ensure they are permitted when making Admin API requests for the selected 3rd Party Integrator.
Cloud Logs ▲ ▼

To access, select the Cloud Logs option in the Connect menu. Used to view and optionally export log information pertaining to the Swiftpos Cloud.
Notes ...
Logs returned are limited to 500, please refine search query if the logs you are looking for fall out of this range.
Header Section
- Time Interval - Select from the drop-down list one of the time intervals listed to limit the search to.
- Log Level - Select from the drop-down list one of the log levels listed to limit the search to.
- Keyword - Enter the text to ensure only those logs are returned that contain the text entered.
- Search - Select to initiate the search of the CLoud logs based on the filters specified above.
- Export CSV - Select to export the currently displayed logs to a CSV file.
Grid Section
Lists the logs returned based on filters specified above, along with their Date/Time, Service, Log Level and Message.
Footer Section
Use the navigation options in the bottom left-hand corner to navigate the pages returned.
Doshii Menu Option ▲ ▼
To access, select the Doshii option in the Connect menu. Used to manage and view the Doshii configuration settings in Venue Manager. Once selected, select from the following menu options:
Selecting this option will display the Data Sync screen and list data sync message information.

To access, select the Doshii menu option and used to enable Doshii and configure the Reseller's details, required for Doshii.
- Refresh - Select to refresh the data displayed in the grid.
- Update Doshii - Select to force a data sync and update Doshii.
Notes ...
The above will only display if Doshii is enabled. Otherwise, the following will be displayed:
When Show Reseller Information is selected, the following will be displayed, to reveal details that are current for the Venue.
Selecting this option will display the Doshii Reseller Configuration screen.

To access, select the Doshii menu option and used to enable Doshii and configure the reseller options and settings.
- Enable Doshii - Select to enable Swiftpos Doshii Integration.
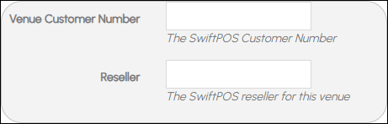
- Reseller - Displays/Enter the Reseller's name.
- Change Reseller Information - Select to change. Once selected the following options will be available:

IMPORTANT
Incorrectly configuring the Reseller information credentials above can result in all Reseller's sites being unable to onboard.
Once the Reseller information credentials have been configured, they don’t need to be configured again and will copy across to all Locations for the same Reseller.
- Doshii API Key - Displays/Enter the API key provided by Doshii.
- Doshii POS Name - Displays/Enter the POS Name provided by Doshii.
Selecting this option will display the Doshii Integration screen, from which the following tabs can be accessed:
Tabs

To access, select the Settings menu option from the Doshii menu option and used to configure options and settings for Doshii integration.
- Doshi Venue ID - Displays/Enter the ID provided by Doshii.
- Floor Plan Layout ID - Enter the ID of the Floor Plan Layout to be used by Doshii to identify the Tables that are available when configuring for a PAT (Pay at Table) type integration. Refer to Floor Plans Screen and specifically the Layouts > Open menu option to locate the ID of the preferred Layout.
- Enable Stock On Hand - Select to enable SOH notifications being displayed. Appropriate warnings will be displayed when SOH levels become low or when Stock is no longer available. Leave unselected if there is no requirement to display SOH notifications.
- Surcharge ID - Displays/Enter the ID of the Swiftpos Surcharge to be associated when surcharges are applied.

To access, select the Settings menu option from the Doshii menu option and used to map Doshii Media to Swiftpos Media.
- Doshi Media - Displays Doshii's Media.
- Swiftpos Media ID - Displays the ID of the Swiftpos Media.
- Edit - Select to edit/enter the ID of the Swiftpos Media that will be mapped to the associated Doshii Media.
IMPORTANT
Ensure that Swiftpos Medias selected are NOT mapped to more than one Doshii Media. That is, Swiftpos Medias should NOT be duplicated.
Health Monitor Menu Option ▲ ▼

To access, select the Health Monitor option in the Connect menu. Used to manage and view the health status of Swiftpos Gateway Clients.
Header Section
- Customer Number - Displays the Customer Number as per the Venue's registration.
- Business Name - Displays the Company Name as per the Venue's registration.
Grid Section
Lists the Gateway Clients currently associated with the Venue's Customer Number, along with their Gateway name, Client ID, POS Location, Status, NetPOS status, Table Tracking status, Version, Last Synced date, Debug option and Delete option.
Notes ...
The Table Tracking status information is only available in Swiftpos v10.77+
3rd Party Integrators Menu Option ▲ ▼
To access, select the Doshii option in the Connect menu. Used to manage and view the Doshii configuration settings in Venue Manager. Once selected, select from the following menu options:
Notes ...
This tab is only accessible to Super Administrators. For further information or assistance, please contact your Swiftpos Reseller or Swiftpos Support.
Customers Menu Option ▲ ▼

- Customer Search - Select from the drop-down list one of the Customers listed.
- Search - Select to commence the search. Once selected, the information returned will look similar to the example below:

Displays the Integrators found for the selected Customer, along with their Integrator Name, Number of Connected Client IDs and the Action options available to each.
- Expand - Select to the selected Integrator to view the Cloud Client information. Lists the Client ID, Location ID and Location Name.
Integrators Menu Option ▲ ▼

- Integrator - Select from the drop-down list one of the Integrators listed.
- Search - Select to commence the search. Once selected, the information returned will look similar to the example below:

Displays the Customers found for the selected Integrator, along with their Customer Name, Number of Connected Client IDs and the Action options available to each.
- Expand - Select to the selected Integrator to view the Cloud Client information. Lists the Client ID, Location ID and Location Name.
Orders API Assignment Menu Option ▲ ▼

To access, select the Orders API Assignment option in the Connect menu. Used to configure the Orders API. Previously known as MSL Connect API Permissions.
- Select Integrator - Select the Integrator from the drop-down list. Once selected, the Operations available will be listed.

Lists the available Operations along with their Availability, Enabled status and Custom Adaptor option.
End of article ▲