![]()
Refer HERE for Internal Help Guide Information
Refer HERE for Reseller & Support Information
This outlines the information and the steps that are required to install and implement the SevenRooms interface for Touch.
The content is targeted at Resellers and Swiftpos Venue administrators who have a sound knowledge of and experience with Swiftpos. For further information or assistance, please contact your Swiftpos Reseller or Swiftpos Support.
Subjects ▲ ▼
About ▲ ▼
- Terms & Concepts
- What Does It Feature?
- What is it?
- What Is Not Supported?
- What is Required?
- What Is Supported?
- What To Consider?
- When Is It Used?
Terms & Concepts? ▲ ▼
The following are terms and concepts referred to in this 3rd Party Integration:
- Bus Table - Bus Table is short for Bussing Tables and means that the Table is either being cleared or being set for the next group of patrons. The term can also refer to an activity where front-of-house operations are in play, as Tables are turned over.
- Booking - A reservation is booked in SevenRooms for a particular time in the future. Once booked, the reservation will appear in the SevenRooms app with a status of Upcoming (Booked). The same booking will only be visible in Touch when a Table has been assigned to the booking in SevenRooms.
- Check Dropped - A reservation is placed in a Check Dropped status when the payment associated with it's Table has been finalised in Touch. This status indicates that the dining experience for that Table is complete, and the Table is now available for the next reservation or walk-in patron.
- Gone - A reservation is placed in a Gone status when it is marked as Paid or Bus Table. This indicated that the patrons have settled their bill and the Table is now available for the next reservation.
- Paid - A reservation is placed in a Paid status when it's Table is closed and paid for in Touch.
- Partially Seated - A reservation is placed in a Partially Seated status when it is assigned a Table and not all the guests included in the reservation, have arrived at the Venue.
- Seated - A reservation is placed in a Seated status when it is assigned a Table and all the guests included in the reservation, have arrived at the Venue. Normally the reservation needs to be manually placed into a status of Seated using the SevenRooms App.
- Walk-in - Refers to a patron or group of patrons that arrives at a Venue without a Table reservation.
What Does It Feature? ▲ ▼
- In SevenRooms When:
- A Reservation Is Created
When a reservation is seated in SevenRooms, the corresponding Table will be automatically opened in Touch, populated with booking details such as customer name, party size, and Table number. - A Walk-In Is Created
Seating a walk-in in SevenRooms will create a corresponding Table in Touch, including party size, Table number, and a booking name in the format “Guest T(table number}”. - A Table Is Moved
All Table movements must be performed within SevenRooms. When a Table is moved, it will be automatically updated in Touch. - A Table Deposit/Prepayment Is Made
Deposits or prepayments made in SevenRooms will be reflected in Touch as a prepayment associated with the corresponding Table. - Client Details Are Displayed
When a Table booking is created in Touch, the client’s name will appear in the sales grid under the Table’s information. - A Client Is Flagged As A VIP
Clients marked as VIP in SevenRooms will have “– VIP” appended to their name in Touch. This appears in the sales grid to assist staff in providing enhanced service.
- A Reservation Is Created
- In Touch When:
- A Table's Status Changes
When a Table's status changes in Touch (e.g. Order Placed, Paid, Cleaning, Closed), the updated status is also reflected in SevenRooms. - A Walk-In Is Created
Walk-in bookings created in Touch will simultaneously create and open a Table in SevenRooms. - A Reservation Is Seated
Active reservations from SevenRooms can be selected and seated directly from Touch. This opens the Table in Touch and marks it as seated in SevenRooms. - Items Are Added To A Table
Any items added to a Table in Touch are automatically synced to the corresponding Table in SevenRooms, ensuring real-time tracking of Table spend. - A Table Is Set To Clean Mode
Once payment is completed in Touch, the Table can be set to Clean mode, updating its status in SevenRooms to either "Paid" or "Cleaning". Clerks/Staff must manually close the Table in Touch when it is ready for the next service. - A Table Is Closed
When a Table is finalised in Touch, its status is updated to “Gone” in SevenRooms, completing the workflow. - Existing Table Functions Are Performed
Existing Touch Table functions remain fully supported, including item transfers, opening TABs, and managing Bistro Tables (assuming Bistro Table numbers are outside the SevenRooms range).
- A Table's Status Changes
What Is It? ▲ ▼
SevenRooms is a cloud-based hospitality platform designed to help restaurants, hotels, and similar venues manage reservations, optimize operations, and deliver highly personalized guest experiences. By integrating it with Swiftpos, venues can streamline operations and gain a full picture of the guest journey, from reservation to final bill.
What Is Not Supported? ▲ ▼
- Multiple Touch devices that are designated as the SevenRooms Master. Only one Touch device can be designated as the SevenRooms Master device.
- Only unique numeric Table Numbers are supported. That is, all Tables within the Venue must have a unique Table number.
- Alphanumeric or special characters in Table numbers are NOT supported. Use of these will result in integration errors and failed Table creation.
- SevenRooms does NOT support Tables used for casual service, like Bistro Tables. These should have numbers outside the defined SevenRooms Table range. If not, the system may treat them as reserved Tables, causing functionality issues.
What Is Required? ▲ ▼
- Swiftpos v10.78.5 + - Supports Bistro Tables.
-
The Auto Close option needs to be set on the Bistro Table (#30) POS Key
OR -
The Auto Close After XX mins option in Table Tracking in Touch.
- The Auto Close After XX mins option will send the orders to the Kitchen KVS/Printer but NOT close the Table.
-
- Swiftpos v10.77+ - Enhanced release of SevenRooms interface that includes the following:
- Swiftpos v10.76+ - Initial release of the SevenRooms interface.
- A Swiftpos registration for Third Party Reservations.
- Ensure at least one Touch device is configured to interface with SevenRooms.
- Ensure the Auto Close All Bistro Tables option is NOT selected.
- Ensure the Table (#30) and 3rd Party Reservation (#460) POS Keys are added to the appropriate Keyboard Layout using the Designer. Refer HERE for more information.
What Is Supported? ▲ ▼
- Currently it only supports IOS devices, such as iPhones and iPads. The SevenRooms App is not available for Android devices.
- Only a single SevenRooms interface can be configured in a Table Tracking database.
- Location and Table number ranges defined HERE must be within the Table Ranges configured for the Touch device.
- Only unique numeric Table numbers are supported. Alphanumeric or special characters in Table numbers will result in integration errors and failed Table creation.
- Currently up to 400 reservations per day are supported.
- The only time a change the status of a Table in SevenRooms, will be considered by the Swiftpos SevenRooms interface is when the status of a Table in SevenRooms is changed to, or from one that is considered an In-Service status. An In-Service status can be:
- Bus Table
- Check Dropped
- Dessert
- Gone
- Paid
- Partially Seated
- Seated
- 1st Course
- 2nd Course
- 3rd Course
What To Consider? ▲ ▼
- Table Movement Must Be Done in SevenRooms - Once a Table is linked through the integration, any movement or reassignment of that Table must be performed in the SevenRooms interface. Attempting to move the Table from within Swiftpos will not work and may cause data mismatches.
- Numeric Table Numbers Only - Swiftpos only supports numeric Table numbers. Alphanumeric or special characters in Table numbers will result in integration errors and failed Table creation.
- One SevenRooms instance per Table Tracking Database - Only a single SevenRooms interface can be configured in a Table Tracking database. If a customer requires multiple SevenRooms instances to be integrated with Touch, they will need to have multiple Table Tracking databases. This will mean that TABS will not be able to be shared between these locations.
- Limited Reservation Control in Touch - While seating and walk-ins can be managed from Touch (if enabled), advanced reservation features—like modifying booking details or reassigning reservations—must be done through the SevenRooms platform.
- No Support for Bistro Tables in SevenRooms Range - Tables used for casual service (like Bistro Tables) should have numbers outside the defined SevenRooms Table range. If not, the system may treat them as reserved Tables, causing functionality issues.
- Touch still retains standard table functions for bistro tables or other areas not managed via SevenRooms (e.g., transferring items, opening tabs).
- When SevenRooms is active on a device, Clerks/Staff cannot manually open a table in Touch for a Table number that is within the table number range that is set in the interface settings. Tables must be created and marked as seated in SevenRooms first.
- When in use at a Venue and one or more Touch devices have been configured to interface with SevenRooms, Clerks/Staff will no longer be able to create/open a Table using Touch at those devices. All Tables are opened/created in SevenRooms, when a Reservation is assigned to a Table and the same Table is flagged as Partially Seated or Seated in SevenRooms. Only then will the Table be available to Clerks/Staff in Touch using the Table (#30) POS Key.
-
A number of Swiftpos POS Keys will NOT function as expected at Touch, once Touch has been configured to interface with SevenRooms. These are:
- Split Table Balance (#38) - This POS Key will NOT be available in Touch. When selected, the prompt below will be displayed.

- Table (#30) - This POS Key will NOT be available in Touch when attempting to create/open a new Table. This is because Tables are created/opened using SevenRooms. Only when the Table is Partially Seated or Seated in SevenRooms, will the Table be available in Touch. When selected, in Touch to create/open a Table using either first or last mode, the prompt below will be displayed.

Notes ...
The Table (#30) POS Key will still function as a Table lookup when used in conjunction with SevenRooms. Refer HERE for more information.- Transfer Items (#42) - This POS Key will NOT be available in Touch. When selected, the prompt below will be displayed.

- Transfer Table (#34) - This POS Key will NOT be available in Touch. When selected, the prompt below will be displayed.

When Is It Used? ▲ ▼
Used when a Venue running Swiftpos wants to integrate with SevenRooms and make use of the Table reservation features it offers, while still being able to have access to Tables in Touch. It features the following:
- Reservations & Table Management - Streamlined handling of bookings, waitlists, and seating assignments.
- Guest CRM - Builds comprehensive guest profiles that include visit history and preferences.
- Automated Marketing - Sends email and SMS campaigns based on real guest behaviour.
- Analytics & Insights - Provides detailed reports to inform operational and marketing decisions.
Once configured, here’s how the system operates:
- Reservations are taken and managed in SevenRooms.
- When guests are fully seated, a corresponding table is created in Swiftpos with all relevant details.
- All item additions, payments, and table status changes are synced between Touch and SevenRooms.
- Walk-ins can be created directly in SevenRooms or from Touch (if enabled).
- Moving tables or updating bookings must be done in SevenRooms.
- The 3rd Party Reservations (#460) POS Key is used in Touch to:
- View and seat upcoming reservations
- Create walk-ins (when allowed by settings)
- When tables are paid, the system can optionally prompt to put the table in clean mode before final closure.
How To? ▲ ▼
- Access A SevenRooms Reservation In Touch?
- Create A Walk-In From Touch?
- GET STARTED?
- Place A Table In Cleaning Mode?
- Seat A Table From Touch?
How To Access A SevenRooms Reservation In Touch? ▲ ▼
A SevenRooms reservations can be accessed in Touch when it is necessary to perform a Table related function. For example, add Items/Products to a Table, finalise a Table, etc. To access a SevenRooms reservation in Touch the reservation must have a Table assigned to it and have a status of either Arrived (Partially Seated), Seated or Upcoming (Booking). To access SevenRooms reservations in Touch, do as follows:
- In Touch:
- Select the Table (#30) POS Key to open the Open Tables for All Clerks screen.
- The Table, the SevenRoom's reservation was assigned to, should be listed in the grid.
- Select the Table and perform the required table function.
Create A Walk-In From Touch? ▲ ▼
Do as follows:
- In Touch:
- Select the 3rd Party Reservations (#460) (SevenRooms) POS Key to open the Reservations screen.
- Select the Add Walk In option to open the Walk In screen.
- Select from the Minutes drop-down list the time in minutes the Walk In reservation is to go for. For example, 90 minutes.
- Select from the Covers drop-down list the number of covers for the Walk In reservation. For example, 3 patrons.
- Select from the available Tables listed in the grid a Table to seat the Walk In reservation.
- Select the Add Walk In option to add and seat the Walk In.
- The Walk In reservation will appear in SevenRooms as a Seated reservation.

Place A Table In Cleaning Mode? ▲ ▼
A Table is placed in Clean mode when a Table is finalised and the Table needs to be made ready for the next patron, or when a Table is finalised and the patrons at the Table remain seated. To place a Table in Clean mode, do as follows:
- In Touch:
- Ensure the Prompt to Clean Table option is selected.
- Then select either the Bus Table or Paid status from the Status drop-down list to ensure the selected status is displayed against the Table in SevenRooms.
- When a Table is finalised in Touch, the following prompt will be displayed:
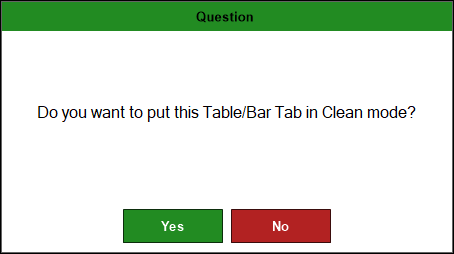
- In Touch continued ...
- Select Yes, to ensure the Table is placed in cleaning mode.
- The next time the Table is opened in Touch, the following prompt will be displayed:
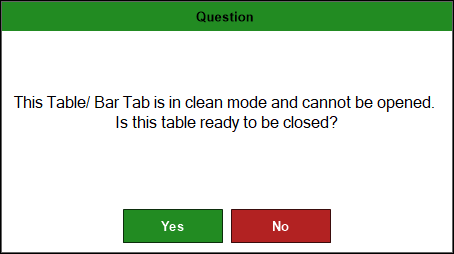
- In Touch continued ...
- Select Yes to close the table and ensure it is available to be seated for the next patron. Select No to ensure it remains in clean mode.
How To Seat A Table From Touch? ▲ ▼
Do as follows:
- In Touch:
- Select the 3rd Party Reservations (#460) (SevenRooms) POS Key to open the Reservations screen.
- Select from the reservations listed in the grid, one that has a status of Booked.
IMPORTANT
A reservation will only appear in the Reservations screen in Touch as Booked if the booking in SevenRooms has a Table assigned to it.
- In Touch continued ...
- Select the Seat option to ensure the reservation is flagged as Seated in SevenRooms.

How To GET STARTED? ▲ ▼
Ensure all the steps outlined here are completed:
- Review About and ensure the steps specifically outlined HERE have been addressed.
- Contact SevenRooms to ensure the required API integrator credentials are obtained for the Swiftpos integration.
- The Venue will need to identify and map the Table numbers that will be used with the integration.
Only numeric Table numbers are supported. Swiftpos does not accept alphanumeric or special characters in Table numbers. Using them will result in integration errors.
Do as follows:
- Ensure that Touch is configured to use the POS API for Table Tracking, and to ensure it can communicate with SevenRooms. Refer HERE for more information.
- Add SevenRooms to the Interface List:
- Navigate to the Interface List menu option in Terminal Settings.
- Select the Add New option.
- In the Add New Interface screen, select Reservation Systems from the Interface Type drop-down list.
- Enter SevenRooms in Description field for the new interface.
- Select OK.
- In the 3rd Party Reservations System screen select the SevenRooms option from the Reservations System drop-down list.

- Add SevenRooms to the Interface List continued ...
- This will display the SevenRooms Settings screen.
- Configure the settings with the information provided by SevenRooms. Notably:
- In the Server Settings tab:
- Ensure the Enabled option is selected.
- Ensure the API credentials provided are entered as is appropriate.
- Select the Log Request Data option for detailed troubleshooting.
- Select the Local Time or select the time zone used by SevenRooms.
- Add the Location and their Table ranges using the SevenRooms Table Locations screen.
- In the Rerservations tab:
- Select the Swiftpos Media to be used for deposits/pre-payments.
- If Walk-ins are going to be created from Touch, ensure the Create Walk Ins from Touch option is selected. Once selected, this will ensure the 3rd Party Reservations (#460) POS Key is enabled to create Walk-ins.
- Select the Allow Seating Reservations from Touch option to ensure the 3rd Party Reservations (#460) POS Key is enabled to seat a SevenRooms reservation.
- Ensure the Prompt to Clean Table option is selected to ensure Touch will prompt Clerks/Staff to place the Table in Clean mode after a Table is finalised.
- In the Server Settings tab:
- Test the connection to SevenRooms by selecting the TEST option.
- If successful, the following prompt will be displayed:

- Add SevenRooms to the Interface List continued ...
- Save the changes.
- Touch should now be configured for SevenRooms.
Screens ▲ ▼
Booking Details Screen ▲ ▼
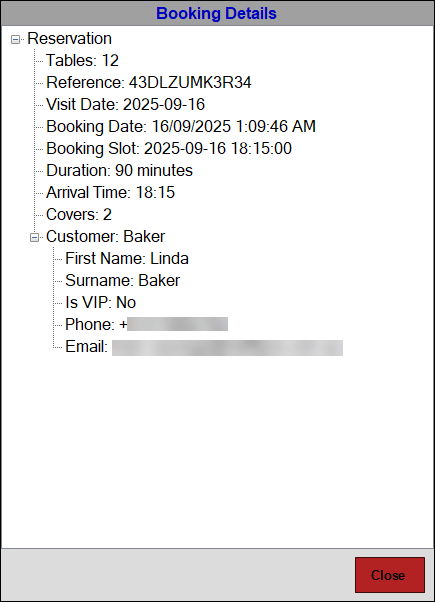
To access, select a reservation listed in the grid of the Reservations screen and then select the View Details option. Used to view the detail associated with a reservation.
- Close - Select to exit the screen.
Reservations Screen ▲ ▼

To access, select the 3rd Party Reservations (#460) POS Key in Touch. Used to manage SevenRooms reservations from within Touch. The management of SevenRooms reservation from within Touch is limited to:
- Viewing all reservations. Both past and present.
- Viewing the details of a reservation.
- Adding a Walk-in.
Header Section
- Filter - Enter in full or partial text, the name of the patron to ensure only those patrons are listed in the grid that have the text entered in their name.
Grid Section
List the Tables that are in use or have been in use along with their Table #, Arrival Time, Booking Name, Covers, VIP indicator and Status.
Footer Section
- Refresh - Select to refresh the contents of the grid.
- Show All - Select to ensure all reservations are displayed. Including reservations that have taken place earlier in the Trading Period.
- View Details - Select to open the Booking Details screen to view the details associated with the selected booking.
- Add Walk In - Select to add a Walk In. Refer HERE for more information.
- Seat - Select to ensure the selected booking is seated. Refer HERE for more information.
- Cancel - Select to exit the screen without saving the changes.
SevenRooms Settings Screen ▲ ▼

To access, select the SevenRooms option in the Reservations System drop-down list. Used to configure/view the SevenRooms interface configuration in Touch.
- Reservations System - Ensure this is displaying the SevenRooms option.
- Enabled - Select to ensure integration with SevenRooms is enabled.

When To Close Bistro Table Section
Bistro Tables will be closed in Swiftpos and SevenRooms when one of the following options is selected:
- End of Reservation Period - Select to ensure the Bistro Table is closed at the end of the reservation period set in SevenRooms.
- After XX minutes - Select to ensure the Bistro Table is closed when the time (XX) set in minutes has lapsed from the time the reservation was made in SevenRooms.
- Leave Open - Select to ensure the Bistro Table is not closed automatically and will need to be closed using the Floor Plan Display (#402) POS Key in Touch, by selecting the Table on the Floor Plan and then in the Table Status screen, selecting the Clean option to place it in a Cleaning status and then selecting the Close option to close the it.
- On Last Order for Table - This is the default. Select to ensure the Bistro Table is closed when the last Order is placed.

- Table Deposit Media - Displays/Select the Swiftpos Media that is to be assigned when a Pre-Payment amount is added to a SevenRooms reservation using the App.
- Create Walk Ins from Touch - Select to ensure SevenRoom walk-ins can be created from Touch. Once selected, set the:
- Interval - Displays/Set the default interval in minutes before a check is done to confirm if a reservation exists on a Table selected for a walk-in.
- Allow Seating Reservations from Touch - Select to ensure Tables can be Seated in Touch using the 3rd Party Reservations (#460) POS Key. Allow for +/- 3- seconds for the Table to be created in Touch.
- Prompt to Clean Table - Select to ensure staff are prompted for a response as to whether a Table must be cleaned or not. Also ensure To be continued ...

- Master (Responsible for Creating Tables)- Select to ensure that this Touch device is the ONLY one designated as the SevenRooms Master, and is the only one that is responsible for creating Tables).
IMPORTANT
It is strongly recommended to designate ONLY ONE Touch device in a Venue as the SevenRooms Master.
Notes ...
Given SevenRooms can be accessed from multiple Locations, ONLY one Touch device (in the Venue) can be designated as the SevenRooms Master at any one time. This is to ensure that only one Table Tracking database is used by SevenRooms. If NO Touch device is designated as the Master, then the Master device will be use by default. If there is more than one Touch Master device in a Venue, then this could cause potential problems. Therefore, it is strongly advised to follow the recommendation above.
- Log Request Data - Select to ensure the logging of request data is enabled.
- Base URL - Displays/Enter the URL provided by SevenRooms.
- Client ID - Displays/Enter the Client ID provided by SevenRooms.
- Client Secret - Displays/Enter the Client Secret provided by SevenRooms.
- Venue Group ID - Displays/Enter the Venue Group ID provided by SevenRooms.
- Venue ID - Displays/Enter the Venue ID provided by SevenRooms.
- Local Time - Select from the drop-down list the local time that is appropriate for the Venue.
- Locations - Select to open the SevenRooms Table Locations screen to select the Locations and Table ranges that will be making use of SevenRooms.
- Test - Select to test whether the details entered above ensure a successful connection to the SevenRooms' API.
- OK - Select to save the changes and exit the screen.
- Cancel - Select to exit the screen without saving the changes.
SevenRooms Table Locations Screen ▲ ▼

To access, select the search icon to the right of the Locations field in the Server Settings tab. Used to set which Location and their Table ranges integrate with SevenRooms.
Grid Section
- ID - Displays the IDs of the available Locations.
- Description - Displays the names of the available Locations.
- From/To - Displays the Table ranges for the available Locations.
- Active - Displays/Select to set to True to ensure the Location integrates with SevenRooms.
Footer Section
- Check All - Select to ensure the Active status is set to True for all Locations.
- Uncheck All - Select to ensure the Active status is set to False for all Locations.
- OK - Select to save the changes and exit the screen.
- Cancel - Select to exit the screen without saving the changes.
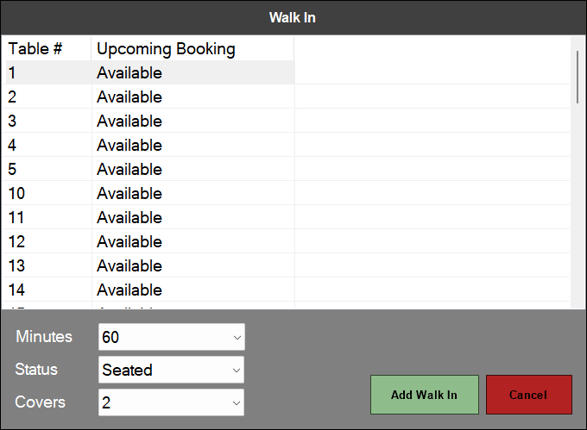
To access, select the Add Walk In option in the search icon to the right of the Locations field in the Server Settings tab. Used to set which Location and their Table ranges integrate with SevenRooms.
Grid Section
- Table # - Displays the Table numbers of the Tables Available.
- Upcoming Booking - Displays either:
- The time of the upcoming booking. Only those Bookings will be displayed if the Minutes selected for the Walk In reservation does NOT clash with the upcoming Booking reservation time. That is, the Table can be available prior to the upcoming Booking, because the Minutes selected ensures the Table will be available for the upcoming Booking once the Walk In reservation has lapsed.
- The text Available, denoting the Table is available for a Walk In reservation.
- Active - Displays/Select to set to True to ensure the Location integrates with SevenRooms.
Footer Section
- Minutes - Select from the drop-down list the time in minutes the Walk In reservation is to go for.
- Status - This should always be set to Seated.
- Covers - Select from the drop-down list the number of patrons for the Walk In reservation.
- Add Walk In - Select to add the Walk In reservation and ensure the Table is flagged as Seated.
- Cancel - Select to exit the screen without saving the changes.
End of article ▲