This outlines How To Configure For Warehouse Requisitioning in Back Office.
Subjects ▼
What Is Required? ▲ ▼
- Venues will need to be registered for the Advanced eTrade for access to this feature.
- The Service Monitor must be running and the Enable Automatic Orders from this PC option must be selected. This will ensure that Purchases Orders are generated automatically when Warehouses are unable to supply a requisitioned Item.
- Ensure the steps outlined in How To Configure For Warehouse Requisitioning have been completed.
To Be Considered ▲ ▼
- When making use of the Transfer Costs option available HERE and HERE in this feature, ensure the Location Transfer In Cost method setting has been configured correctly against each requisitioning Location.
How To Configure For Warehouse Requisitioning? ▲ ▼
Do as follows:
- Ensure a Location of the type Warehouse has been created. Below is an example of a Location Warehouse Type configuration:
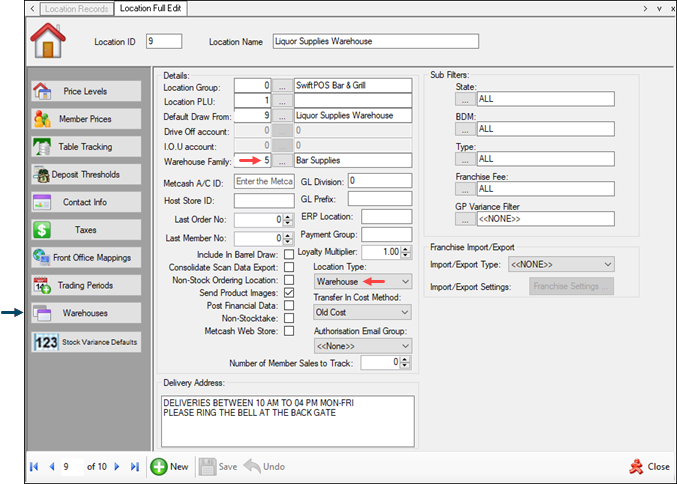
- Repeat the above steps for each Warehouse type Location that has been identified for the site.
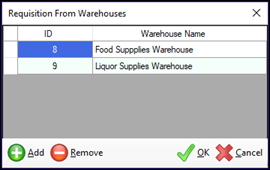
- Ensure the Warehouse(s) (from which stock will be requisitioned) are assigned to each of the non-Warehouse type Locations, that will be doing Warehouse Requisitioning. This can be done by selecting the Warehouses button in the Location Full Edit screen (above) to open the Requisition from Warehouses screen:
- If necessary, create a Family of Products which can then be assigned to the Warehouse created in the above step. This will ensure that only those Products assigned to the Warehouse Family can be included in Requisitions and Shopping Lists.
- Lastly, but IMPORTANTLY, ensure the relevant Clerk Security authorisations have been configured in the Clerk Group Permissions > Inventory > Warehouse Requisitioning against the appropriate Clerks Security Groups.
Notes...
By default, Clerk Security is NOT configured for all Security Groups.
End of article. ▲