
This provides information regarding the EFT43 - Posnet Linkpos EFTPOS peripheral in Touch.
Subjects ▲ ▼
About ▲ ▼
What Is Not Supported? ▲ ▼
- Refunds are not supported.
What Is Required? ▲ ▼
- Swiftpos v10.71+
What Is Supported? ▲ ▼
- Reversals are supported.
What To Consider? ▲ ▼
- Sites must have a current Software Enhancement Licence to use this feature.
- Ensure an actual printer is assigned for all integrated EFTPOS printing. Do NOT use the <<Default Printer> option because the EFTPOS cannot see it.
How To? ▲ ▼
How To GET STARTED? ▲ ▼
- Review About and ensure the steps outlined HERE are addressed.
- Obtain the credentials and configuration details from POSNET.
- Add the EFTPOS peripheral to Touch. Refer HERE for more information.
- Ensure the EFTPOS - EFT43 - Posnet Linkpos option is selected from the EFTPOS Type drop-down list.
- Configure the Posnet Linkpos Settings screen.
- Save the configuration.
Screens ▲ ▼
EFTPOS - EFT43 - Posnet Linkpos Screen ▲ ▼
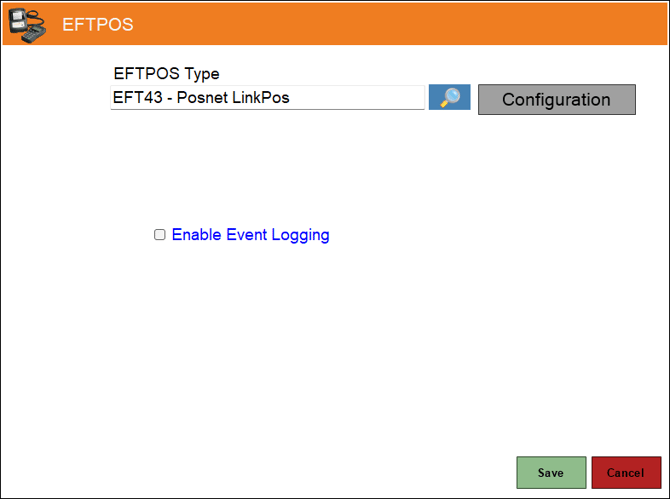
To access, add the EFTPOS peripheral to Touch and select the EFTPOS - EFT43 - Posnet Linkpos option from the EFTPOS Type drop-down list. Refer HERE for more information.
- EFTPOS Type - Select from the drop-down list the EFTPOS - EFT43 - Posnet Linkpos option. Refer HERE for more information.
- Configuration - Select to open the Posnet Linkpos Settings screen to configure the settings.
- Enable Event Logging - Select to enable. It is recommended that this is enabled when testing or when troubleshooting an issue.
Posnet Linkpos Settings Screen ▲ ▼
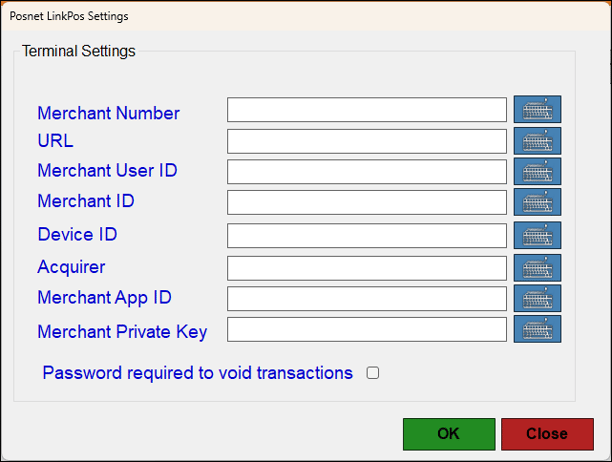
To access, select HERE. Used to configure the Posnet Linkpos Settings.
Terminal Settings Section
Displays as well as allows for the entry of the following settings, which POSNET provides:
- Merchant Number
- URL
- Merchant User ID
- Merchant ID
- Device ID
- Acquirer Name
- Merchant App ID
- Merchant Private Key
Options
- Password required to void transactions - Select to force the entry of a password when deleting transactions.
End of article ▲