Subjects ▲ ▼
About ▲ ▼
What Is Required? ▲ ▼
- The appropriate Clerk Security Group permissions required to add and edit Surcharges in Back Office.
- A Surcharge PLU. Refer to HERE for more information.
When Is It Used? ▲ ▼
Used to create and configure Surcharges, that can then be applied to orders/sales. For example, a Public Holiday surcharge.
Screens ▲ ▼
Surcharge Setup Screen ▲ ▼
To access, select Surcharge Setup option in the Vouchers/Discounts menu.
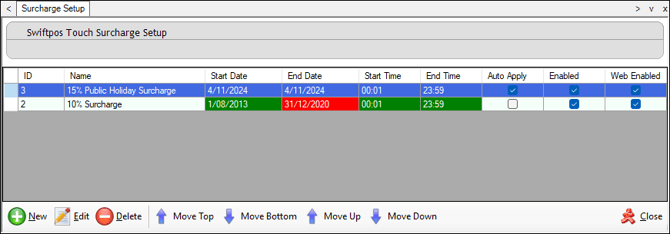
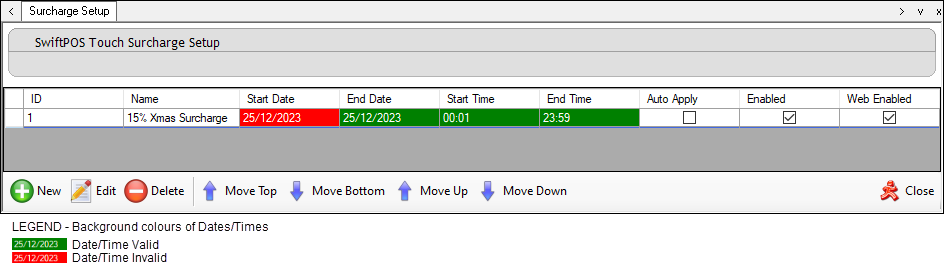
Grid Section
The grid displays a list of Surcharges along with their ID, Name, Start Date, End Date, Start Time, End Time, Auto Apply, Enabled and Web Enabled indicators.
Footer Section
- New - Select to open the Surcharge Edit screen to create a new Surcharge.
- Edit - Select to open the Surcharge Edit screen to edit the selected Surcharge.
- Delete - Select to remove the selected Surcharge.
- Move Top/Bottom or Up/Down - Select to re-order the Surcharges listed in the grid. The order determines how the Surcharges are applied. That is, the first Surcharge listed is applied first, then the second and so on.
- Close - Select to exit.
Surcharge Setup Edit Screen ▲ ▼
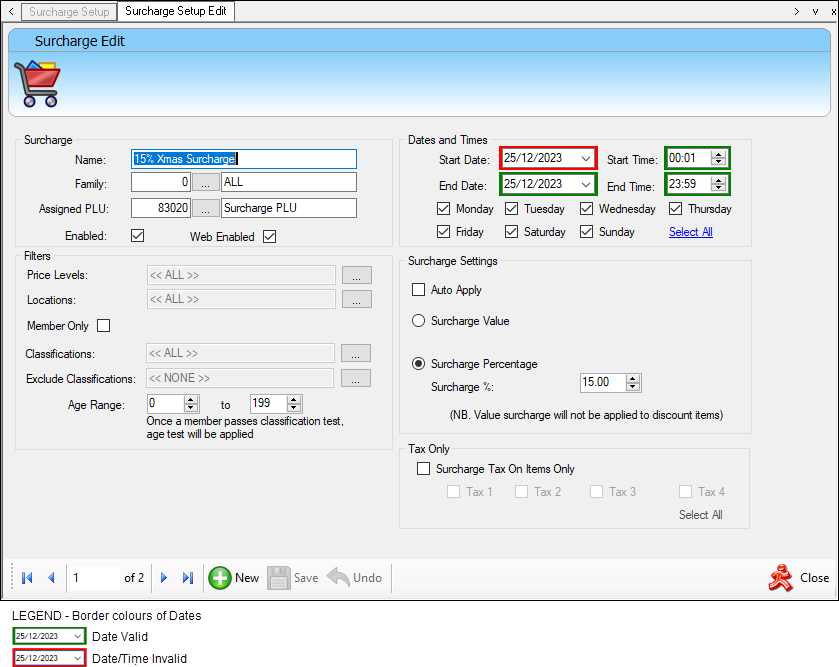
To access, select either the New or Edit buttons in the Surcharges Setup screen.
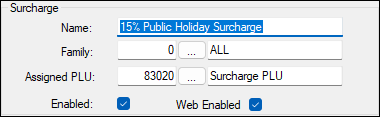
- Name - Displays/Enter the name of the Surcharge. A maximum of 50 characters is allowed to be entered.
- Family - Select to open the Search Families screen to select the Family of Product(s) the Surcharge will be applied to. To apply a Surcharge to ALL Products enter a zero (0) in this field. This will result in the ALL Family being selected.
- Assigned PLU - Select to open the Search Products screen to select the Product the Surcharge will be assigned to.
- Enabled - Select to ensure the Surcharge is activated and enabled to be applied in Touch.
- Web Enabled - Select to ensure the Surcharge is activated and enabled to be applied in OrderAway and TouchMini v2 via the Web API.
Notes ...
For an up to date overview of the availability of features in relation to orders/sales placed and/or Vouchers redeemed, click here.
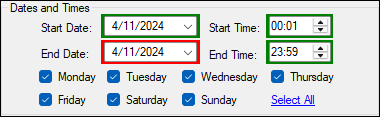
Displays/Set the period the Surcharge is active. This is done by setting the following:
- Start/End Dates - Select the overall period for which the Surcharge will apply.
- Start/End Times - Select the Start/End time in which the Surcharge will be applied on the Days selected.
- Days - Select the Days on which the Surcharge will be applied.
Notes ...
Surcharges will ONLY be applied between the Start/End Times set and ONLY on the Days selected and ONLY if those Days fall within the Start/End Dates.
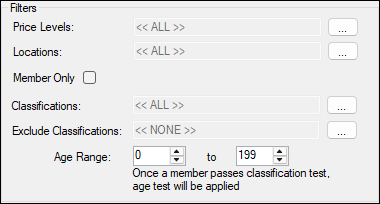
Use the Filters as required to further restrict the application of the selected Surcharge.
- Price Levels - Select to limit the application of the Surcharge to the Price Level selected. The default is all.
- Classifications - Select to limit the application of the Surcharge to the Classification selected. The default is all.
- Locations - Select to limit the application of the Surcharge to the Location(s) selected. The default is all.
- Member Only - Select to ensure the rule is only triggered when an order/sale is placed by a Customer/Member.
- Age Range - Only enabled when the Classification filter has been configured and is used to restrict the application of a Surcharge to an age range. For example, Senior Citizens - A Venue may decide NOT to apply the Surcharge to Customers/Members whose age is 65+. To do this they would configure a range from 0 to 64.
Surcharge Settings Section ▲ ▼
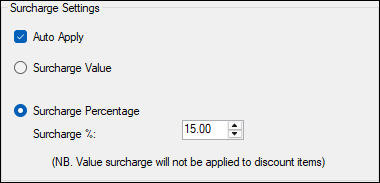
Determines the type and value of Surcharge to be applied.
- Auto Apply - Select to ensure the Surcharge is applied automatically. That is, a Surcharge (#80) POS Key does not need to be selected.
- Offer Surcharge Options - Select one of the following options:
- Surcharge Value - Select to specify the dollar amount the Products are to be Surcharged by in the sale.
- Surcharge Percentage - Select to specify a percentage value the Products are to be Surcharged by in the sale.
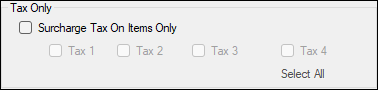
Determines the Taxes to be applied to the Surcharge incurred in an order/sale.
- Surcharge Tax On Items Only - Select to ensure the Surcharge applied to Items/Products is also Taxed. Once selected, select 1 or more of the 4 Taxes available.
![]()
- New - Select to Add a new Surcharge.
- Save - Select to save changes.
- Undo - Select to undo changes made.
- Close - Select to exit.
End of article ▲