
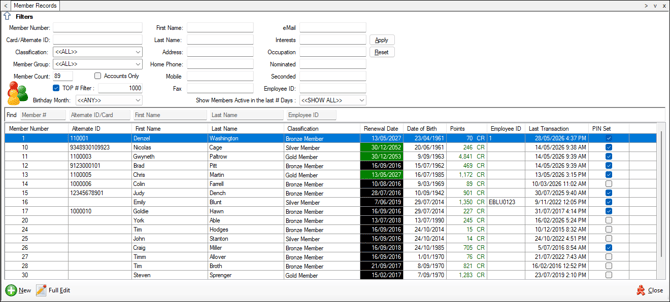
Used to configure, manage and search for a Customer/Member in Back Office.
Subjects ▲ ▼
About ▲ ▼
What Is Required? ▲ ▼
- Venues will need to be registered for the Accounts & Members module for access to this feature.
- Clerks/Staff must have the appropriate Clerk Security Group authorisation to access Member Records and it's functions in Back Office.
What To Consider? ▲ ▼
- Configuration options that may affect the way the Customer/Members module functions within a Venue will need to be considered. These can be found here:
- In the Members tab via the Global Preferences menu option in Back Office.
- In the Members/Accounts tab via the Local Configuration menu option in Back Office.
- Customers/Members can only be deleted using the Accounts/Members tab in the Delete Records screen.
When Is It Used? ▲ ▼
Used when a patron is required to be added as a new Customer/Member record or to edit/view the details of an existing Customer/Member.
Screens ▲ ▼
Member Full Edit Screen ▲ ▼
Sections ▲ ▼
Header Section ▲ ▼

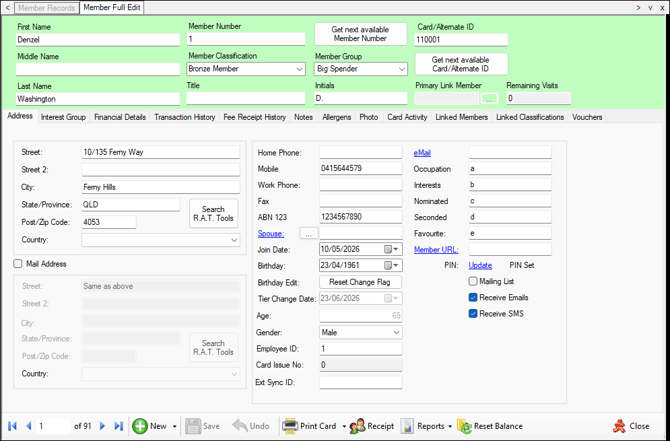
Provides filters to limit the number of rows displayed in the grid section. Once all filters have been selected, select the Apply option to apply them. Otherwise, select the Reset option to clear all filter selections.
Find fields are also provided to facilitate the locating of a specific row in the grid section.
Noteworthy
- Get next available Card/Alternate ID - Select to retrieve the next system generated Card/Alternate ID.
- Primary Link Member - Displays/Select the Customer/Member (Primary) to which this Customer/Member is linked to. This is primarily used to link a partner/spouse/child/etc to a Customer/Member. Select to open the Search Members screen to select a Customer/Member. Once selected, this Customer/Member will appear as a Linked Member in the Linked Members tab of the primary Customer/Member.
- Remaining Visits - Displays the number of Visits remaining as a result of a Visit Check done at Reception. When a number of visits are sold to a Customer/Member in Touch, then the value displayed here will be incremented by the number sold. An example of this would be, when a limited number of visits is sold to access a facility, such as a Pool, Gym, etc. Click here for an example.
Notes ...
This is disabled when the Customer/Member is already linked to another Customer/Member. In this instance the Linked Members tab will be made available to be selected.
Tabs Section ▲ ▼
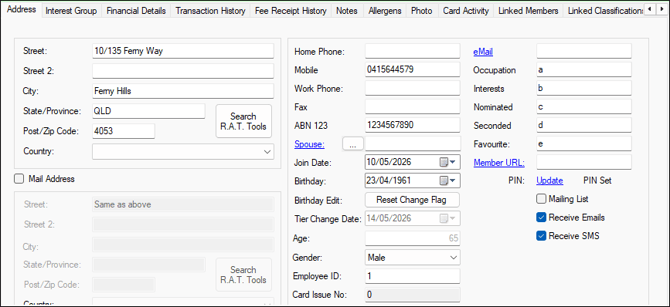
- Address
- Interest Groups
- Financial Details
- Transaction History
- Fee Receipt History
- Notes
- Allergens
- Photo
- Card Activity
- Linked Members
- Linked Classifications
- Vouchers
Noteworthy
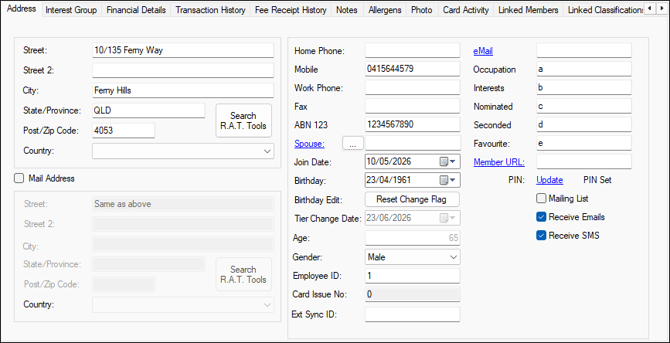
- Addresses - Displays/Enter both the billing and mailing addresses. To change/enter a mailing address select the Mail Address check box first.
- Search R.A.T. Tools - Select to open the Rapid Addressing Tool. To make use of this, this software will need to be purchased and installed. This software can be sourced from here.
- Spouse - Select to open the Search Members screen and select a Customer/Member.
Notes ...
Clicking on the field label 'Spouse' will reset the content of the Spouse field to blanks.
- Birthday Edit - Select the Reset Change Flag option to ensure the Customer/Member can their Birthday via the Web Member Portal. This is only applicable when the Birthday Edit Mode option is set to Single Edit.
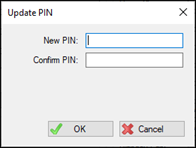
- PIN - Select the Update text to open the Update PIN prompt (as seen below) to change the current PIN.
Notes ...
The Pin Set is displayed when a PIN has been set for a Customer/Member. It will not be displayed when there is no PIN set for a Customer/Member.
- Tier Change Date - Displays the date the last time the Customer's/Member's Classification was changed.
- Card Issue No - Displays the number of times a Customer's/Member's card is re-issued. This count is incremented every time a Member Card is issued.
- Ext Sync ID - Displays a Customer's/Member's External ID. For example, when importing Customers/Members sourced from an external employer's HR/Payroll database this field will be populated with the external Employee ID or Payroll No.
Notes ...
If the currently logged in Clerk/Staff Member does not have the appropriate authority to edit the Ext Sync ID value, then the
- eMail / Interests / Occupation / Mobile / Nominated / Seconded and Favourite - These are Custom fields and are configured here.
Notes ...
The Email address and Mobile number entered here will be used to send Emails and/or SMS messages to the Customer/Member.
-
eMail / Interests / Occupation continued ...
Notes ...
Clicking on the field label eMail will invoke an email to be generated. This will only occur if an email address exists and an email application can be opened (for example Outlook).
- Member URL - Displays/Enter the Customer's/Member's current web site.
Notes ...
Clicking on the field label 'Member URL' will open the web page to be displayed.
- Web Password - Select the Update text to open the Update Password prompt (as seen below) to change the current password.
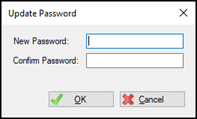
Enter the Customer/Member's PIN to access the Web. This password is also used in conjunction with the PinPad peripheral and the Charge /Redemption (#151) POS Key.
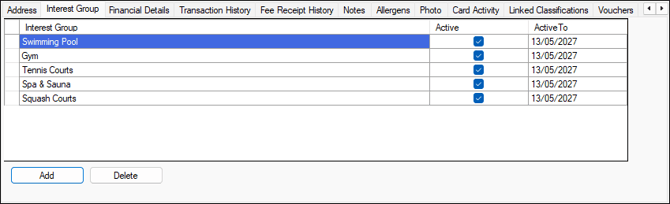
Used to record a Customer's/Member's interests for the purpose of directing appropriate promotional material. Interest Groups are managed HERE.
Grid Section
Lists the Interest Groups along with their Active indicator and Active To date.
- Interest Group - Displays the Interest Groups the Customer/Member is currently assigned to.
- Active - Select to indicate the Customer/Member is still active within the selected Interest Group.
- Active To - Select to set the expiration date when the Customer/Member becomes inactive for the selected Interest Group. When adding a new interest Group the date defaults to the Customer's/Member's current membership renewal date.
Footer Section
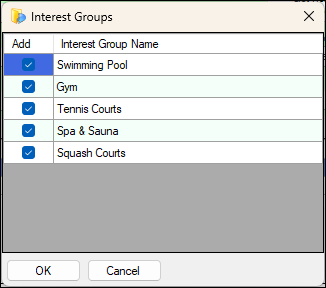
- Add - Select to open the Interest Groups selection prompt to add one or more Interest Groups to the Customer/Member.
- Delete - Select to delete the selected Interest Group and remove it from the Customer/Member.
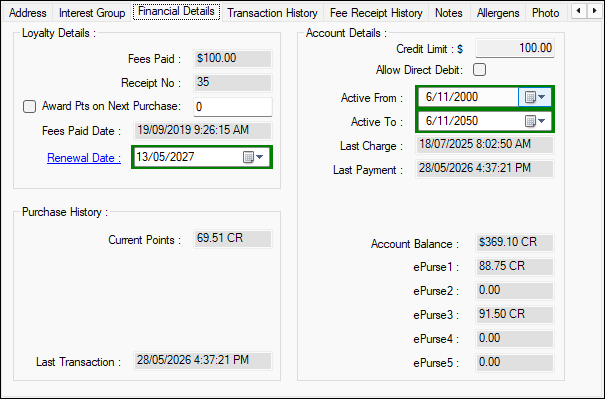
Used to review a Customer's/Members financial details including Loyalty, Purchase history and Account details. It also enables the setting of their credit limit amongst other things.
Loyalty Details Section
- Fees Paid - Displays the membership fees last paid.
- Receipt No - Displays the receipt number associated with the last membership fees paid transaction.
- Award Pts. On Next Purchase - Select and set the number of points that will be awarded to the Customer/Member on and only on their next purchase. This will not update any other 3rd party points system, only Swiftpos loyalty points. If you want to do this in Touch, then use the Loyalty PLU to award bonus points manually.
- Fees Paid Date - Displays the date/time membership fees were last paid.
- Renewal Date - Displays/Set the renewal date. If this date is in the past, the Customer/Member is considered to be Un-financial, otherwise the Customer/Member is considered to be Financial. When creating a new Customer/Member, select the field label Renewal Date to ensure the date is defaulted to the Paid To Date associated with the Member's Classification.
Account Details Section
- Credit Limit - Displays/Enter the Customer's/Member's current credit limit. Set to determine the maximum value a Customer/Member can charge to their account before they are required to credit their account.
Notes ...
If the currently logged in Clerk/Staff Member attempts to enter a credit limit that exceeds their authorised Credit Limit, then they will be notified with an appropriate prompt, similar to the one that can be shown HERE.
- Allow Direct Debit - Select to flag that the Customer/Member can make use of a Direct Debit facility.
Notes ...
This option was added to cater for the inclusion of the Direct Debit flag in the IGT Member Import File Specification required by the IGT Member Synchronisation interface.
- Active From/To - Displays/Set the date range for which the Customer's/Member's Account is active.
- Last Charge - Displays the last Date/Time a charge was made.
- Last Payment - Displays the last Date/Time a payment was made.
- Current Account Sales - To be continued ...
- Total Account Sales - To be continued ...
- Account Balance - Displays the current Account Balance.
- ePurse1-5 - Displays the current balance of the ePurse Accounts.
Purchase History Section
- Current Points - Displays the total points accumulated to date in the current month.
Notes ...
Points will only be earned from orders/sales made in Touch, if the Create Sales for NetPOS option is selected.
- Last Transaction - Displays the date/time of the last order/sale transaction.
Notes ...
A Customer's/Member's account will be Active when the Active From/To dates are current, and it has either a credit limit or an account balance.
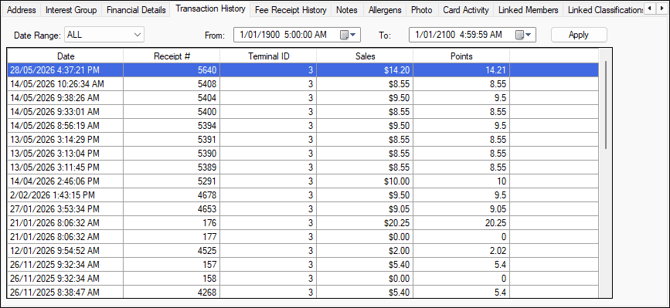
Used to review a Customer's/Member's transaction history. The transactions displayed in the grid can be limited by selecting a period from the drop-down list, or by specifying From/To dates.
This tab also enables the printing of Tax invoices. This is done by selecting a specific transaction in the grid and then selecting the Transaction Details option in the Reports drop-down list in the footer section.
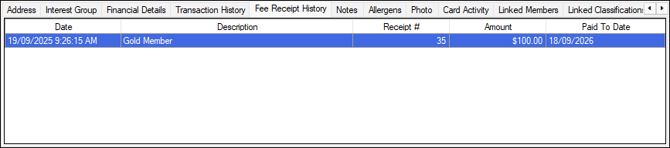
Used to view the membership fees paid history of a Customer/Member.
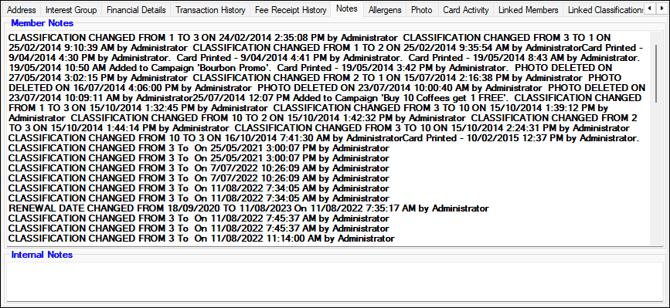
Member Notes Section
Displays a historical record of activity for a Customer/Member. For example, activity such as Classification changes, printing of cards, inclusion in Member Campaigns, etc.
Internal Notes Section
Enter notes specific to the Customer/Member which can then be viewed in Touch when the Customer/Member is added to the order/sale. Refer HERE for more information.
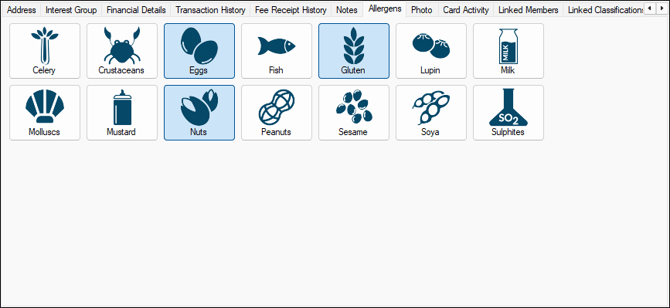
Used to select the allergens a Customer/Member may declare. Declared allergens are highlighted. For example, in the above screenshot, Eggs, Gluten and Nuts have been declared for the Customer/Member. Toggle select to apply/remove the declaration. Refer HERE for more information.
Once allergens have been declared, this will assist in facilitating to ensure that Venue staff are notified of any allergen concerns detected when it comes to the taking and preparation of orders for Customers/Members.
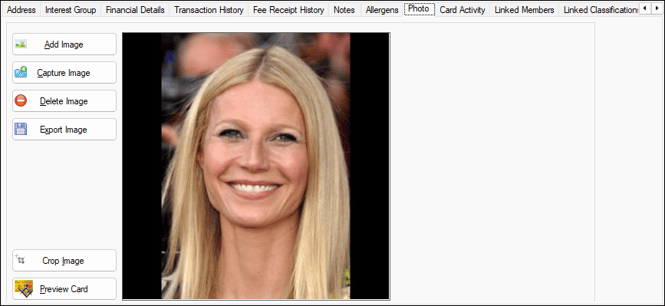
Used to add a Customer's/Member's photo. Once added these images can then be used to print on Member Cards, as well as display at the Reception device when the Customer/Member swipes their card.
-
Add Image - Select to add an image stored locally on the PC. Images must be in either BMP, GIF, JPEG or JPG format. If the image selected is smaller than the Max. Member Image Size selected, then the image will be added automatically. If the Image is greater than the Max. Member Image Size selected, then a Crop and Resize Image screen will be displayed.
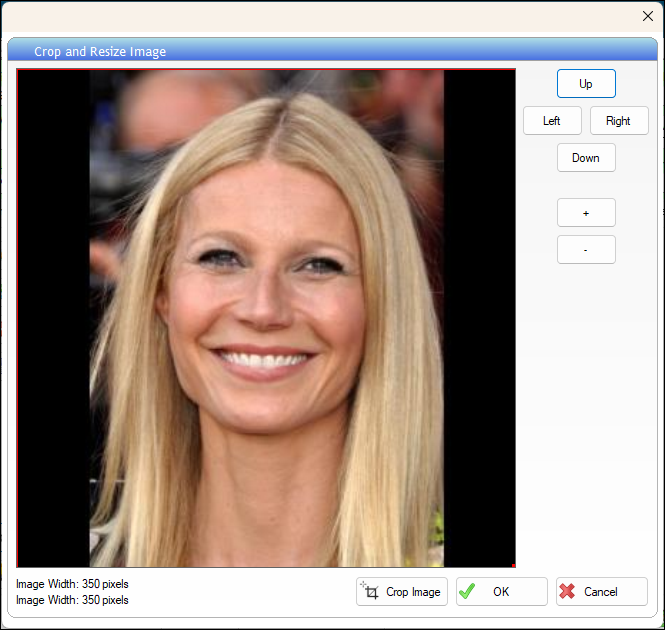
Crop the image as required or select OK to automatically resize the image to the Max. Member Image Size Max.
- Capture Image - Select to capture an image of the Customer/Member. An image capturing device (Camera/Webcam) will need to be setup.
- Delete Image - Select to delete the current image being displayed from the Swiftpos database.
- Export Image - Select to export the image to the local PC.
- Setup Devices - Select to open the Image Acquisitions settings screen to setup an image capturing device (ie. Camera/Webcam).
- Crop Image - Select to crop the image displayed.
- Preview Card - Select to preview the Customer's/Member's Card.
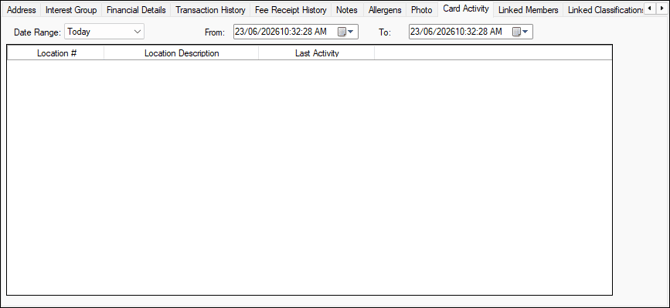
Used to list all occurrences of a Customer's/Member's card being swiped. The card activity displayed in the grid can be limited by selecting a period from the drop-down list, or by specifying From/To dates.
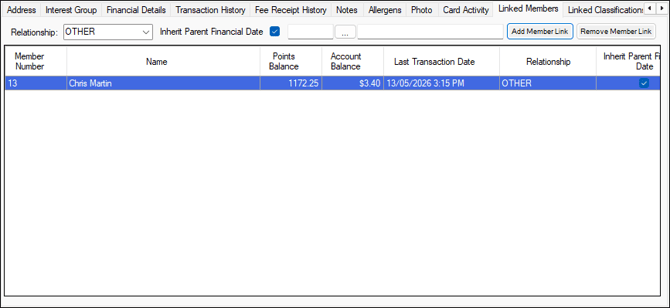
Used to add and delete Customer's/Members linked toa Customer/Member.
- Relationship - Select the relationship of the linked Customer/Member to the Customer/Member.
- Inherit Parent Financial Date - Select to ensure that when Fees are receipted for the Primary Link Member, then the Renewal date is inherited from the Primary Link Member.
Notes ...
The Save Changes option will need to be selected in order for this setting to function correctly.
- Add Linked Member - Select to open the Search Members screen and select a Customer/Member to link to the current Customer/Member.
Notes ...
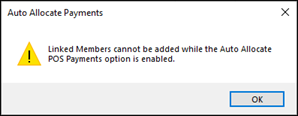
Linked Customers/Members cannot be added if the Auto Allocate POS A/C Payment option is selected. If this option is selected the following warning will be displayed.
- Remove Linked Member - Select to delete the selected linked Customer/Member in the grid.
Linked Classifications Tab ▲ ▼
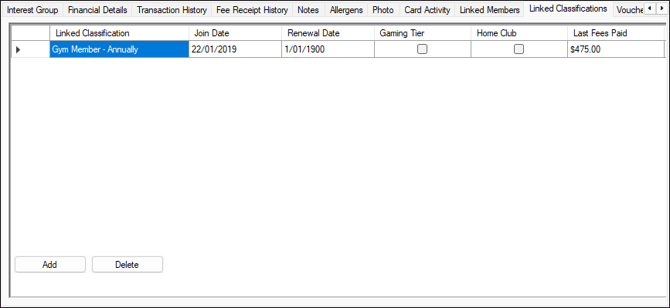
Used to add and delete Classifications associated with a Customer/Member. Linked Classifications are mostly used when calculating the number of Customers/Members in Classification screen and also for Member Quick Reports. It is also used in Touch when checking any Mix n Match, Discount, Member Campaigns etc. This feature is for example, when a Venue records everyone essentially as a Customer/Member, however a Customer/Member can also have a fitness membership. So, the Member Quick Reports needs to be able to isolate Fitness Members for marketing.
Grid Section
- Linked Classification - Displays the Classifications currently linked to the selected Customer/Member.
- Join Date - Displays the date the Classification was linked to the Customer/Member.
- Renewal Date - Displays the date the Customer/Member is required to renew their membership.
Notes ...
A Renewal Date of '01/01/1900' indicates the Classification has been linked to the Customer/Member, but no fees have ever been receipted.
- Gaming Tier - Displays a Tick when applicable and updated by the IGT Member Sync.
- Home Club - Displays a tick when applicable and updated by the IGT Member Sync.
- Last Fees Paid - Displays the amount last paid for Membership Fees.
- Last Paid Date - Displays the date Membership Fees were last paid.
Footer Section
- Add - Select to open the Classifications screen and select a Classification to link to the current Customer/Member.
- Delete - Select to delete the selected linked Classification in the grid.
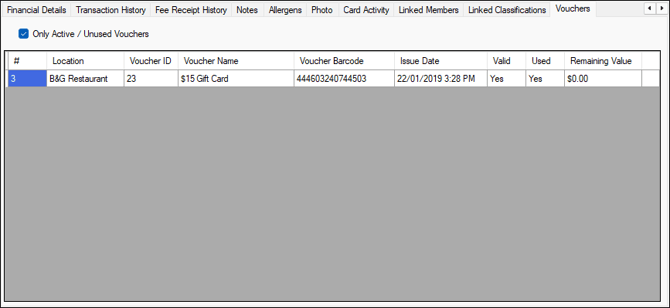
Used to display the Vouchers associated with a Customer/Member.
Footer Section ▲ ▼
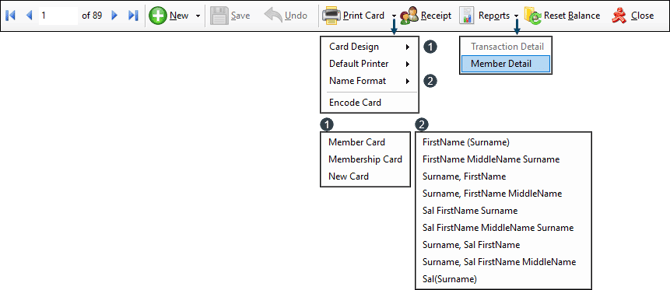
- New - Select from the drop-down list on of the following options:
- Copy Member - Select to copy the Customer's/Member's details and copy them to a new Members.
- New Member - Select to create a New Customer/Member from scratch.
- Save - Select to save changes.
- Undo - Select to undo changes made.
- Print Card - Select from the drop-down list one of the following options:
- Card Design
- Default Printer
- Name Format
- Encode Card
- Receipt - Select to open the Receipt Membership Payment screen below to receipt a membership payment for renewing joining as a new Customer/Member. Complete and select to either the Print Receipt and/or Print Card option. Then select Receipt option in the footer section to process the payment.
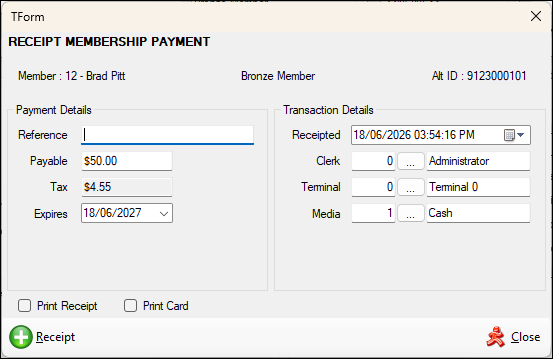
- Print Receipt - Select to ensure a Member Receipt invoice is printed.
- Print Card - Select to ensure a Member Card is printed.
- Reports - Select from the drop-down list one of the following:
- Transaction Detail - Select to generate a Tax Invoice for the Transaction entry currently selected in the grid.
Notes ...
This option is only enabled when the Transaction History tab is selected.
- Member Detail - Select to generate a Member Information report.
- Reset Balance - Select to reset the current Customer's/Member's Account balance to zero.
- Close - Select to exit.
Member Records Screen ▲ ▼
To access, select the Member Records option in the Members menu in Back Office. Used to configure, manage and search for a Customer/Member in Back Office. Refer HERE for more information.
Sections ▲ ▼
Header Section ▲ ▼
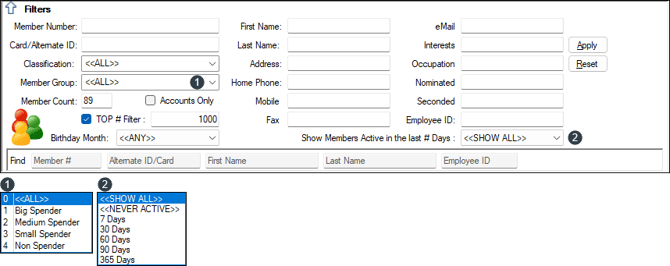
Provides filters to limit the number of rows displayed in the grid section. Once all filters have been selected, select the Apply option to apply them. Otherwise, select the Reset option to clear all filter selections.
Find fields are also provided to facilitate the locating of a specific row in the grid section.
Noteworthy
- TOP # Filter - This filter restricts the number of rows returned for a given search. The default number displayed can be changed HERE.
Grid Section ▲ ▼
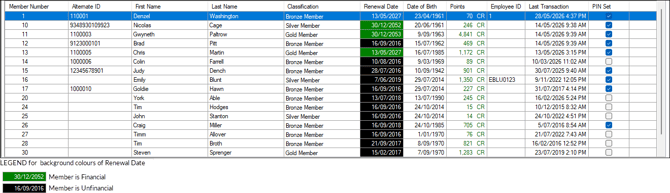
Lists the Customers/Members along with their Member Number, Alternate ID, First Name, Last Name, Occupation, Date of Birth (DOB), Points, Employee ID, Last Transaction and PIN Set indicator.
Footer Section ▲ ▼

- New - Select to add a Customer/Member.
- Full Edit - Select to open the Member Full Edit screen to edit the selected Customer/Member.
- Close - Select to exit.
End of article ▲