This outlines How To Create A XERO App For An API Connection that is needed for Swiftpos Back Office to be able to interface with a Venue's XERO Organisation.
Refer HERE for more information regarding the XERO API.
Subjects ▲ ▼
When Is It Used? ▲ ▼
This is generally used by either the Swiftpos XERO Basic or XERO Advanced interface, when:
- A Venue wants to establish a connection to their XERO application and are wanting to interface it, with their Swiftpos application, by using either the Swiftpos XERO Basic or XERO Advanced interface.
What Is Required? ▲ ▼
- A Venue will require a XERO account to be created. This can be either a subscription or a 30 Day free trial account.
How To Create A XERO App For An API Connection? ▲ ▼
Creating The XERO APP ▲ ▼
Do as follows:
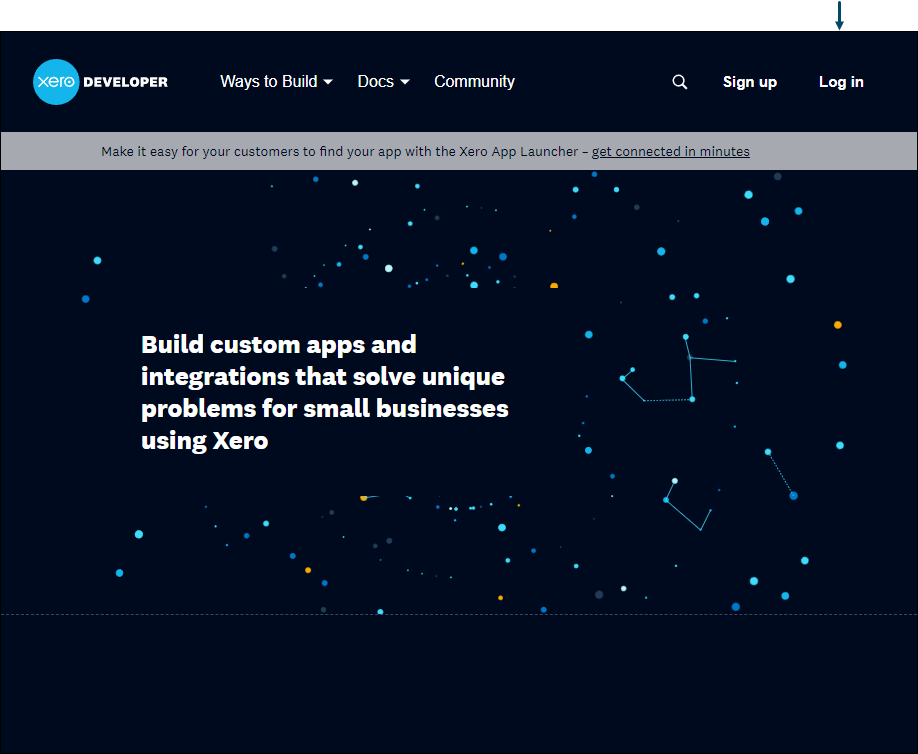
- In https://developer.xero.com select Log in and login using your XERO account credentials (this also includes accounts using the 30 day free trial option). Refer HERE for more information.
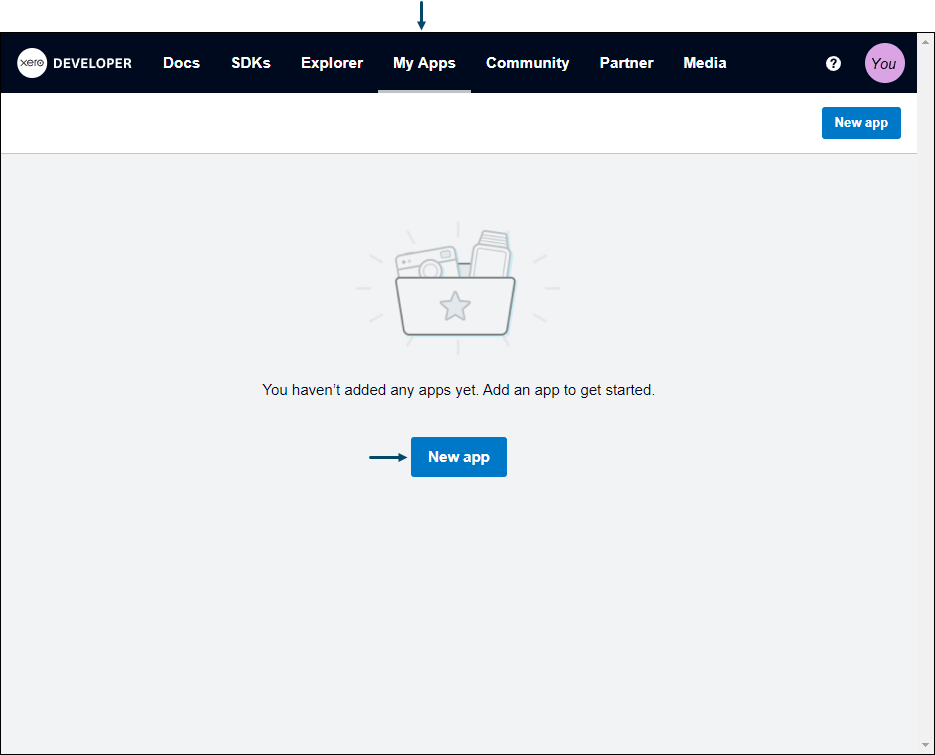
- Once logged in, in the My Apps menu, select the New app button.
- Fill out and complete the Add a new app screen.
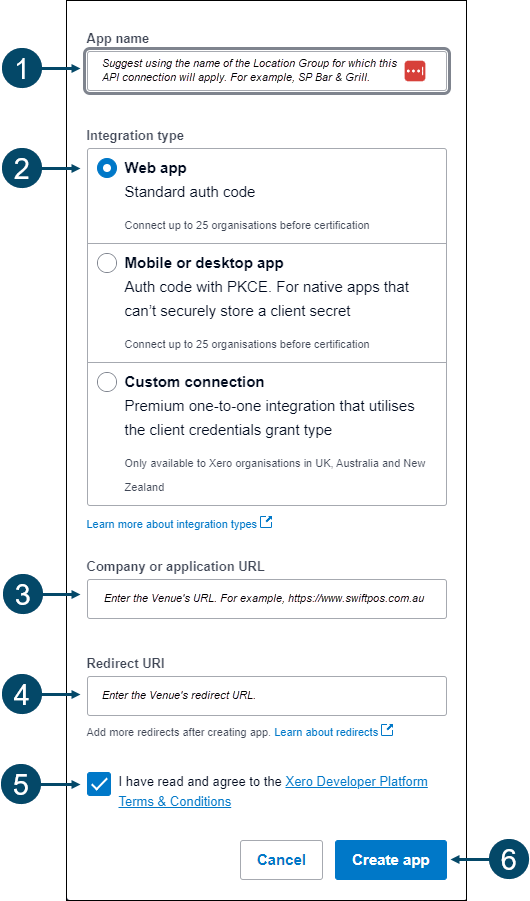
Notes...
The Redirect URL is a URL on your server to redirect back to – This must be an https address, however for testing you can use http://localhost/ Please note that http://127.0.0.1 cannot be used. Refer HERE for more information
- Once filled out and completed, select the Create app button.
- Once created, the App details screen will be displayed for the newly created App.
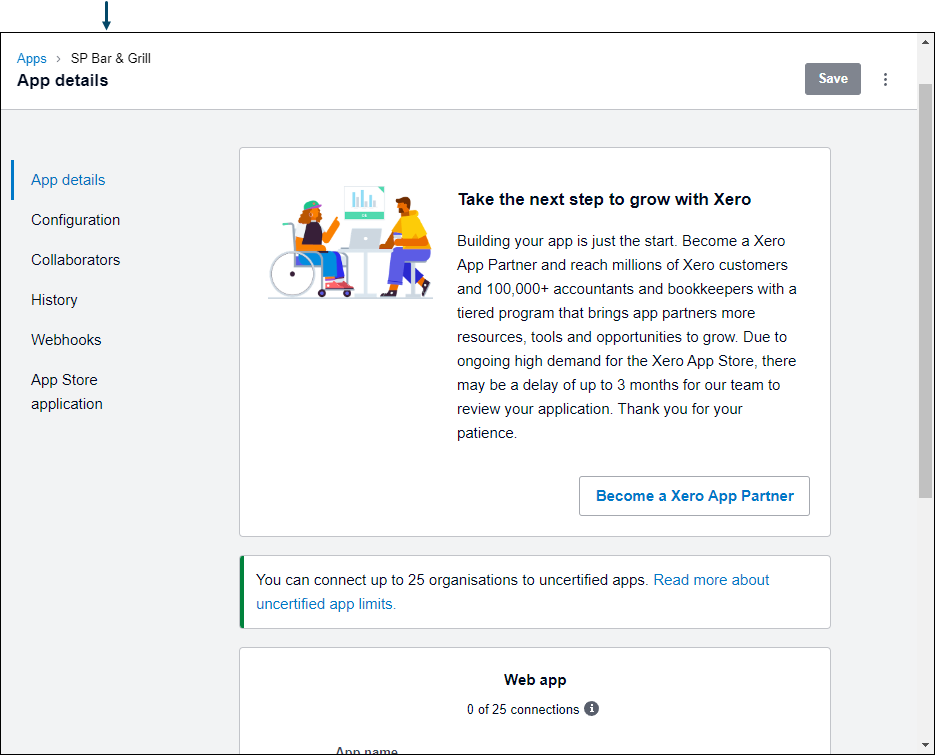
Notes...
Scroll down to optionally enter URLs for the Venue's Privacy policy and for the Terms and Conditions.
Configuring The API Credentials ▲ ▼
Do as follows:
- Select the Configuration menu option listed on the left-hand side of the screen.
- The connection details will be displayed for the currently selected App.
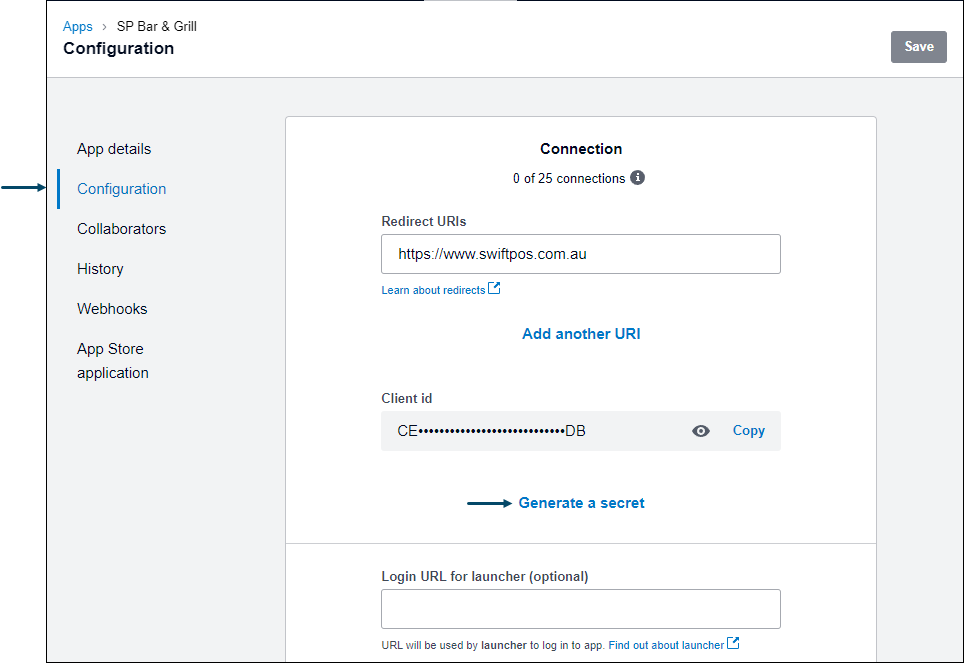
- Select the Generate a secret to ensure a Client Secret is generated. This is required when establishing a connection to XERO in Back Office. Make sure to select Copy to copy and paste the new secret immediately to Notepad. It will not be visible again.
Notes...
If 2 Client Secrets are displayed and no Copy option is selectable, opposite either, then simply delete 1 of them and generate a new Client Secret again and copy it.
- Once a Client Secret has been generated, it is recommended to copy the following credentials to Notepad, so that they can later be used when configuring a connection to XERO in Swiftpos:
- Redirect URLs
- Client ID
- Client secret
End of article ▲