Back Office - Touch Settings
This menu is used to create and maintain Floor Plan Layouts for Touch in Back Office and Touch. The purpose of Floor Plans is to provide Clerks/Staff a visual representation of floor layouts by positioning Tables and assigning them numbers. It is also possible to create multiple Layouts to cater for different floor Layouts, for example, for Breakfast/Lunch and/or Dinner. Floor Plans can also be accessed from Touch using the Floor Plan Designer (#401) POS Key.
Subjects ▼
To Be Considered ▲ ▼
Floor Plans Screen ▲ ▼

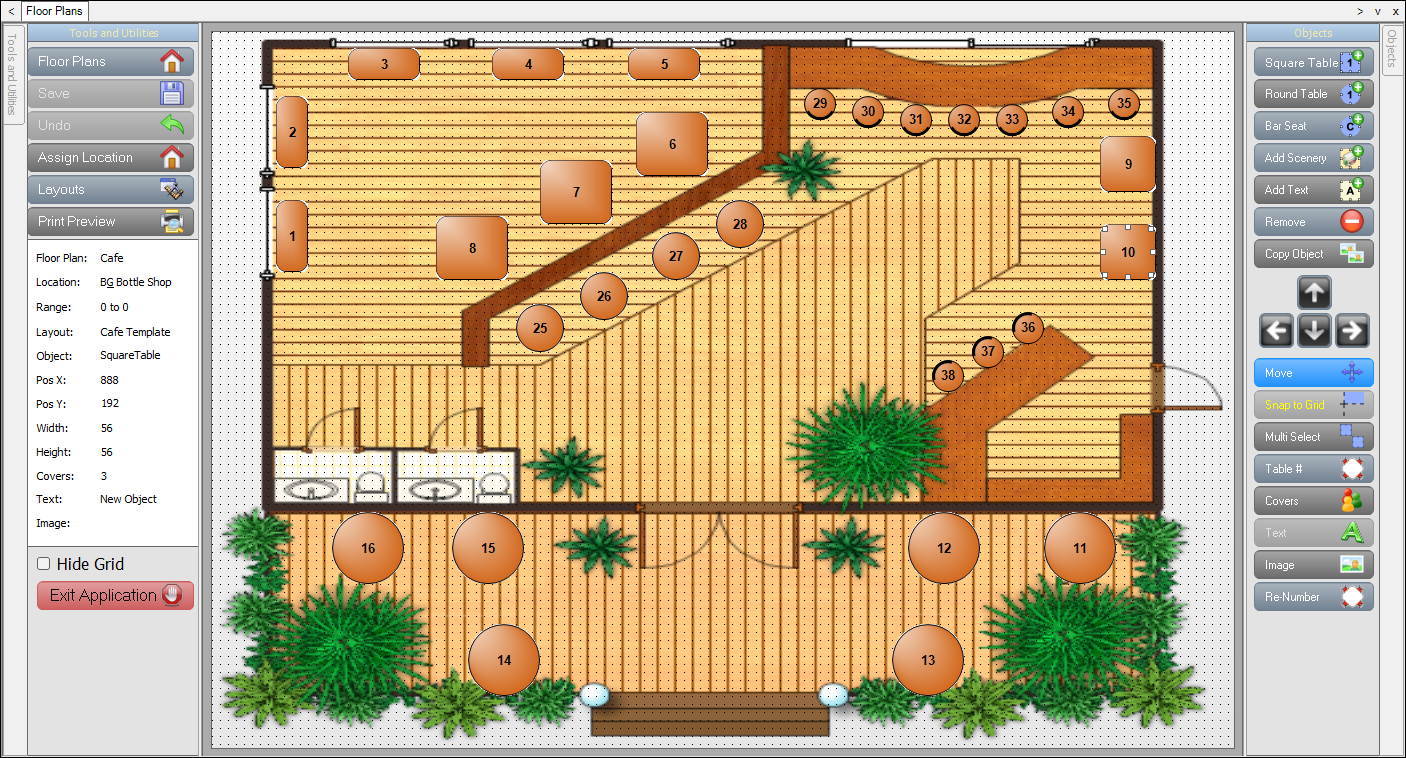
Accessed from here. The above provides an example of a Floor Plan Layout.
Tools And Utilities Section ▲ ▼

Located on the left-hand side, the Tools and Utilities section provides access to the following:
- Floor Plans - Select to display a popup menu to access one of the following:
- New - Select to add a Floor Plan. Once a Floor Plan has been added you can select or create a Layout.
- Open - Select to open the Floor Plans Search screen to locate and select an existing Floor Plan.
- Rename - Select to rename the Floor Plan currently open.
- Delete - Select to delete the Floor Plan currently open.
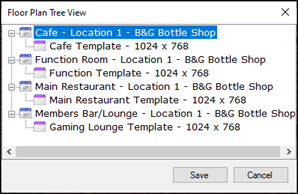
- Floor Plan Tree View - Select to open the Floor Plan Tree View screen to view a tree view structure of all available Floor Plans. For example:

- Save - Select to save the changes.
- Undo - Select to undo changes made.
- Assign Locations - Select to open the Locations screen to select the Location for which the current Floor Plan is to be assigned to.
Notes...
Layouts will ONLY be visible in Touch when selecting the Floor Plan Designer (#401) POS Key, when the Floor Plan has been assigned to a Location.
- Layouts - Select to display a popup menu to access one of the following:
- New - Select to create a new Layout.
- Open - Select to open an existing Layout
- Copy - Select to copy an existing Layout.
- Rename - Select to rename a Layout.
- Delete - Select to delete the current Layout
Notes...
Multiple Layouts can be created for one Floor Plan. For example for : Breakfast, Lunch, Dinner and Special Functions.
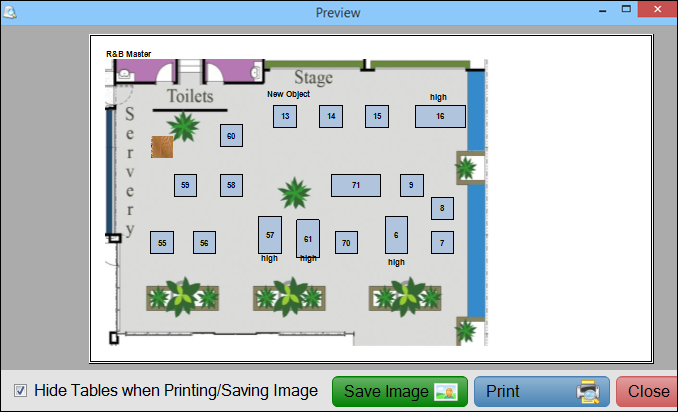
- Print Preview - Select to preview the design prior to printing.
- Hide Grid - Select to hide the grid.
- Exit Application - Select to exit.
Objects Section ▲ ▼

Located on the right-hand side, the Objects section provides access to the following:
- Square Table - adds a square table to the layout.
- Round Circle - adds a round table to the layout.
- Bar Seat - adds a Bar Tab object to the layout. Bar Seats can be rotated to using the Move/Resize/Rotate button.
- Add Scenery - Select to add an object that can have an image associated with it.
- Add Text - adds an object that allows for text to be added to the layout. Text objects are maintained using the Text button.
Notes...
Once the Text object has been added to the Floor Plan, the Text can be resized by resizing the Text object itself.
- Remove - Select to remove the selected object.
- Copy Object - Select to copy the selected object.
- Arrow Buttons - Used in conjunction with the Move/Resize/Rotate button.
- Move/Resize/Rotate - Select to either Move/Resize/Rotate the selected object using the Arrow buttons. Select again to toggle through the Move/Resize/Rotate options. The Rotate button only applies to Bar Seat objects.
- Snap to Grid - Select to align the selected object to the grid.
- Multi Select - Select to enable the selection of more than one object.
- Table# - Select to open the Enter Table Number screen to assign a number to the selected Table. See also Floor Plans displaying Multi Locations.
- Covers - Select to open the Enter Number of Covers screen to set the number of covers to be allocated to the selected Table.
- Text - Select to enter/change the text of the selected text object. That is, an object added to the Layout using the Add Text button
Notes...
The name of the Layout can be added by adding a Text object and using this button to enter the text '..LayoutName'. The can also be done for the Date and Time by entering the text '..DateTime'.
- Colours - Select to open a Colour selection prompt to configure the background and Text colours of selected Text items.
- Image - Select to add images to a Floor Layout. This can include digital versions of building plans representing the floor layout, as well as furniture, plants, etc. Images can only be added to Scenery objects.
- Re-Number - Select to re-number the selected Tables. See also Floor Plans displaying Multi Locations.
Notes...
When Re-Numbering tables and a starting from Table # is entered that already exists, then the Tables selected will be automatically re-numbered based on the highest existing Table number plus one.
How To Create A Floor Plan And Add Furniture? ▲ ▼
- Scan the Floor Plan layout from the building plans and add as an image using the Add Scenery button.
- Add furniture, plants, etc as PNG files (no larger than 250px wide x 250 px high).
- Once the basic Floor Plan has all been done, and before adding Tables and Bar Seats, save the basic layout as an Image. To do this select the Print Preview button to open the Preview screen.

- Select the Hide Tables when Printing/Saving Image option to ensure the created layout is saved as a background picture without any Tables/Bar Seats showing. Now select the Save Image button. This will save the Floor Plan layout, furniture and plants, etc as one JPG files. This file can then be used as the background layout for all other layouts. This will also ensure faster response times.
- Now add the Tables and Bar Seats.
End of article. ▲
