
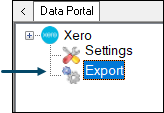
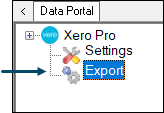
Accessed by selecting the Export option in either the XERO or XERO Pro menu in Data Portal.
Provides a Venue with the ability to export General Journal, Supplier Invoice and Terminal Cash Off related data from swiftpos and import them directly into XERO using XERO's API. General Journal data includes both Sales and Stock Movement transaction data. Supplier Invoice data refers to completed Supplier Invoices. Terminal Cash Offs refers to committed Terminal Cash Offs that have recorded a variance.
Subjects ▼
Export Screen ▲ ▼
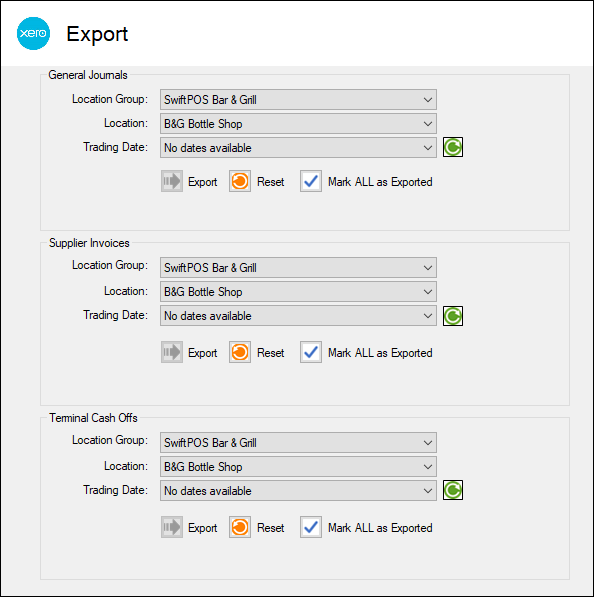
Sections ▲ ▼
General Journals ▲ ▼
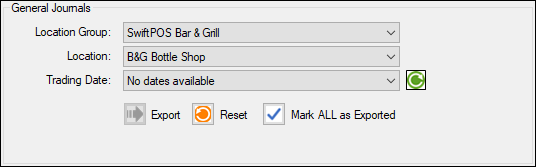
Used to export Sales and Stock Movement transaction data to XERO
- Location Group - Select from the drop down list the Location Group for which data will be exported.
- Location - Select from the drop down list the Location for which data will be exported.
- Trading Date - Select from the drop down list of dates the date for which data will be exported and uploaded into XERO using XERO's API.
Notes...
Once exported, the data will be flagged as exported and the date will be removed from the Trading Date drop down list. This will ensure that the same data is NOT exported multiple times. It is important to note that even though the export for a specific Trading Date may NOT be completely successful, the Trading Date will still be removed from the drop down list. It is therefore VERY IMPORTANT to always review the Event Logs to ensure that any ERRORS are investigated and resolved in an appropriate manner.
- Export - Select to invoke the export. Once completed a prompt will be displayed confirming completion. All exported Journals can be viewed in the Event Logs.
Notes...
If no prompt is displayed and the Export appears to have completed without the selected Trading Date being removed from the list of available dates, this may point to a failure of being able to connect to Xero. Check the Event Logs > swiftpos Applications > swiftpos SQL Application for any logging that may have occurred. Refer to Troubleshooting for more information.
- Reset - Select a Trading Date to ensure that General Journal related transactions for that date are flagged as NOT Exported, so that they can be exported again. Select to display the following prompt:

- Continued ...
- Location Group - Select from the drop down list the Location Group for which data will be reset.
- Location - Select from the drop down list the Location for which data will be reset.
- Trading Date - Select from the drop down list the Trading Date for which General Journal related transactions will be reset.
- OK - Select to Reset.
- Cancel - Select to exit without Resetting.
Notes...
When resetting and exporting again, be sure that they DO NOT result in duplicates when imported into XERO.
- Mark ALL as Exported - Select to display the following prompt and thereby ensure ALL General Journal related data in the selected Location is flagged as exported.

- Continued ...
- Location Group - Select from the drop down list the Location Group for which data will be flagged as exported.
- Location - Select from the drop down list the Location for which data will be flagged as exported.
- OK - Select to flagged as exported.
- Cancel - Select to exit without marking as exported.
Notes...
This is usually recommended when initially configuring swiftpos to Export to XERO for the first time and also, when there is a requirement that all existing General Journal related transactions for a selected Location need to be flagged as exported.
Supplier Invoices ▲ ▼
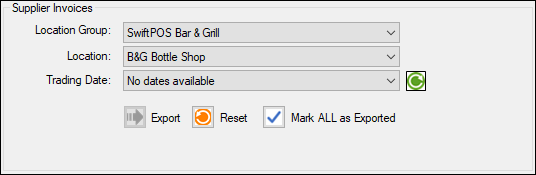
Used to export completed Supplier Invoice data to XERO
Notes...
Invoices completed and having the same Posting Date as that of the selected Trading Date, will be selected for Export. Also, DO NOT enter Credit Notes into swiftpos as negative Supplier Invoices. These DO NOT export to Xero successfully. Instead raise a Credit Note using the Credit Note Type option available when entering Supplier Invoices.
- Location Group - Select from the drop down list the Location Group for which data will be exported.
- Location - Select from the drop down list the Location for which data will be exported.
- Trading Date - Select from the drop down list of dates the date for which data will be exported and uploaded into XERO using XERO's API.
Notes...
Once exported, the data will be flagged as exported and the date will be removed from the Trading Date drop down list. This will ensure that the same data is NOT exported multiple times. It is important to note that even though the export for a specific Trading Date may NOT be completely successful, the Trading Date will still be removed from the drop down list. It is therefore VERY IMPORTANT to always review the Event Logs to ensure that any ERRORS are investigated and resolved in an appropriate manner.
- Export - Select to invoke the export. Once completed a prompt will be displayed confirming completion. All exported Invoices can be viewed in the Event Logs.
Notes...
If no prompt is displayed and the Export appears to have completed without the selected Trading Date being removed from the list of available dates, this may point to a failure of being able to connect to Xero. Check the Event Logs > swiftpos Applications > swiftpos SQL Application for any logging that may have occurred. Refer to Troubleshooting for more information.
- Reset - Select a Trading Date to ensure that Supplier Invoice related transactions for that date are flagged as NOT Exported, so that they can be exported again. Select to display the following prompt:
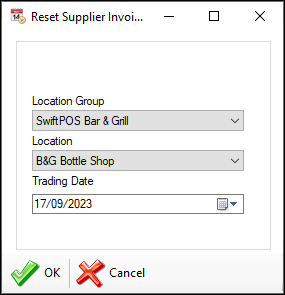
- Continued ...
- Location Group - Select from the drop down list the Location Group for which data will be reset.
- Location - Select from the drop down list the Location for which data will be reset.
- OK - Select to Reset.
- Cancel - Select to exit without Resetting.
Notes...
When resetting and exporting again, be sure that they DO NOT result in duplicates when imported into XERO.
- Mark ALL as Exported - Select to display the following prompt and thereby ensure ALL Supplier Invoice related data in the selected Location is flagged as exported.

- Continued ...
- Location Group - Select from the drop down list the Location Group for which data will be flagged as exported.
- Location - Select from the drop down list the Location for which data will be flagged as exported.
- OK - Select to flagged as exported.
- Cancel - Select to exit without marking as exported.
Notes...
This is usually recommended when initially configuring swiftpos to Export to XERO for the first time and also, when there is a requirement that all existing Supplier Invoice related transactions for a selected Location need to be flagged as exported.
Terminal Cash Offs ▲ ▼
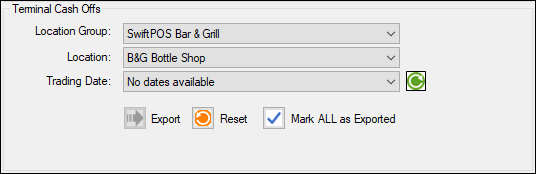
Used to export committed Terminal Cash Off data to XERO
Notes...
Terminal Cash Offs that have not recorded a variance will NOT be available for export.
- Location Group - Select from the drop down list the Location Group for which data will be exported.
- Location - Select from the drop down list the Location for which data will be exported.
- Trading Date - Select from the drop down list of dates the date for which data will be exported and uploaded into XERO using XERO's API.
Notes...
Once exported, the data will be flagged as exported and the date will be removed from the Trading Date drop down list. This will ensure that the same data is NOT exported multiple times. It is important to note that even though the export for a specific Trading Date may NOT be completely successful, the Trading Date will still be removed from the drop down list. It is therefore VERY IMPORTANT to always review the Event Logs to ensure that any ERRORS are investigated and resolved in an appropriate manner.
- Export - Select to invoke the export. Once completed a prompt will be displayed confirming completion. All exported Invoices can be viewed in the Event Logs.
Notes...
If no prompt is displayed and the Export appears to have completed without the selected Trading Date being removed from the list of available dates, this may point to a failure of being able to connect to Xero. Check the Event Logs > swiftpos Applications > swiftpos SQL Application for any logging that may have occurred. Refer to Troubleshooting for more information.
- Reset - Select a Trading Date to ensure that Terminal Cash Off related transactions for that date are flagged as NOT Exported, so that they can be exported again. Select to display the following prompt:

- Continued ...
- Location Group - Select from the drop down list the Location Group for which data will be reset.
- Location - Select from the drop down list the Location for which data will be reset.
- OK - Select to Reset.
- Cancel - Select to exit without Resetting.
Notes...
When resetting and exporting again, be sure that they DO NOT result in duplicates when imported into XERO.
- Mark ALL as Exported - Select to display the following prompt and thereby ensure ALL Terminal Cash Off related data in the selected Location is flagged as exported.

- Continued ...
- Location Group - Select from the drop down list the Location Group for which data will be flagged as exported.
- Location - Select from the drop down list the Location for which data will be flagged as exported.
- OK - Select to flagged as exported.
- Cancel - Select to exit without marking as exported.
Notes...
This is usually recommended when initially configuring swiftpos to Export to XERO for the first time and also, when there is a requirement that all existing Terminal Cash Off related transactions for a selected Location need to be flagged as exported.
End of article. ▲