
Subjects ▲ ▼
About ▲ ▼
When Is It Used? ▲ ▼
Used to setup custom Time Periods that can be used with selected Swiftpos Reports. For example, the Average Daily Sales by Time Period (SAL061) report. Time Periods can be completely customised to suit the requirements of individual Venues. There are also a number of preset Time Periods that can be created using the Time Period Wizard.
Screens ▲ ▼
Time Periods Screen ▲ ▼
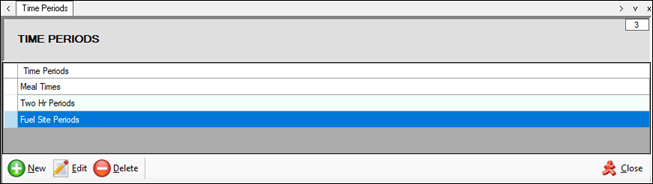
To access, select the Time Periods menu option from the Administration menu. Used to create and manage custom Time Periods. These are mainly used for filtering Reports.
Grid Section
Lists the Time Periods currently available.
Footer Section
- New - Select to add a Time Period.
- Edit - Select to open the Time Period Edit screen to edit the selected Time Period.
- Delete - Select to delete the selected Time Period.
- Close - Select to exit.
Time Period Edit Screen ▲ ▼
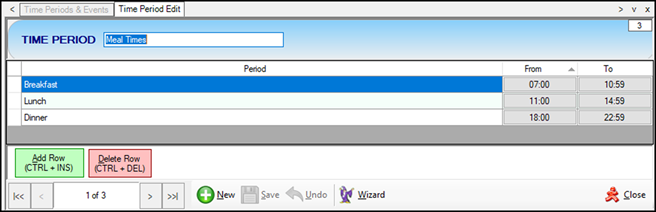
To access, select the Edit option in the footer section of the Time Periods screen. Used to edit/view a Time Period.
Header Section
Displays/Edit the name of the Time Period.
Grid Section
Lists the Periods along with their name, From and To time. All values listed can be edited.
Grid Footer Section
- Add Row - Select to add a row to the grid.
- Delete Row - Select to delete the selected row.
Footer Section
- New - Select to create a new Time Period.
- Save - Select to save changes.
- Undo - Select to undo changes made.
- Wizard - Select to start the Time Period Wizard to assist when creating Time Periods.
- Close - Select to exit.
Time Period Wizard Screen ▲ ▼
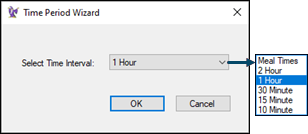
To access, select the Wizard option in the footer section of the Time Period Edit screen. Used to create preset Time Periods based on a selected time Interval.
- Select Time Interval - Select from the drop-down list the interval required.
- OK - Select to run the wizard.
- Close - Select to exit.
End of article ▲