Subjects ▲ ▼
About ▲ ▼
What Is Not Supported? ▲ ▼
-
Delivery charges/fees based on an open price. An open price is a price that is entered by a POS operator at the time the order is taken. Only fixed price delivery charges/fees are supported. Refer HERE for more information.
What Is Required? ▲ ▼
- Ensure the Portal Location option has been set in the Other tab in Global Preferences for the Venue.
When Is It Used? ▲ ▼
Used to configure Locations that require a connection to the Swiftpos Cloud for the purposes of supporting for Web based applications such as Orderaway, Touchmini and/or 3rd Party ordering systems.
How To? ▲ ▼
- Activate A Cloud Location?
- Authenticate A Venue With Swiftpos Cloud?
- Cloud Onboard A Venue?
- Submit Orders Directly To Touch POS?
Screens ▲ ▼
Activation Wizard Screen ▲ ▼
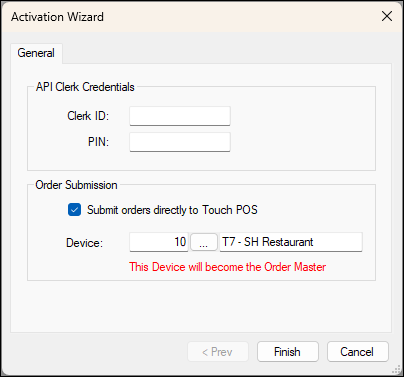
To access, select the Activate option in the footer. Used to Activate a Venue's Location to ensure communication with the Swiftpos Cloud. Refer HERE for more information.
Sections ▲ ▼
General Section ▲ ▼
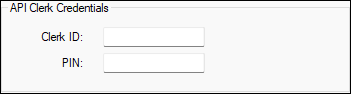
- API Clerk Credentials - Used to enter the Clerk credentials required to ensure communication between the Location and the Swiftpos Cloud.
- Clerk ID - Enter the ID of the Clerk that was created in the Authenticate A Venue With Swiftpos Cloud step. For example, 888000001 - Swiftpos API Cloud Clerk
- PIN - Enter the PIN of the Clerk entered above.
Notes ...
It is strongly advised to NOT change the credentials of the Clerk entered here once the first Location has been activated. This is because the Clerk's credentials are recorded against the Location during the activation process.
Order Submission Section ▲ ▼
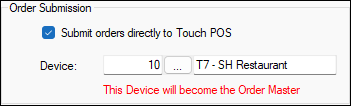
Used to configure settings in relation to the submission of orders/sales.
- Submit orders directly to Touch POS
- Select to ensure that orders/sales submitted are submitted via the Swiftpos POS API (running on the designated Orders Master device for the selected Location).
- If left unselected, orders/sales will be submitted via the Back Office API, then use the Connect service to make their way down to the Orders Master Device in that Location.

Notes ...
For Venues that are making use of Swiftpos Orders API, Orderaway and/or Touchmini to place orders/sales, it is highly recommended that this option is always selected. This will ensure all future rollouts of Swiftpos POS API features will be available to the Venue.
Also, it ensures Table functionality is available to Touchmini and Receipt information is returned by the Swiftpos POS API to generate Tax Invoices in Touchmini.
- Device - Select the Touch Device that is designated as the Orders Master Device for the selected Location. This option will only be available when the Submit orders directly to Touch POS option above is selected. The Device being selected must be configured to be BOTH the Table Tracking Master and Orders Master Touch Device, so the necessary processes/interfaces are started on that Device post-activation.
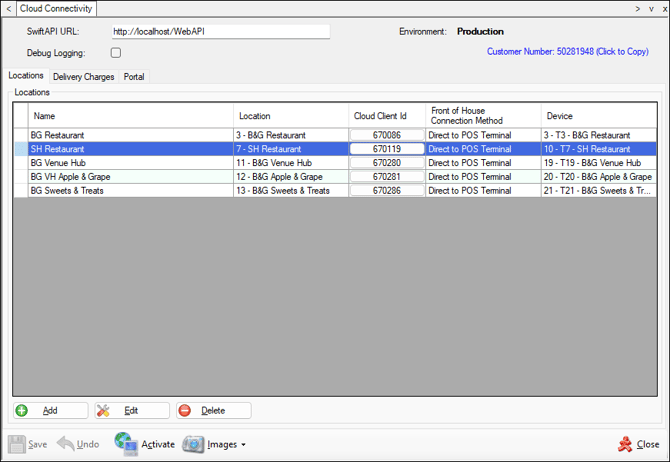
Cloud Connectivity Screen ▲ ▼
To access, select the Cloud Connectivity option in the Administration menu.
Sections ▲ ▼
Header Section ▲ ▼

- SwiftAPI URL - Displays/Enter the WebAPI's URL. Ensure that this is set to the Venue's Web Api.
Notes ...
If the URL changes, then Re-activation of the Locations listed will be required.
- Debug Logging - Select to enable.
- Environment - Displays the environment that Orderaway is connected to. This can be either a Swiftpos Production or Test database. The Portal Location will only be displayed if the Location is something other than Australia and the database is live (Production) database. For example, Production UK.
Tabs Section ▲ ▼
![]()
Tabs
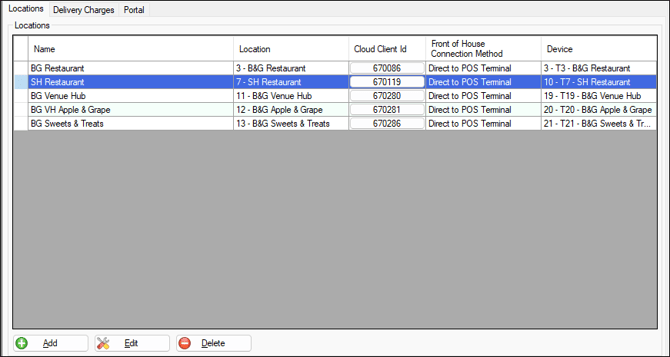
Used to display the Locations that are available in the Swiftpos Cloud. It is also used to access their Venue Manager Portal by selecting a Location's Cloud Client ID. Locations can also be activated from here.
Notes ...
Locations listed here will generally be those Locations that require communication with the Swiftpos Cloud. For example, these would generally be Locations that need to be available to Cloud applications such as Orderaway, Touchmini, 3rd party applications, etc., using the Swiftpos Orders API. For 3rd party applications each Location will ALSO need to be added to the Web Apps Locations in Back Office.
- Name - Displays the name of the Location given when a Location was added to the grid.
- Location - Displays the Location ID and Name.
- Cloud Client ID - Displays the Client ID assigned to the selected Location, only after the Location has been activated. This is used to identify the Cloud Location for the purposes of Support assistance. Also, it can be selected to open the Portal tab to access menus in Venue Manager.
Notes ...
If the Cloud Client ID option is selected and a MSL VENUE MANAGER login prompt is displayed instead of the Orderaway Profiles, refer HERE for more information.
- Front of House Connection Method - Displays either one of the following methods in which orders are submitted:
- via Back Office API - This will be displayed when the Location has been activated with the Submit orders directly to Touch POS option NOT SELECTED at the time of Activation.
- Direct to POS Terminal - This will be displayed when the Location has been Activated with the Submit orders directly to Touch POS option SELECTED at the time of Activation.
- Device - Displays the Device selected when the Location was last Activated and to which all orders will be sent.
![]()
- Add - Select to open the Search Locations screen to select a Venue's Location, so that it can be added to the grid to enable connectivity to the Swiftpos Cloud.
- Edit - Select to open the Web Location screen to edit the current settings for the selected Orderaway Location.
Notes ...
After editing a Location's settings the Web Location screen the Location will need to be Re-activated for those changes to applied.
- Delete - Select to delete the selected Location.

Used to configure delivery charges to be applied to orders placed in Orderaway that require delivery to an address specified when then Delivery option is selected in the Checkout in Orderaway. Delivery charges can be set either as a Fixed Value or as a Percentage of the total value of the order. Also, different charges can be applied depending on which value range (configured as shown in the grid above), the value of the order falls in.
- Type - Select from the drop-down list either one of the following:
- Fixed Value - To ensure the value entered in the Delivery Fee column, is applied to the order as a fixed value.
- Percentage - To ensure the value entered in the Delivery Fee column, is used as a percentage to determine the Delivery Fee based on the total value of the order.
- From/To Value - Displays/Enter the From/To values to determine the range of values for which the delivery charge is to be applied. An order with a total value falling within this range will have the delivery charge applied to it.
- Delivery Charge PLU - Displays/Enter the PLU of the delivery charge Product to which the value charged to the order will be assigned.
- Delivery Charge PLU - Displays/Enter the PLU of the delivery charge Product to which the value charged to the order will be assigned.
Notes ...
For the delivery charge to be applied, The Delivery option will need to be selected in the Service tab, and the Address option will also need to be selected in the Location type drop-down list.
Also, delivery charges/fees based on an open price are currently not An open price is a price that is entered by a POS operator at the time the order is taken. Only fixed price delivery charges/fees are supported.
Delivery Tab Footer Section
- Add - Select to add a row to the grid in order to configure a new delivery charge.
- Delete - Select to delete the selected delivery charge.
- Delivery Charge PLU - Select to open the Search Products screen to locate and select the PLU to be associated with a delivery charge applied.

Displays the selected Cloud Location and Client ID in the drop-down list. Used to configure and view the current configuration of the selected Cloud Location in Venue Manager. Select from the available menus the one to be configured/viewed. For example, Orderaway, Events, Touchmini, Notify, etc.
Footer Section ▲ ▼

- Save/Undo – Select to save/undo changes.
- Activate - Used to Activate a Venue's Location to ensure communication with the Swiftpos Cloud. Refer HERE for more information.
- Images - Select from the drop-down list to either Delete/Upload Images set against the Products in Back Office.
- Delete - Select to delete all Images in Orderaway. Once deleted, ensure the browser's cache is cleared to ensure the deleted Images are no longer displayed.
- Upload - Select to upload Images in Back Office to Orderaway depending on one of the following:
- In Keyboard Layout Menu Mode - This will upload the images associated POS Keys on all Keyboards in the selected Location. Also, it will upload images associated with Layout POS Keys, for the different Layout graphics in Orderaway.
- In Product Families Menu Mode - This will upload images for ALL web enabled Family items.
Notes ...
This does NOT upload any images for the Families themselves. Also, t he Clerk/Staff Member does NOT need any additional permissions to upload Images other than access to the Orderaway screen.
- Close - Select to exit.
Web Location Screen ▲ ▼
To access, select the Edit option. Used to configure the selected Location to ensure it can communicate with the Swiftpos CLoud.
Sections ▲ ▼
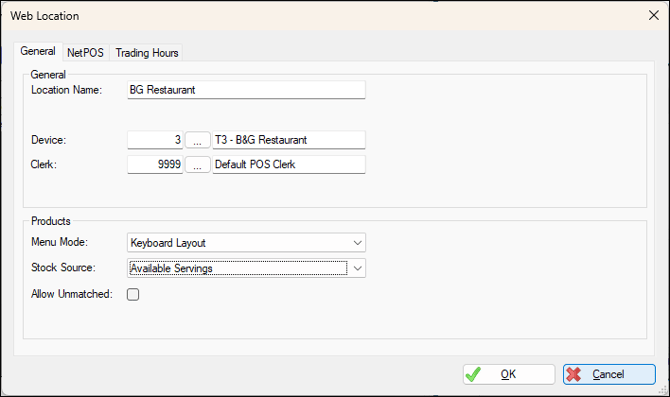
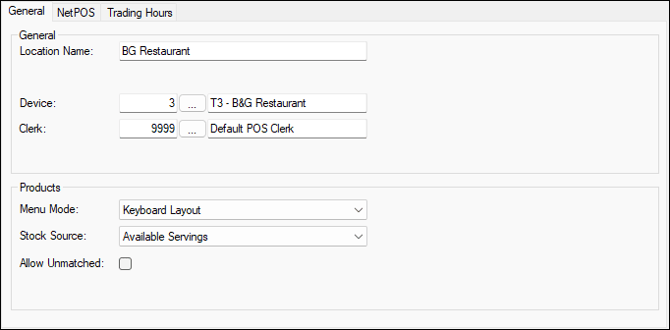
General Section ▲ ▼
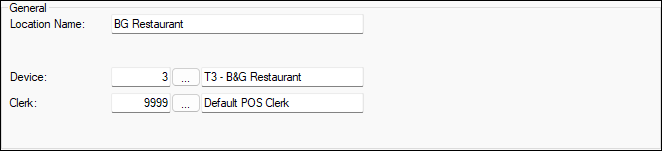
- Location Name - MANDATORY. Displays/Enter the name that will be used to generate the Orderaway URL once the selected Location is activated. It is recommended to use a combination of the Venue and Location name. A maximum of 30 characters is allowed. For example, "{Venue Name} - {Location Name}"
Notes ...
Once set the URL CANNOT be changed.
- Device - MANDATORY. Select to open the Search Devices screen to select the Device that will be assigned to all orders placed in Orderaway, Touchmini devices and/or 3rd party ordering systems. The Device selected here must be designated as the Orders Master Device for the Location. Once set it can then be used to filter on when reporting.
- Clerk - MANDATORY. Select to open the Search Clerks screen to select a Clerk that will be used in:
- Orderaway - As the default Clerk that will be associated with all orders placed via Orderaway.
- TouchMini - As the default Clerk that will be associated with all orders, unless it is overridden by the device specific Clerk that is set against the No login required option found HERE.
Notes ...
A specific Clerk may optionally be created for this purpose. For example, 9999 – Orderaway Clerk. Ensure it is assigned to the appropriate Clerk Group and Clerk Security Group, and it has the Back Office option NOT selected and the POS option selected. Once created it can then be used to filter when reporting.
Products Section ▲ ▼
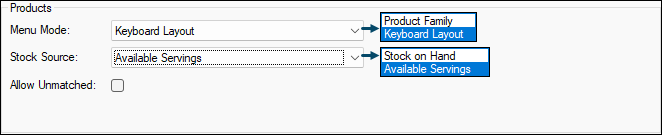
- Menu Mode - MANDATORY. Used to determined where the Menu and Item structure will be sourced from. The options available are:
- Product Family - Select to ensure Families that have the Web option selected, and which are also active for the Venue, are used.
- Keyboard Layout - RECOMMENDED. Select to ensure Keyboard Layouts are used. This is the recommended for the following reasons:
- Layouts can be easily linked to or unlinked from the Menus.
- Products can be easily added to and removed from Menus.
- Menus and Products can easily be presented in their desired order.
Notes ...
Products and Layouts are displayed in order from left to right, top to bottom. Refer HERE for information.
- Stock Source - MANDATORY. Select from the drop-down list the value that will be used to determine Out of Stock and Limited Stock notifications when The Enable Quantity Checks option is selected in Orderaway and Touchmini:
- Stock on Hand - Select to ensure SOH levels are retrieved and used to determine Stock Level notifications.
- Available Servings - Select to ensure Available Servings are retrieved and used to determine Stock Level notifications. Available Servings values are set at the Touch Device. Refer HERE for more information.
- Allow Unmatched - Select to allow items to be ordered that cannot be matched with a Product in the Back Office. The only requirement is that a description of the item is provided in the order request. Unmatched items will be assigned to the Comments PLU (19995). NOTE this is only applicable to order submitted through the Back Office API. Orders submitted to the POS API (direct to POS) behaves as this is always ENABLED.

Used to set where the NetPOS service is located and to configure the Interface that will be used to retrieve/validate Member/Account information.
- Host/IP - The machine name or IP address where the NetPOS service is installed for the Location. Ensure the Host/IP entered is accessible by the Back Office API (SwiftAPI).
- Port Number - the TCP port that the NetPOS service is assigned too. Default is 10101.
- Available Interfaces - Select the Get option to populate the drop-down list with Interfaces that are available in NetPOS.
- When prompted to Set NetPOS Interface for the Swiftpos Back Office #1 interface, select Yes. Select No, if validation needs to occur against another interface.
- Use the drop-down list to select the interface that Members/Account validation should occur against.
- When prompted to set Member Lookups, select Yes.
- Interface Type - Displays the unique NetPOS interface which has been previously set via the Available Interfaces drop-down list above.
- Interface Id - Displays the unique ID for interfaces that support multiple configurations within the one NetPOS instance. Default is 1.
- Access Code - Displays/Enter the Access Code used to ensure access to the NetPOS Interface. The code is only required if the NetPOS interface selected above has been configured with an Access Code.
- Lookup Field - The context of this setting changes depending on the interface selected for validation:
- Swiftpos Back Office interface - displays/set the default field to be used when looking up a Member/Account via the Back Office API. Generally, this would be set to Member Number.
- 3rd party interfaces - displays/set the field to be passed to a 3rd party system to validate a Member/Account. Generally, this would be set as follows:
- For Gaming interfaces excluding Prime (Aristocrat), select Alternate ID. Member data must be synced into the Back Office database as this configuration relies on the active card number being stored against the Member's Alternate ID field.
- For Prime (Aristocrat) interfaces, select Member Number.
- For MSL Solutions Connect interface, select Member Number.
- Lookup Type - The context of this setting changes depending on the interface selected for validation:
- Swiftpos Back Office interface - displays/set the default type of lookup to be performed when looking up a Member/Account via the Back Office API. Generally, this would be set to Standard.
- 3rd party interfaces - Displays/Set the type of lookup to be performed by the 3rd Party system to validate a Member/Account. Select from the options available as follows:
- For Gaming interfaces excluding Prime (Aristocrat), select Standard.
- For Prime (Aristocrat) interfaces, select Alternate.
- For MSL Solutions Connect interface, select Standard.
- Swiftpos Interface Id - Used to specify the Back Office Interface instance when more than one Interface exists within the one NetPOS service. displays/set the ID found within the NetPOS Registration window. Default is 1.
- Swiftpos Access Code - Displays/enter the Access Code used to access the Back Office NetPOS Interface specified above. The code is only required if the Swiftpos Interface Id specified above has been configured with an Access Code.
- Use SSL - Select if the NetPOS service has Use SSL enabled (due to it being bound to an SSL certificate), otherwise leave unselected.
- Timeout (sec) - Displays/Set the length of time the Back Office API will wait for a response from the NetPOS service before returning a timeout error. This should be set greater than the NetPOS Timeout set HERE.
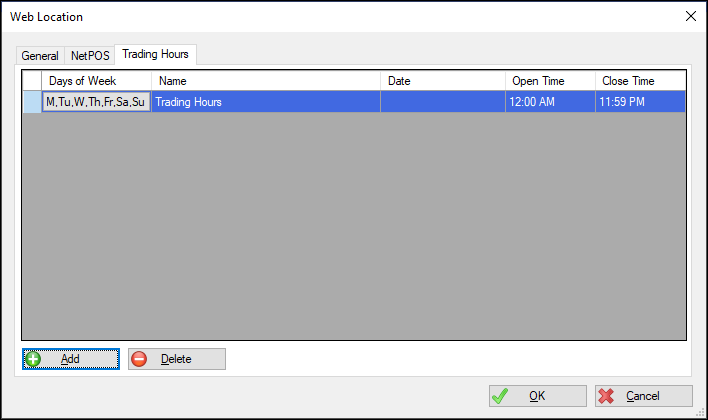
Used to configure the Trading Hours within which Orderaway will be available for trading.
- From Swiftpos v10.34 onwards, this tab is ONLY USED to manage Trading Hours for the legacy Swiftpos Web Store.
- For Swiftpos Cloud applications such as Orderaway, Touchmini and 3rd Party Ordering systems configure Trading Hours HERE.
Notes ...
The Trading Hours configured here, function as the default for the selected Location. These will be overridden if Trading Periods are configured HERE for the same Location (Cloud Client ID). Orderaway menus will be loaded in a view-only mode when launched outside of the configured Trading Periods.
- Ensure the changes to the Web Location tabs are saved.
Notes ...
At this point, the Back Office API (SwiftAPI) IIS App Pool should be restarted to ensure the latest settings are being used.
End of article ▲