
Subjects ▲ ▼
About ▲ ▼
What Is Required? ▲ ▼
-
The Venue must be registered as a Swiftpos customer.
-
The End of Day service must be running for the Batch Reports to be processed and sent to their destination.
- Fixed File Name Variables - In addition to being able to create a completely Fixed File Name there are also extended options which allow File Names to be generated by using variables. Any of the variables listed below can simply be entered into the Fixed File Name field in the Batch Reports screen and when the Batch Report is processed the data relating to each variable will be retrieved from Swiftpos. This feature is mainly used by OnTap Data / Liquor File customers who need to create their scan data Report with a specific file naming convention.
Notes ...
When using the Fixed File Name option, Swiftpos will append data to the file if it already exists.
| Variable | Type | Description |
| $Time1 | Time | Inserts the current time in the following format: HHmmss. |
| $Time2 | Time | Inserts the current time in the following format: HHmm. |
| $Date1 | Date | Inserts the current date in the following format: yyyyMMdd. |
| $Date2 | Date | Inserts the current date in the following format: MMddyyyy. |
| $Date3 | Date | Inserts the current date in the following format: ddMMyyyy. |
| $Date4 | Date | Inserts the current date in the following format: yyMMdd. |
| $Date5 | Date | Inserts the current date in the following format: MMddyy. |
| $Date6 | Date | Inserts the current date in the following format: ddMMyy. |
| $Date7 | Date | Inserts the current date in the following format: yyyyMMdd -1 day. |
| $Date8 | Date | Inserts the current date in the following format: MMddyyyy -1 day. |
| $Date9 | Date | Inserts the current date in the following format: ddMMyyyy -1 day. |
| $Date10 | Date | Inserts the current date in the following format: yyMMdd -1 day. |
| $Date11 | Date | Inserts the current date in the following format: MMddyy -1 day. |
| $Date12 | Date | Inserts the current date in the following format: ddMMyy -1 day. |
| $Date13 | Date | Inserts the current date in the following format: yyyyMMdd +1 day. |
| $Date14 | Date | Inserts the current date in the following format: MMddyyyy +1 day. |
| $Date15 | Date | Inserts the current date in the following format: ddMMyyyy +1 day. |
| $Date16 | Date | Inserts the current date in the following format: yyMMdd +1 day. |
| $Date17 | Date | Inserts the current date in the following format: MMddyy +1 day. |
| $Date18 | Date | Inserts the current date in the following format: ddMMyy +1 day. |
| $GrpPrefix | Venue Group Prefix | Inserts the Venue's Group Prefix into the filename, e.g.: 0001. |
| $Site0 | Venue ID | Inserts the Venue ID as raw data, e.g.: 12. |
| $Site1 | Venue ID | Inserts the Venue ID into a 1 character string. |
| $Site2 | Venue ID | Inserts the Venue ID into a 2 character string. |
| $Site3 | Venue ID | Inserts the Venue ID into a 3 character string. |
| $Site4 | Venue ID | Inserts the Venue ID into a 4 character string. |
| $Site5 | Venue ID | Inserts the Venue ID into a 5 character string. |
| $Site6 | Venue ID | Inserts the Venue ID into a 6 character string. |
| $Site7 | Venue ID | Inserts the Venue ID into a 7 character string. |
| $Site8 | Venue ID | Inserts the Venue ID into a 8 character string. |
| $Site9 | Venue ID | Inserts the Venue ID into a 9 character string. |
What To Consider? ▲ ▼
- The legal requirement that any personal data "Is the data encrypted in transit and at rest" so there is no risk of a “notifiable data breach” This means that you can only transmit data via a secure FTP server and NOT via email because it is NOT secure.
- Ensure all Venues have been set up with Locations assigned to them. If this is NOT the case, then some Batch Reports may not be visible via this menu item.
- If you are sending data to an FTP Server, then we recommend that you also duplicate your batch report and save a file locally. If the FTP Server is not operational, then you can always manually transfer a copy of the CSV file to the FTP Server. This might also be an option with emailing reports also in the event that the email server is not working. The option to go back and generate a report for "Yesterday" or earlier is NOT available.
- All of the same filters that are used when running Reports in Swiftpos may be used with the exception of the From/To date filters. Selection of a specific date as a report filter, is NOT applicable to Batch Reports.
- A Venue can add as many Reports to the list as needed and the End of Day service will run them at the selected frequency.
When Is It Used? ▲ ▼
Used to set up Reports that will be run by the End of Day service when the Process Batch Reports option is selected. Batch Reports can be configured to be run on a regular basis like Daily/Weekly/Monthly/etc. The option to print, save to file, email or FTP them, can also be configured. Nearly every Swiftpos Report, with only a few exceptions, can be setup as a Batch Report and run at user specified times.
How To? ▲ ▼
Screens ▲ ▼
Batch Reports Screen ▲ ▼
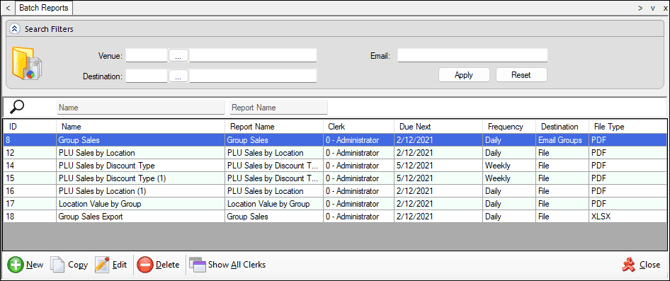
To access, select the Batch Reports option in the Administration menu in Back Office. Used to set up Reports that will be run by the End of Day service. Batch Reports can be configured to be run on a regular basis like Daily/Weekly/Monthly/etc. The option to print, save to file, email or FTP them, can also be configured. Nearly every Swiftpos Report, with only a few exceptions, can be setup as a Batch Report and run at user specified times.
Sections ▲ ▼
Header Section ▲ ▼

Search Filters
Provides filters to limit the number of reports listed in the grid. The filters available are Venue, Email and Destination. Once all filters have been selected, select the Apply option to apply them. Otherwise, select the Reset option to clear all filter selections.
Grid Section ▲ ▼
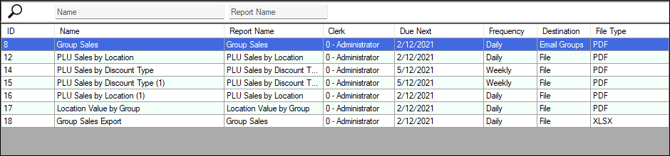
Lists the Batch Reports currently configured, along with their ID, Name, Report Name, Clerk, Due Next, Frequency, Destination and File Type.
Find Fields
The Find fields above the grid will automatically sort the rows in the grid by the field selected. Entering a value into in any one of the Find fields will cause the closest matching row to be highlighted.
Footer Section ▲ ▼

- New - Select to add a Batch Report.
- Copy - Select to copy the selected Batch Report.
- Edit - Select to open the Batch Report Edit screen to edit the selected row.
- Delete - Select to remove the selected Batch Report from the grid. Below are the likely reasons why a Report may not delete:
- When you open Batch Reports and select Show All, does anything show?
- Are you logged in as a Clerk/Staff Member who has access to all Venues?
- Also have you unselected Process Batch Reports in the End of day setup and restarted the End of Day service?
- Show All Clerks/Hide Other Clerks - Select to toggle between displaying Batch Reports for All Clerks/Staff Members or only for the currently logged in Clerk/Staff Member.
Batch Report Edit Screen ▲ ▼
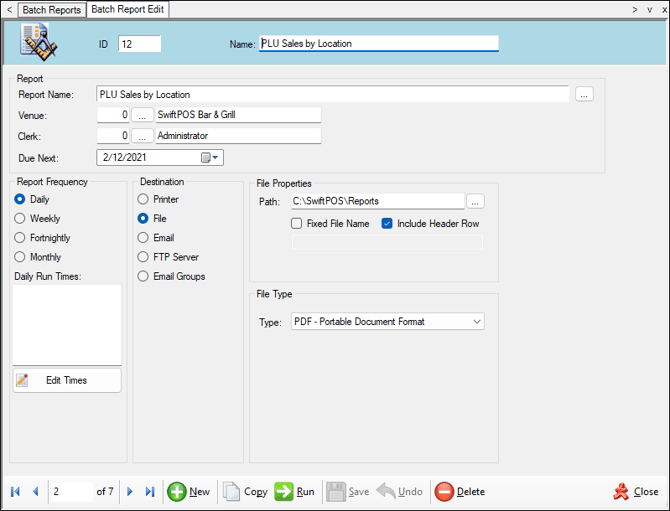
To access, select the Edit option in the footer section of the Batch Reports screen. Used to create and modify Batch Reports. There are a number of customisation options available when creating Batch Reports.
Sections ▲ ▼
- Header
- Report
- Report Frequency
- Destination
- File Properties
- File Type
- Email Properties
- FTP Server
- Email Groups
- Footer
Header Section ▲ ▼

- ID - Displays the Batch ID assigned to the created Batch Report.
- Name - Displays/Enter the name assigned to the Batch Report.
Report Section ▲ ▼

- Report Name - Select to open the Reports screen to select a report, from the available reports or from the Stored Procedures list of exports available and specify the required filters. Selected Reports are included as part of the Batch Reports List. To ensure that Batch Reports run when no one is logged on, ensure all Swiftpos Services in Start > Control Panel > Administrative Tools > Services are set to log on as an Administrator
Notes ...
From/To Report filters cannot be used when creating Batch Reports. Instead ensure a pre-defined Period is selected instead.
- Venue - Select from the drop-down list, the Venue to which each Batch Report will be assigned. By selecting a Venue, it just means that when the End of Day process for that Venue runs the Batch Report will be exported to the specified Venue.
- Clerk - Select from the drop-down list the Clerk/Staff Member generating the selected Batch Report. By assigning a Batch Report to a Clerk/Staff Member then the data Reported will be limited to that data which the selected Clerk/Staff Member is authorised to view.
- Due Next - Select from the drop-down calendar the date and time that the selected Batch Report is next due to be generated.
Report Frequency Section ▲ ▼
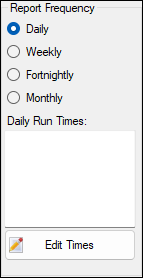
Select one of the following:
- Daily - Select to run the selected Batch Report daily. This is used for Replenishment Reports as well.
- Daily Run Times - Select the Edit Times option to display the Daily Run Times screen.
- Weekly - Select to run the selected Batch Report weekly. Once selected the day of the week can be selected set.
- Fortnightly - Select to run the selected Batch Report fortnightly. This option uses the Next Report Due date and produces Reports for the two-week period prior to that date plus the trading time. Example: If the Next Report Due date is set to 15th April 2014, then the date range selected would be 1st April 2014 at 6:00 to 15th April 2014 at 5:59am (assuming your End of Day Run Time is set to 6:00am. Technically, the logic is; from-date is next-Report-due-date - 14 + start time and to-date is next-Report-due-date + start-time - 1 sec.
- Monthly - Select to run the selected Batch Report monthly.
Destination Section ▲ ▼
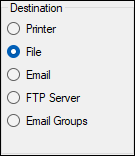
The destination determines the way in which the Reports are exported. The options available are:
- Printer - Select to print Batch Reports to a predetermined printer. The printer to be used is configured HERE.
- File - Select to ensure Batch Reports are written to a file. When selected the File Properties section will be displayed.
- Email - Select to ensure Batch Reports are emailed. For reports to be emailed, the appropriate mail server settings must be entered into the Global Preferences menu option before any reports can be emailed. When selected the Email Properties section will be displayed.
- FTP Server - Select to ensure Batch Reports are sent to a FTP Server. When selected the File Properties and the FTP Server sections will be displayed.
- Email Groups - Select to email Batch Reports using Email Groups. This allows the inclusion and removal of email addresses to Email Groups rather than having to edit each Batch Report's Recipient list. When selected the Email Properties and the Email Groups sections will be displayed.
-
File Properties Section ▲ ▼
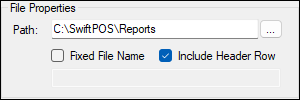
To access, refer HERE or HERE.
- Path - Defaults to C:\Users\Public\Documents\SwiftPOS Reports. To change select/enter the file path to which the Batch Report will be written.
Notes ...
If the Path (folder) is to be located over a local area network (LAN) or VPN (ie. not on the local PC) then ensure the Path is specified in Universal Naming Convention (UNC) format or also know as the network path (eg. \\OtherServer\SwiftPOS\...), and not in a mapped drive format (eg. S:\SwiftPOS\...). Also, ensure the appropriate folder permissions are configured when using a LAN or VPN location.
- Fixed File Name - It is recommended not to select this unless a specific file name is required to export a Batch Report to a 3rd party application that always expects the same file name. Defaults to the Report name which should suffice for most users. Refer HERE for more information.
- Include Header Row - Select to ensure columns headings are included when either a CSV or TSV file type is selected.
File Type Section ▲ ▼
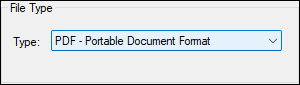
| File Format | Description |
| PDF - Portable Document Format | Portable Document Format is most commonly associated with Adobe Acrobat. |
| XLSX - Microsoft Excel | XLSX format is used with Microsoft Excel Spread sheet application. |
| TXT - Plain Text | Plain text format can be opened in almost any text editor. Most commonly associated with Notepad or email messages. |
| RTF - Rich Text Format | Rich Text Format includes formatting and is most commonly associated with Microsoft Word. |
| TIF - Tagged Image File Format | Tagged Image File Format is a widely used image format. Especially useful for sending Reports that cannot be easily edited. |
| XML - Extensible Mark-up Language | Extensible Mark-up Language format is used mostly for exporting data to third party applications. |
| HTM - Hypertext Mark-up Language | Hypertext Mark-up language format is used primarily for creating websites and is able to be formatted similarly to Rich Text Format. |
| CSV - Comma Separated Values | Comma Separated Values format is a text file where each column of data is separated by a comma. Used when third party applications are used to process the data contained in the file. |
| PSV - PIPE-Separated Values | Pipe (|) Separated Values format is a text file where each column of data is separated by a | character. Used when third party applications are used to process the data contained in the file. |
| TSV - Tab Separated Values | Tab Separated Values format is a text file where each column of data is separated by a tab. Used when third party applications are used to process the data contained in the file. |
| XLSX - Pivot Table | Select to export the report data to an Excel Pivot table. |
Notes ...
It is also possible to specify your own file extension when a Batch Report is generated using the Fixed File Name field. This, however, is not recommended.
Email Properties Section ▲ ▼
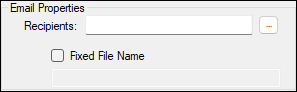
To access, refer HERE or HERE.
- Recipients - Enter the email address(es) (separated by semi colons) that the Batch Report will be sent to. This can also be done by selecting the option to the right to open the Edit Batch Report Email List popup, which can then be used to enter email addresses on separate lines.
Notes ...
Using this method does not require the entering of semi colons as these will be generated automatically. For example,
person1@swiftpos.com.au; person2@swiftpos.com.au or person1@swiftpos.com.au;person2@swiftpos.com.au
- Fixed File Name - It is recommended not to select this unless a specific file name is required. Refer HERE for more information.
FTP Server Section ▲ ▼
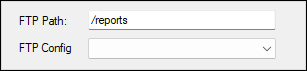
To access, refer HERE.
- FTP Path - Enter the file path/folder to which the Batch Report will be written, on the sFTP Server. Other FTP settings requiring configuring before this option can be used can be found via the Venue screen.
- Fixed File Name - It is recommended not to select this unless a specific file name is required. Refer HERE for more information.
Email Groups Section ▲ ▼
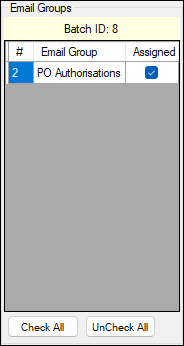
To access, refer HERE.
- Email Groups - Select from the list displayed the Email Groups to receive the selected Batch Report.
Notes ...
If issues are encountered when emailing Reports, please ensure the Batch Reports/Service Email Setup settings are configured correctly in Global Preferences and that you can use an email client on the same PC to connect to the same Outgoing Mail Server (SMTP) (ask your ISP or server administrator to help you with this if necessary) Also check with your ISP as to how many emails you can send before it is considered as spam. Also, personal data cannot be sent (like Member details) via email.
Footer Section ▲ ▼

- New - Select to add a Report as part of the list of Batch Reports.
- Copy - Select to copy and add the currently selected Batch Report.
- Run - Select to perform a test run of the Batch Report and will indicate to the user if there is no data to display or a problem has occurred. If a Batch Report runs through the testing ok you can be sure that it will export automatically without any problems.
- Save - Select to save changes.
- Undo - Select to undo changes made.
- Delete - Select to delete the current Batch Report.
- Close - Select to exit.
Daily Run Times Screen ▲ ▼
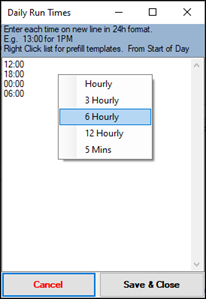
To access, refer HERE. Used to specify times to run the selected report. Only useful if there is a requirement to run a specific report multiple times through out a trading day.
Notes ...
Data reported at each of the times intervals set will be for the period from Start of Day Trading time and up to the set time interval.
Right select in the grid to display a list of pre-fill options available. Hourly, 3 Hourly, 6 Hourly or 12 Hourly. Select anyone of these to fill the grid with the required times, or enter the times, each on a separate line, in 24h format manually. For example, 1pm is entered as 13:00.
Reports Screen ▲ ▼
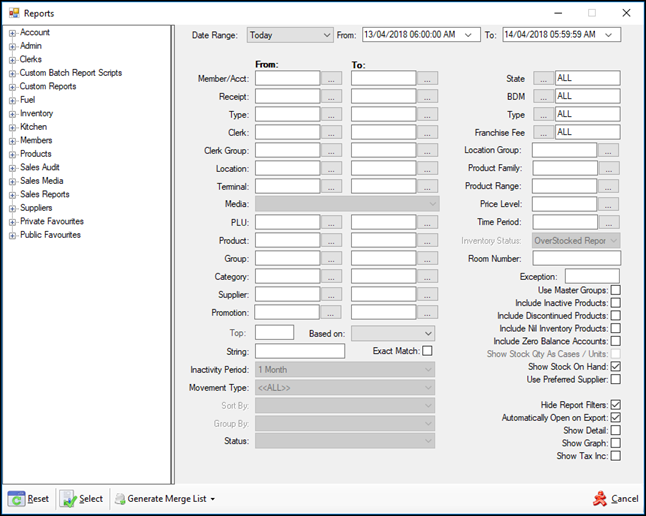
To access, refer HERE. Used to select the Report required and specify the filters.
Notes ...
The From/To Report date/time range cannot be used when creating Batch Reports. Instead ensure the pre-defined Periods are used instead.
There is no way to go back and get reports for "Yesterday" a week after the event. Specific dates cannot be selected for batch reports.
End of article ▲