
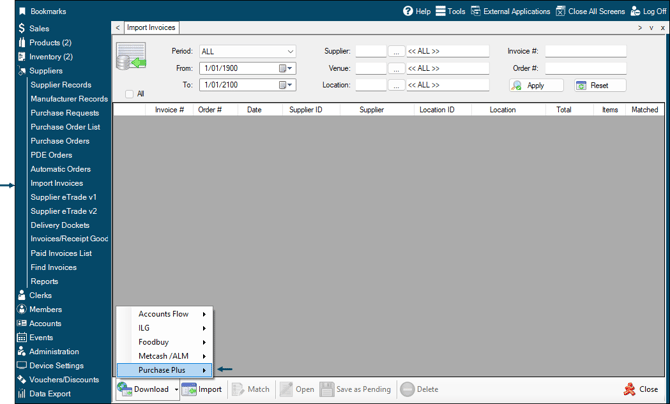
This outlines the information and the steps required to implement and manage the Swiftpos Purchase Plus Supplier Invoice Import at a Swiftpos Venue. To access select the Import Invoice option in the Suppliers menu in Back Office.
Subjects ▲ ▼
About ▲ ▼
What Is Required? ▲ ▼
- Swiftpos v10+
- Venues will need to be registered for the Swiftpos Advanced eTrade module in order to gain access to this feature. Email registrations@swiftpos.com.au to obtain the appropriate registration.
What To Consider? ▲ ▼
- The Purchase Plus import is only available to those Venues whose Software Enhancement licence has not expired.
When Is It Used? ▲ ▼
Used to configure Purchase Plus download settings to support the Importing of Purchase Plus Supplier Invoices.
How To ▲ ▼
- Download Purchase Plus Invoices?
- GET STARTED
- Import Purchase Plus Invoices?
- Match Purchase Plus Invoices?
How To GET STARTED ▲ ▼
- Review About and ensure the steps outlined HERE are addressed.
- In Back Office:
- In Venues - For each Venue that will be importing Invoices ensure the following:
- Ensure the Group Prefix option against the Venue has a value containing the Purchase Plus provided Organisation ID. This is used to ensure correct API connectivity with Purchase Plus.
- In Locations - For each Location that will be importing Invoices ensure the following:
- For Purchase Plus V1 - Ensure the Host Store ID contains the Purchase Plus provided Department Code. If NO Location is found with a matching Department Code in the Host Store ID field, then those invoices will NOT be imported.
- For Purchase Plus V2 - Ensure the Host Store ID contains the Purchase Plus provided Corporate Code. If NO Location is found with a matching Corporate Code in the Host Store ID field, then those invoices will be imported and assigned to the first Location listed.
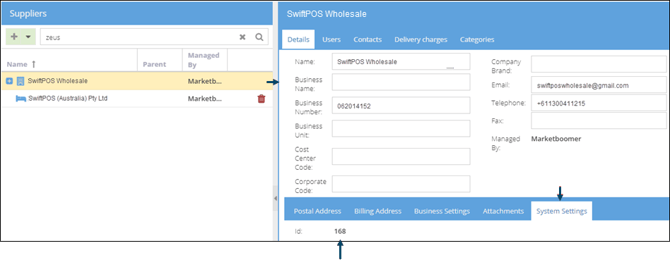
- In Suppliers - For each Supplier for which invoices will be imported ensure the following:
- The Supplier's Account value is set to the Purchase Plus provided Supplier Code, which can be found as indicated below:
- In Invoice Import - Ensure the Settings screen has been configured. Refer HERE for more information.
- In Venues - For each Venue that will be importing Invoices ensure the following:
Once the above has been configured, the downloading, matching and importing of Purchase Plus invoices can commence. To do this, refer as follows:
Screens ▲ ▼
Download Purchase Plus Invoices Screen ▲ ▼
Sections ▲ ▼


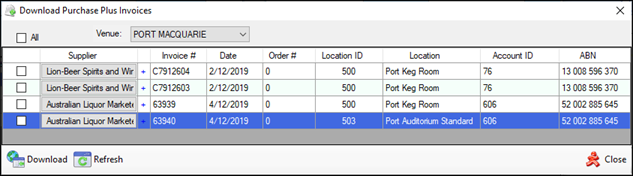
List the Purchase Plus Invoices ready to be downloaded and imported, along with their Supplier, Invoice #, Date, Order#, Location ID, Location, Account ID and ABN.

- Download - Select to download the selected Invoices.
- Refresh - Select to refresh the invoices displayed in the grid.
Settings Screen ▲ ▼
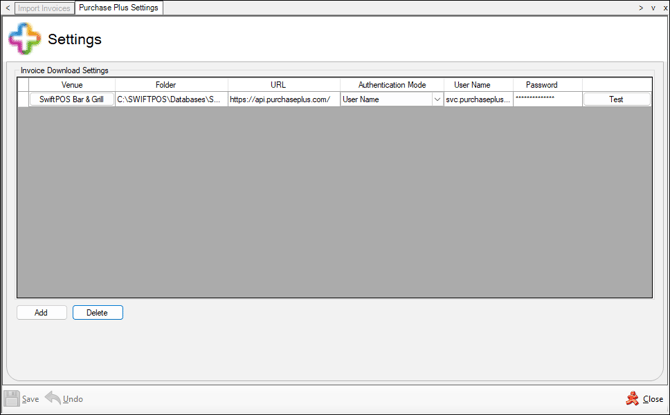
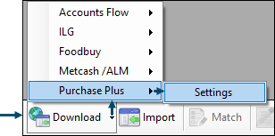
To access, select the Settings option from the Purchase Plus option in the Download option's drop-down list of the Import Invoices screen.
Sections ▲ ▼
- Venue - Select from the drop-down list the Venue for which invoices are to be downloaded.
- Folder - Displays/Select the folder into which invoices will be downloaded.
- URL - Displays/Enter the Purchase Plus provided URL from which data will be downloaded.
- Authentication Mode - Select from the drop-down list the User Name option.
- User Name - Displays/Enter the Purchase Plus User Name provided.
- Password - Displays/Enter the Purchase Plus Password provided.
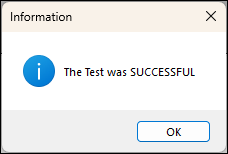
- Test - Select to test the configuration. If successful, the following will be displayed:
- Add - Select to add another row to the grid to configure a Venue.
- Delete - Select to delete the selected row.
- Save - Select to save the changes.
- Undo - Select to undo the changes.
End of article ▲