
Subjects ▲ ▼
About ▲ ▼
What Is Required? ▲ ▼
- Swiftpos v10.50+
- Once Card Masking has been configured in Back Office then the Use Back Office Card Masks option in Terminal Settings will need to be selected and enabled at each swiftpos Touch terminal that will be making use of the Back Office configured Card Masks.
When Is It Used? ▲ ▼
Used to create/maintain peripherals (such as printers) for Touch POS devices. This will ensure that their settings are consistent across all Touch POS devices that are synced to the Back Office. where This option is recommended for Venues that operate more than one Touch POS device. For Venues that only operate one Touch POS device, it is recommended that peripherals are setup in Touch POS HERE.
How To? ▲ ▼
Screens ▲ ▼
Add New Peripheral Screen ▲ ▼
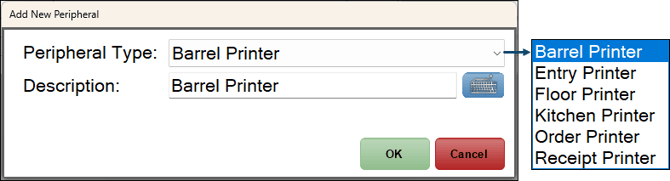
To access, select the peripherals menu option in Device Settings in Back Office.
- Peripheral Type - Select from the drop-down list one of the following:
- Barrel Promotion Printer - Used for Barrel Draws.
- Entry Printer
- Floor Printer - Graphical printers only.
- Kitchen Printer - Graphical and standard (ESC/POS) Kitchen printers supported.
- Order Printer - Graphical printers only.
- Receipt Printer - Graphical printers only.
- Description - Enter an appropriate description.
Notes...
Graphical printing is required if printing in a language other than English.
Card Masks Screen ▲ ▼
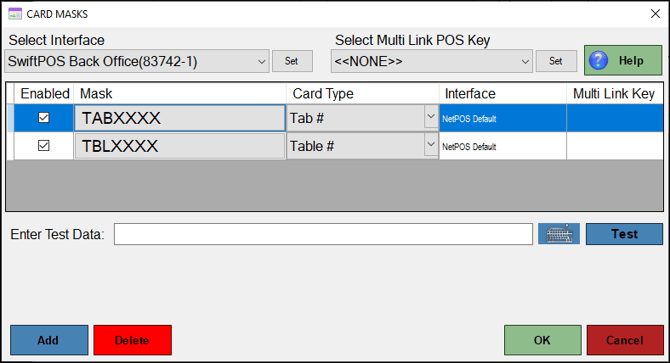
To access, select the Edit option in the footer section of the Card Masks tab. Used to configure the Card Mask required for a peripheral. Refer HERE for more information.
Peripherals Screen ▲ ▼
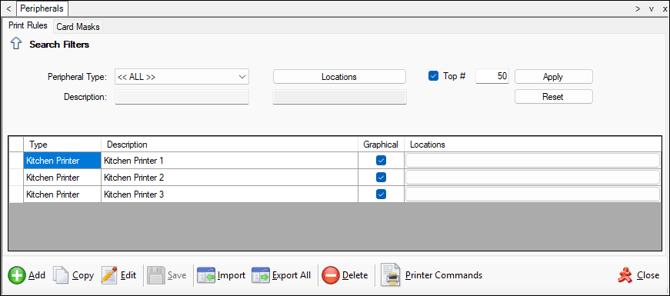
To access, select the peripherals menu option in Device Settings in Back Office.
Tabs ▲ ▼
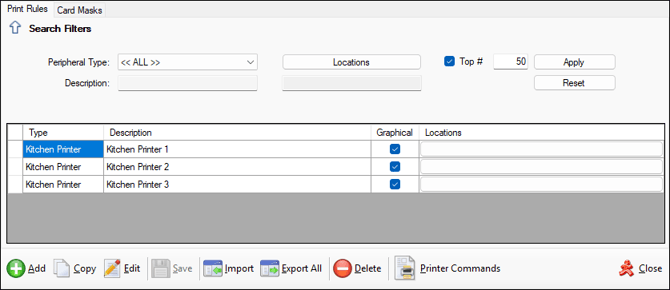
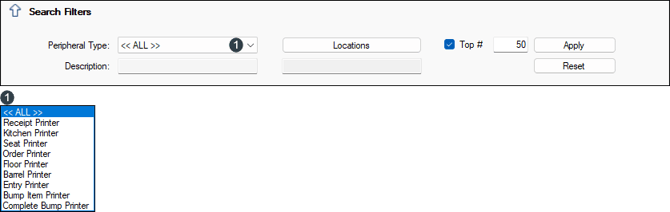
Used to limit the number of rows displayed in the grid section. Once all filters have been selected, select the Apply option to apply them. Otherwise, select the Reset option to clear all filter selections.
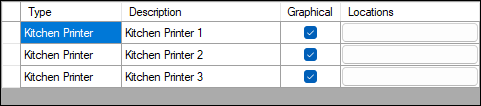
Lists the peripherals along with their Type, Description, Graphical indicator and Locations they are assigned to. The Graphical indicator is checked when the peripheral is configured in graphical mode. Select the Locations option to open the Locations screen to select the Locations the peripheral will be assigned to.
Notes...
To edit an entry in the grid, double click a row. Rows displayed in the grid can be sorted by toggle selecting the column headings.

- Add - Select to open the Add New Peripheral screen to add a peripheral.
- Copy - Select to copy the selected peripheral.
- Edit - Select to edit the selected row.
- Save - Select to save changes.
- Import - Select to import previously exported peripherals.
- Export All - Select to export all peripherals and additional setting to an xml file.
- Delete - Select to delete the selected peripheral.
- Printer Commands - Select to open the Printer Commands screen to configure all the Esc/POS printer commands in the Back Office. These will automatically be sent to each Touch POS device.
- Close - Select to exit.
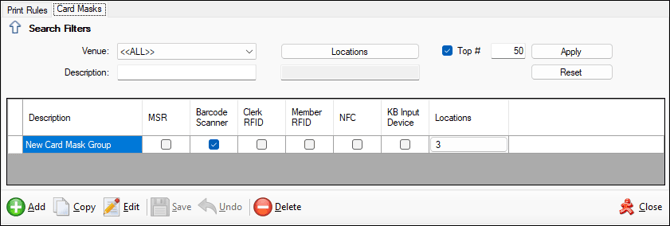
Used to configure Card Masks for Touch in Back Office.

Used to limit the number of rows displayed in the grid section. Once all filters have been selected, select the Apply option to apply them. Otherwise, select the Reset option to clear all filter selections.

Lists the Card Mask Groups along with their Magnetic Swipe Reader, Barcode Scanner, Clerk RF Reader, Member RF Reader, NFC Card Reader, Keyboard Input Device and Locations indicators.

- Add - Select to add a row to the grid, to configure a new Card Mask Group.
- Copy - Select to copy the selected row.
Notes...
An existing Card Mask or Card Mask Group can only be copied if it has Card Mask settings configured. This can be done by selecting the Edit button.
- Edit - Select to open the Card Mask screen to edit the selected row.
- Save - Select to save changes.
- Undo - Select to undo the changes.
- Delete - Select to delete the selected row.
- Close - Select to exit.
End of article ▲