This outlines How To Add A Layout To A Keyboard in Back Office.
Subjects? ▲ ▼
About ▲ ▼
What Is It? ▲ ▼
A Layout is used in SwiftPOS Touch to group POS Keys together so that Touch operators can access those POS Keys that provide similar functions in one place. For example:
- A Layout maybe created for the ordering/selling of drinks in a Restaurant. In which case POS Keys can be assigned to a Drinks Layout to access the different types of drinks:
- Beers
- Coffee/Tea
- Pre Mixes
- Soft Drinks
- Spirits
- Wines

Example of a Layout created for the different types of Drinks available in a Restaurant.
- Or a Layout maybe created for the ordering/selling of food in a Restaurant. In which case POS Keys can be assigned to a Food Layout to access the different types of drinks:
- Cakes & Treats
- Combos
- Desserts
- Entrees
- Mains
- Today's Specials

Example of a Layout created for the different types of food available in a Restaurant.
Notes ...
Selecting anyone of the drink or food type POS keys displayed in the Layouts above will take the Touch operator to the relevant Layout in which the drink and food items available can then be selected and ordered. For example, selecting the Entrees POS Key in the Food Layout above will bring up the Entrees Layout with all the Entree options displayed for selection.
What Is Required? ▲ ▼
- The appropriate Clerk Security Group permissions required to access Keyboard Designer in Back Office.
- Ensure a Keyboard already exists. Refer HERE for more information.
When Is It Used? ▲ ▼
Used to create/design/maintain Layouts for use in conjunction with Touch Keyboards.
How To? ▲ ▼
How To Add A Layout To A Keyboard? ▲ ▼
In Back Office, do as follows:
-
Select the Keyboards menu option in the Touch Settings menu.
- Select the Keyboards menu in the Toolbar.
- Select the Open Keyboard option from the Keyboard menu to open the Touch Keyboards screen.
- Select the Keyboard to which a Layout is to be added, from the list of available Keyboards, to open it.
- Select either the Add New Layout option in the Layouts menu or the Add option in the footer of the Keyboards screen, to open the New Layout screen.
- Enter an appropriate name for the new Layout into the Layout Name field. For example, Desserts, Entrees, Mains, etc.
Notes ...
If adding a Layout to a Self-Service styled Keyboard, a Layout Type drop-down option will also be displayed in the New Layout screen. Select from the drop-down list the appropriate Layout type to be attributed to the Layout being added.
- Select OK to continue.
- The new Layout will be displayed in the Keyboards screen, along with it's ID. For Non-Self-Service Layouts the Layout will by default contain the following POS Keys:
- Home (#001)
- Return (#002)
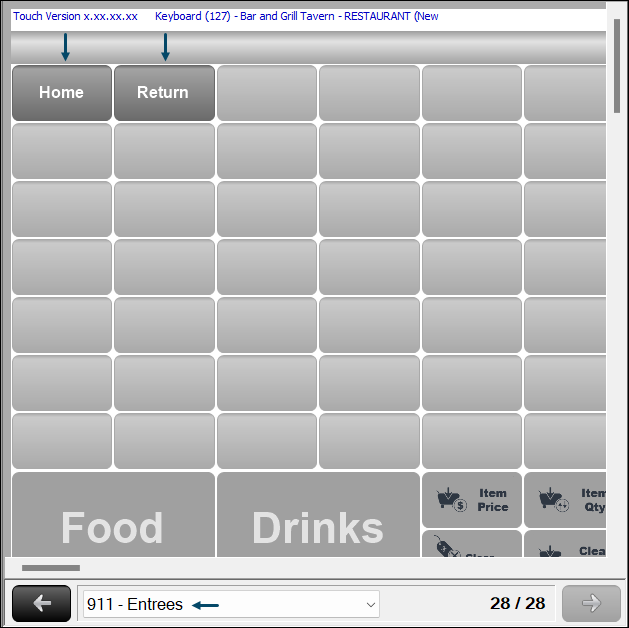
Example of a new Layout created for Entrees with the default Home and Return POS Keys added by default.
- Configure the Layout by adding:
- A background image, if required. This is applicable to Self-Service styled Keyboards pnly. only. To do this, select the Add Layout Image option from the Layouts menu. This will open the Images Menus. Refer HERE for more information.
- POS Keys. POS Keys can be added for Finalises, Functions, Images, Layouts and Products. Configure the POS Keys added as is appropriate for their use in the Location. Refer HERE for more information.
- If required, the new Layout can be set as the Home Layout. Refer HERE for more information.
- Once complete select Save to save the changes.
- Consider adding a Layout POS Key to one of the other Layouts to link the Layout and ensure Touch operators can navigate to the new Layout. Refer HERE for more information. Save the changes.
- Send a Full Update to the Touch terminals requiring the new Keyboard.
- Once the update has been applied to the relevant Touch terminals, the new Layout will be available to Touch operators.
End of article ▲