Add A Terminal
Back Office - How To
This outlines How To Add a Terminal in Back Office.
How To? ▲ ▼
What Is Required? ▲ ▼
- The appropriate Clerk Security Group permissions required to access Terminal Records in Back Office.
- Ensure that for each Terminal added, the Venue's registration has enough POS Terminal licences available, so that a licence can be allocated to each new Terminal added. If more Terminal licences are required, then please contact your swiftpos Reseller or swiftpos Support.
Notes ...
Training Terminals can also be added. These will NOT require POS Terminal licences . Refer to HERE for more information.
How To Add A Terminal? ▲ ▼
To add a Terminal in Back Office, do as follows:
- Access the Terminal Records menu option in Back Office.
- Select the New option to add a row in the grid.
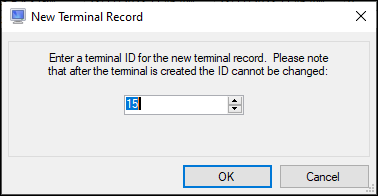
- This will display the New Terminal Record prompt for the entry of a Terminal ID.

- Either enter an ID and select OK or select OK to continue with the ID displayed.
- In the grid in the Terminal column, the name of the new entry will be highlighted. Change it to an appropriate name for the new Terminal. For example, Restaurant POS, or Restaurant KVS.
- In the Type column, select from the drop-down list the appropriate type of Terminal being added. For example, Touch POS or KVS (PRO). Refer to HERE for more information.
- In the Location column, ensure the Location in which the Terminal is going to operate in is selected from the drop-down list.
- Select Save to save the changes.
End of article ▲
