Print Table Guest Bills
Touch
This outlines how to assign a new ID to a Clerk/Staff Member in Touch.
Subjects ▲ ▼
How To Print Table Guest Bills ▲ ▼
Using the Table Tools menu, do as follows:
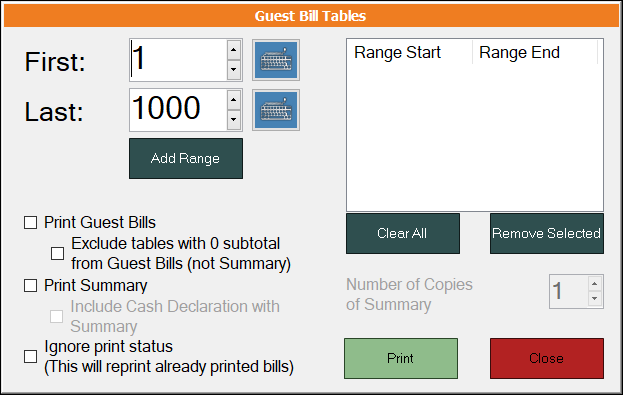
- Select the Print Table Guest Bills menu option. The Guest Bills Table screen will be displayed:

- In the Guest Bills Table screen:
- Select a range of Table numbers by setting the First and Last values. Once a range is selected, it will appear in the grid on the right hand side. Use the buttons below the range grid to manage the ranges listed in the grid.
- Select the Print Guest Bills option and one or more of the remaining options available. The Print Summary option has the added option of printing multiple copies.
- Select Print to print the Guest Bills for the selected Table ranges listed in the grid.
Notes ...
A Receipt Printer will need to be installed and enabled for printing to proceed. If this is not the case, Guest Bills will NOT be printed.
End of article ▲
