IMPORTANT
Touchmini v1 has reached it's end of life and will NO LONGER be enhanced/improved. It is now superseded by Touchmini v2.
This outlines the steps required to onboard a PAX All In One Device (AIOD) for TouchMini.
Subjects ▼
- How to onboard a PAX Device?
- How To Use 802.1x Wi-Fi protocol on a PAX A920?
- How To Force Quit The TouchMini App On A PAX Device?
- How To Clear The TouchMini App Data On A PAX device?
- What To Consider?
What To Consider? ▲ ▼
- When using the TouchMini app, the Android BACK button in the bottom toolbar is disabled on purpose.
- If the app is accidently closed and re-opened, it should return to the state it was in previously.
- If the app has not been used in a 2-hour period, the session will be refreshed automatically.
How To Onboard A PAX Device? ▲ ▼
- Unbox the PAX.
- Power on (right side of device, hold for 3-5sec). The device may need charging using the in-built charging brick before it will switch on.
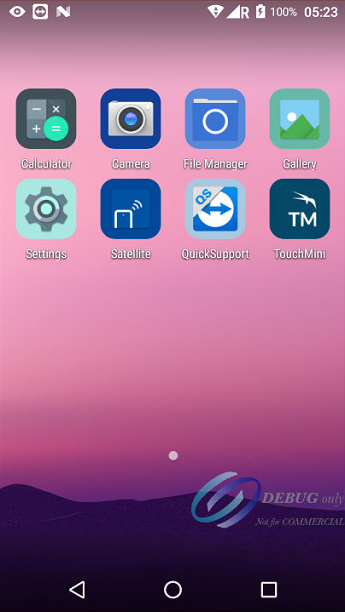
- Once on, the TouchMini app should be already installed and displayed on home screen shown below:
Notes ...
If the TouchMini app is not installed/found, then a request for it to be installed should be sent to Datamesh support team (support-operations@datameshgroup.com) asking for them to remotely install it.
- PAX’s have a SIM Card which connect to a 4G network out of the box. You can optionally join the PAX to a Wi-Fi network by doing the following:
- Swipe down from the top of screen to expose the notifications menu.
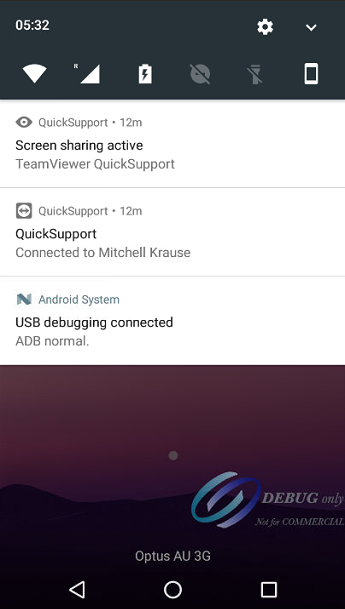
- Continued ...
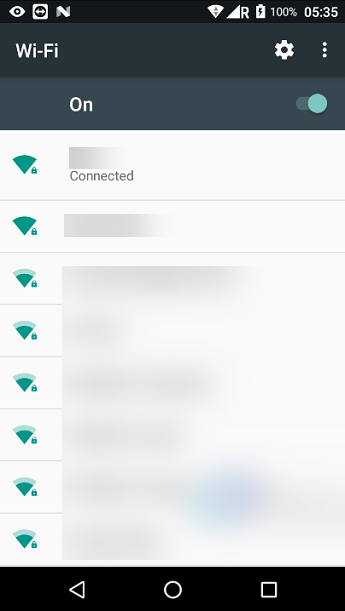
- Select & hold on the Wi-Fi icon (top left). The Wi-Fi menu will now open.
- Select the Wi-Fi network you wish to join and enter credentials if prompted. Once joined, it’ll show as Connected.
- Check the Time up the top of the terminal. If incorrect, you may need to manually set the time zone within the PAX settings by doing the following:
- Open the Settings app from the Home screen.
- If prompted for a password, enter the login credentials found HERE.

- Continued ...
- Scroll to the bottom of the page to find the System settings where within, you’ll find the Date & time menu. Select this.

- Continued ...
- Select Select time zone within and find the correct time zone within the list to apply to the device.

- Back on the Home screen, select the TouchMini app to launch it.
- If launched for the 1st time, you’ll be presented with the Settings page as shown below:

- Continued ...
- Confirm the TouchMini URLs are correct. Refer HERE for more information.
Notes ...
The URL can be overridden; however, this would normally only be for internal testing purposes. The URL entered must match the region selected with the OrderAway Portal Location selected in Global Preferences in Back Office. This is because the Cloud Client ID generated will be specific to the region it is configured for.
- Continued ...
- Enter the Cloud Client ID associated with the Location in which the device is going to be used.
- Select SAVE to save any changes.
- The device will automatically attempt to connect, and in doing so will prompt for the device to be registered (given it is a new device). Refer to HERE for more information.

- Select the Cloud Client ID (entered above) in the Cloud Connectivity screen in Back Office to load the Portal tab.
- The new PAX should show in the list with the name TBC. Find it and select the toggle on the right to enable it.
- Now select the TBC name to open the settings for the PAX.
- Enter a name for the new device, into the Device Name field. Enter a name that will be easy to identify the PAX device. You may choose to use the S/N (serial number) on the back of the PAX as part of the name. E.G. PAX 0821123456. Then
- Select Save to save any changes.
- Now clone the settings from default configuration. Refer to HERE for more information.
- Back on the PAX device, select the Home button to re-load the PAX.
- Once re-loaded, TouchMini should now load successfully on the PAX device.
How To Use 802.1x Wi-Fi Protocol On A PAX Device? ▲ ▼
- After selecting Add network, enter the case-sensitive network SSID in the Network name field.

- Then from the Security drop down list select the 802.1x EAP option.

How To Force Quit The TouchMini App On A PAX Device? ▲ ▼
If you wish to force kill the TouchMini app, this can be done on the PAX itself by following these steps:
- Close the TouchMini app.
- Select the app switcher icon in the toolbar down the bottom right of screen (square icon).
- Find TouchMini in the list and either select the X in the top right corner of it or swipe it to the left or right of the screen so it disappears from the list.
- Select the home button in the toolbar down the bottom centre of screen (circle icon).
- Now when launching the TouchMini app, it'll start a new session.
How To Clear The TouchMini App Data On A PAX device? ▲ ▼
If you wish to force clear any saved app data on a PAX (reset to factory), this can be done on the PAX itself by following these steps:
- Close the TouchMini app.
- Open the Settings app.
- If prompted for a password, enter the login credentials found HERE.
- Scroll down to the 'Apps' section and open this.
- Scroll down to the 'TouchMini' app and select this.
- Select the 'Storage' option within.
- Select 'CLEAR DATA'.
- Select 'OK' to proceed.
- The App Settings page will open where a new URL can be entered along with the correct Venue Id (which is the Cloud Client Id visible in Back Office).
- Select the Android home button and then re-launch the TouchMini app. You'll be prompted to enter a TouchMini URL + Cloud Client Id again.
End of article. ▲