This outlines How To Add A Surcharge PLU in Back Office.
Subjects ▲ ▼
What Is Required? ▲ ▼
- The appropriate Clerk Security Group permissions required to add and edit Products in Back Office.
How To Add A Surcharge Plu? ▲ ▼
Do as follows:
- In Back Office:
- Locate and access the Product Records screen.
- Confirm that a Surcharge PLU has NOT already been created. To do this, do as follows:
- In the Product Search Filters section enter the text surcharge in the Description field.
- Select the Apply button.
- If PLUs/Products are returned, identify which one of these can be used for the purposes of a Surcharge PLU, if any.
- If a PLU/Product already exists, then NO FURTHER ACTION is required, other than to note the PLU number of the one identified above, so that it can be used when configuring Surcharges.
- If no PLU/Product was identified, then continue as per below.
- If no PLUs/Products were returned, then continue as per below.
- If PLUs/Products are returned, identify which one of these can be used for the purposes of a Surcharge PLU, if any.
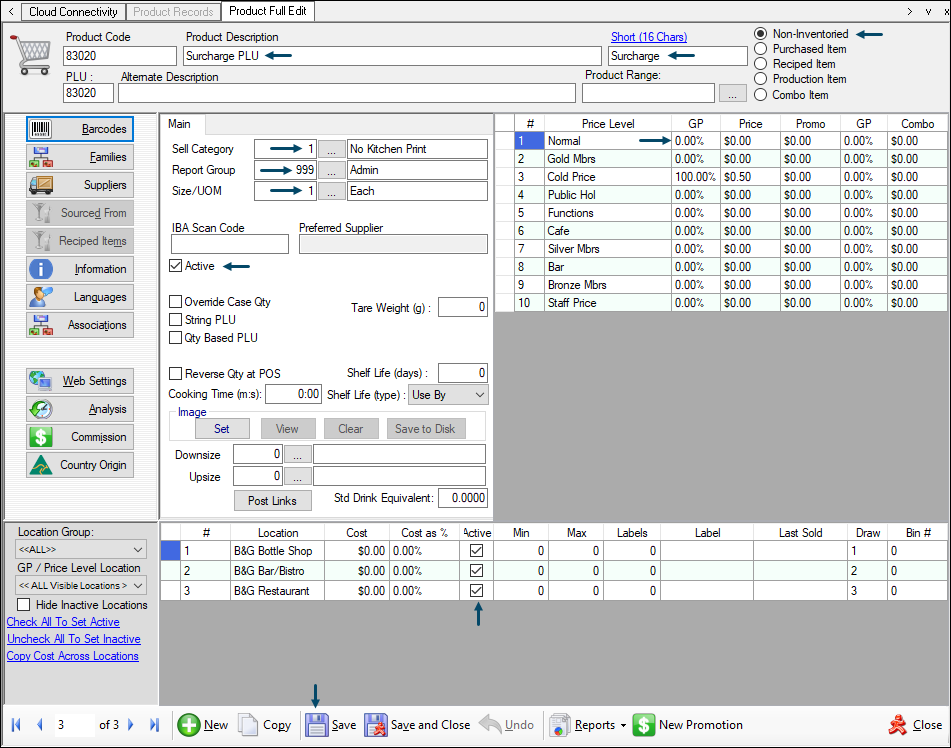
- Select the New button to add a new PLU/Product. This will result in the Product Full Edit screen being displayed.
- Using the example below, configure the Surcharge PLU/Product and ensure the Save button is selected to save the changes.
End of article ▲