
This outlines How To Configure Settings For Services in Back Office.
Notes ...
Please be aware this article is only a recommendation. The requirements of the Venue will need to be considered when configuring Swiftpos Services.
How To? ▲ ▼
Swiftpos Services are used to control sales processing, Product and pricing updates and End of Day processes. To achieve the best performance from these Services and to lighten the load on the SQL Server, it is important to configure them correctly. The following needs to be considered when configuring Swiftpos Services related settings:
- Scan Intervals - By setting the scan intervals for each Service appropriately, Swiftpos will be able to operate more efficiently, resulting in more processing power being available to other tasks.
The End of Day service cannot have it's scan interval changed as it will run only when the End of Day Run Time is reached for each Venue in Swiftpos.
Log On as Administrator ▲ ▼
To ensure Swiftpos Services continuously run (ie, also, when no one is logged onto the Swiftpos host PC), it is recommended that all Swiftpos Services are logged on as an Administrator. To do this, do as follows:
- In Windows, select Start > Control Panel > Administrative Tools > Services, to open the Services screen.
- Select a Swiftpos Service (for example, Swiftpos Touch Communication Service), and double select it to open the Properties screen.
- Select the Log On tab.
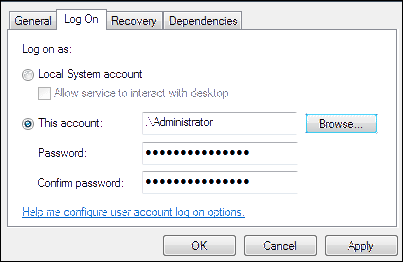
- Select This account and enter the details of an Administrator account.
- Select Apply to apply the changes.
- Select OK to exit.
- Repeat the steps 2 to 6 for each of the Swiftpos Services.
Regional Settings ▲ ▼
To ensure no issues arise when parsing dates and times, it is recommended to ensure that all user accounts (on the Swiftpos host PC) use the same Regional Settings as the Administrator account used to run the Services (ie. the account as entered above). Thus, ensuring dates (formats, etc) and times (zones, etc) are the same for all users of the PC. To do this, do as follows:
- In Windows, select Start > Control Panel > Region, to open the Region screen.
- Via the Formats tab and the Location tab, configure the settings for the Administrator account.
Notes ...
Configure the Numbers, Currency, Time and Date additional settings via the Additional Settings option on the Formats tab.
- Then via the Administrative tab, select the Copy settings option.
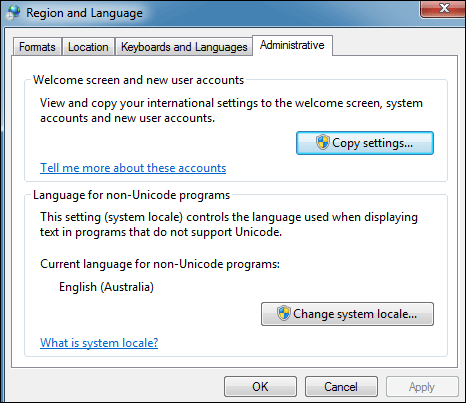
-
The Welcome screen and new user accounts settings screen will be displayed.
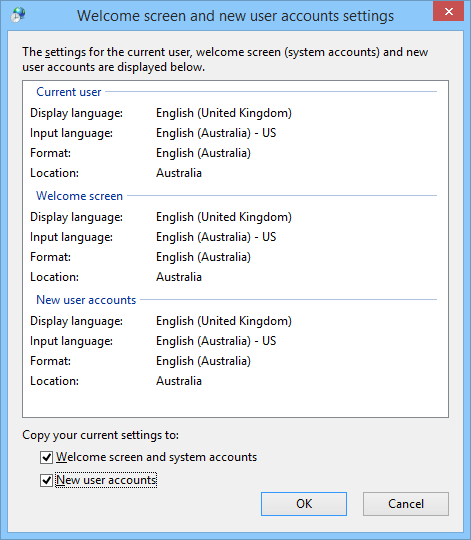
- Select the Welcome screen and system accounts and New user accounts options. This will ensure all current user accounts and any new accounts all use the same Regional Settings.
- Select OK.
End of article ▲